
An easy crag to get to. Follow the A658 Bradford/Harrogate road towards Harrogate and you'll see it on a hill to your left about 3 miles outside Pool-In-Wharfedale. If not follow signs for North Rigton. This is a fantastic bouldering venue: Powerful, thuggy with some of the best gritstone to be found anywhere. Just one word on the access front - there are rather uneasy relations with the farmer so please stick to the marked paths to approach the crag and park in the designated layby, not outside the farm. .
Now I know that I've probably included a few too many hard problems. However to be honest the best bouldering here is fairly hard, but don't let that put you off - you don't have to climb them all!
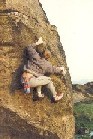
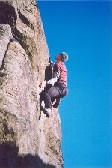
| Photo | Problem | Grade | Beta |
|---|---|---|---|
 |
The Crucifix | V 1/2 / F4+ | A little beauty to get you warmed up. It's on the sunny SW face which is at the top RHS of the crag as you approach. The problem takes the inverted cross shaped crack. Pull-up, layback and reach. |
 |
The Nose | V4 / F6b+ | From the crucifix hop over the wall and start above the flat boulder. Climb the nose on the left, laybacking the pocket until a small layaway for your left hand and a nasty smear enable a commiting reach to be made upto the ledge. Take care!! |
| The Slopey Traverse | V10 / F7c | A contender for the best problem on grit. You can see it on your right as you arrive at the crag. Start sitting with both hands in the vertical crack. Pull left then slap, swipe, swing, and smear, leftwards to, finally, style up Morrell's Wall | |
 |
Morrell's Wall | V3 / F6a+ | The superb concave wall passed on your right as you arrive at the crag. Start on the big hole and pull up using a layaway. Bring your right hand over onto a small crimp, your left to another then grab the top. It's good! |
 |
The Flying Arete | V3 / F6b+ | Along the bottom path from Morrell's Wall is a leaning 'A' shaped wall. Start on the left and climb the arete using a combination of crap footholds, optimism and balls! Rock on to the top at the apex. |
 |
Sloper Patrol | V5 / F7a | Further along the track are two huge boulders. This is on the second of the two. Start at the entrance to a rock gully. Work your way exhaustingly uphill until a hard rock-over-cum-press enables you to escape. Try going downhill! |
 |
The Keel | V9.5 / F7b+ | I'd have been publicly tarred and feathered if I hadn't included this one. Personnally I don't get a kick from scratting round underneath boulders. Still if you must: start below 'Sloper Patrol' in the sandy hollow. Take the Keel with your left hand and extend to the chip on the lip. Jam in your right foot, using the pebble as a landmark. Secure? Right, slap the pocket. You can do it without the chip as in the photo at about V10/11 |
 |
Pistol Whip | V10 / 7c | A long standing problem up the seemingly blank groove over-looking the egg. Take a mat, or two. Step accross the shelf to a pocket in the break. Press rightwards to a nasty two finger pocket. Then use the pathetic undercut pocket with your left to commence a powerful rockover. This may gain the pockets on MK wall. |
 |
The Wall of Horrors (start) | V5 / F6c+ | This is round on the North West Face, which is the big wall facing the car-park. Step 1 - Think how you're going to get down! Step 2: start just right of the pinnacle on a big chalky hold. Step 3: snatch the undercut and pull powerfully up using the rib on the left. Step 4: grab the cup. Step 5: Yes, you've guessed it - see step 1. |
| The Teaspoon Variation | V2 / F6a | Down in the cave at the LHS of the NW face. This is the crack AND arete on the right wall. Starting is the crux. Getting down is an epic. |