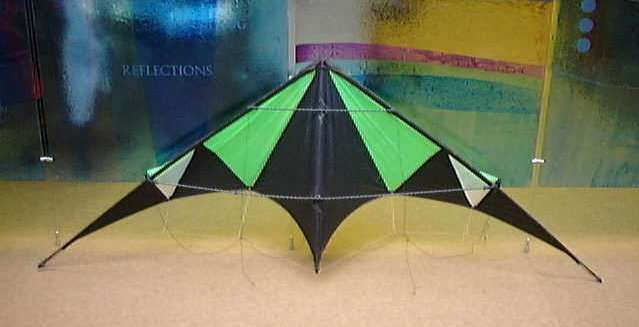
Here are some photos and tips from my Tim kite

Also, the dimensions given in the plan for the leading and trailing edges did not fit exactly to curves. I used an approximate best fit curve going through the key points (spreader and standoff attatchment points).
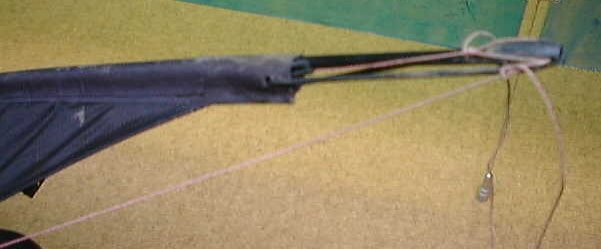
Make a hole straight through the leading edge tunnel from the front to the back. Thread one end of the bungee from the outside of the tunnel up through the opening. Repeat with the other end of the bungee. Tie a knot in the two ends and then push the knot back into the tunnel. Do this before the frame is in place. (you can just see the ends of the knot in the photo)
- complete the sewing of the sail
- thread the leach line through the trailing edge tunnel and leave plenty of spare at the wing tip
- cut 2 lengths of dacron band which, when starting at the nose, will extend 10 cm past where the trailing edge intersects the dacron when the tunnel is in position. This doesn't need to be hot cut.
- double over the last 5cm of the dacron you have just cut and sew
- fold the dacron in half along it's length - I just press down on it with a round metal knife handle
- put prit stick glue along one half of the inside of the fold you have just made. and put the leading edge of the sail up to the centre fold of the dacron. I used to use super (instant) glue but it doesn't allow for repositioning. Prit stick allows for repositioning but isn't strong so you may need to adjust what you stick as you stitch
- put glue on the length of dacron above the sail and press the dacron onto the sail. If the leading edge has a large curve then you may need to work on a small length at a time - sticking as you go.
- I start stitching at the nose and work towards the tip. As you approach the point where the trailing edge meets the tunnel you will have to stop this run of stitching leave a gap and then start again. Be careful that you do not sew the leach line.
- At the tip you will be stitching through 4 layers of dacron and 1 or 2 of ripstop so you may need to adjust your thread tension or use a wider needle than usual
- At the points where the speaders meet the leading edge I put another layer if dacron over the tunnel for re-enforcement.
There are 2 holes approx. 1cm apart in the dacron. Thread the ends of a piece of bungee through these from front to back and tie together. When the spine is in place it goes between the knot and the dacron and the knot holds it against the sail.

Materials I used
Sail: ripstop nylon seconds, gauze
Re-enforcement: dacron band
Nose: dacron band, seat belt webbing
Frame: 6mm exel carbon fibre tube, 3mm carbon fibre rod for inner standoffs, 3mm fibre glass rod for outer standoff
Fittings: whatever I had lying around
Bridle: dacron sheathed dynema (150lb strength)
Leach line: 75lb dacron line
Trick line: same