
كيف تصمم
موقعك
الشخصي؟؟![]()
يمكنك
تحميل كتاب تعليم
frontbageمن هنا
أو
يمكنك تصميمه
من word و وضعه على
الإنترنت عن طريق
التسجيل
في الموقع easy upload http://www.oocities.org/
و إليك
الخطوات
You should store all the source files in their own folder, for example,
a folder called. C:\my site\source\.
1.
Start
Microsoft Word 2000.
2.
If you
have not altered Microsoft Word 2000's default settings, you should be
presented with a blank document and be ready to start typing.
(If you have changed Microsoft Word 2000's default settings, you may need to
click File/New and select Blank Document before you can start).
3.
Before you start typing, let's pick the
file name, and save as a Web Page (you must use this file format for your Activ
E-Book source files).
Click Save As... on the File menu.
4.
You
will want to save this file as index in the Web Page format, into
the source folder, for example C:\mysite\source\.
Before saving the file though - you should make sure the Save options
are all set correctly! This is very important - if you don't do this, your
E-Book may not look right on older computers, and pictures may not work at all!
o
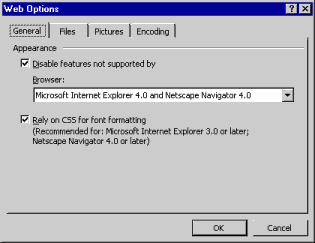
In the
Save As dialog, click Tools and then Web Options.
o
Set
the General options like this:
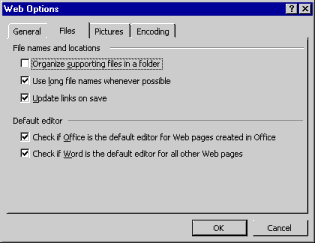
o
Set
the Files options like this (you may vary the Default editor options
just leave the File names and locations section as shown).
You can now proceed with filling out
the Save As dialog box. As this will be the main page of your site, you should
use the file name index.
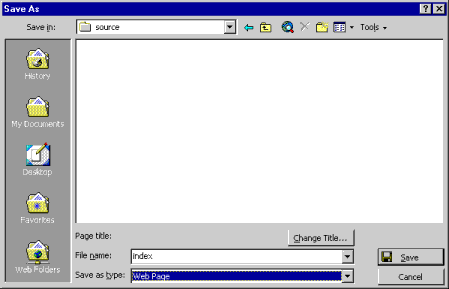
Here are the exact steps, if you have never done this before:
o
Drop
down the Save in dropdown combination box, and find the source folder
(you may need to do this more than once if your source folder is a folder
inside a folder).
o
Click
inside the File name text entry field, and type index. Do NOT
press Return!
o
Drop
down the Save as type dropdown combination box. Select HTML Document.
o
Click
Save
5.
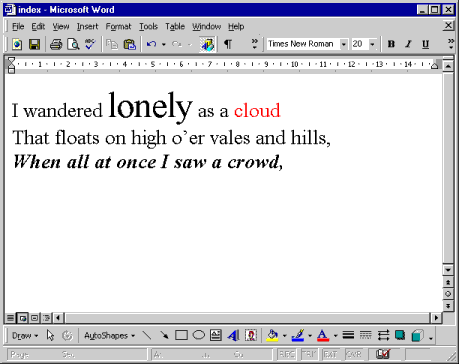
Now
start entering the text of the first page of your site into Word.

Don't forget, if you like, you may use text formatting as in this example:
6.
When
you are done with your first page, click Save on the File menu.
7.
Next,
we'll create a second page. Do not close Word yet, we want to keep using
it for a while.
8.
Click New
on the File menu.
9.
Select
Blank Document on the dialog box, then click OK.
10.
Before you start typing, let's pick the
file name, and save as a Web Page.
Click Save As... on the File menu.
11.
You
will want to save this file under a different file name (you can use any name
you like, but we recommend not using spaces in your file names as this can
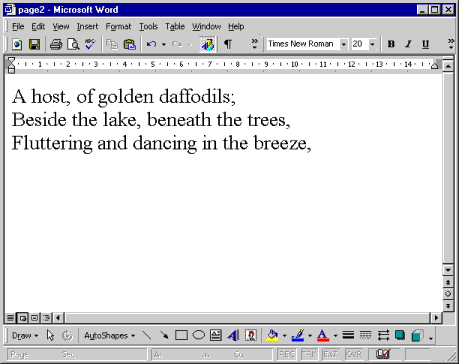
sometimes cause problems). For example, as page2. Regardless of what
name you pick you will want to save in the Web Page format, into the
source folder (for example: C:\mysite\source\, using the same procedure
we used to save index earlier in this chapter.
12.
Now
start entering the text of the second page of your site into Word.
13.
If you
click the Window menu in Word, at the bottom of this menu, you will see
numbered items to switch between the various documents you have open.
14.
Next,
we'll create a hyperlink between the main page and the second page. This will
allow a person to read the first half of our poem, and then click on a link to
continue reading.
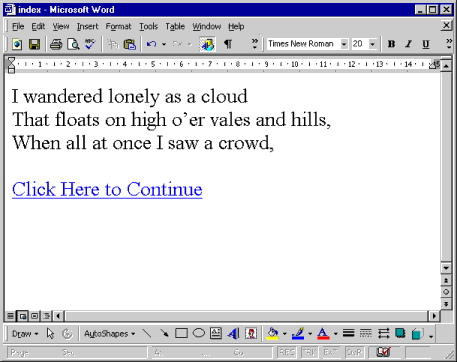
15.
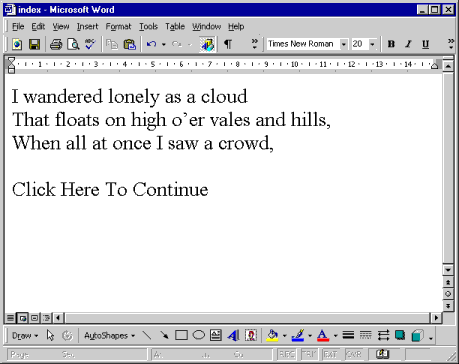
Select
index (it's probably numbered 1) on the Window menu.
16.
At the
bottom of the page, add some text that will eventually become the hyperlink.
17.
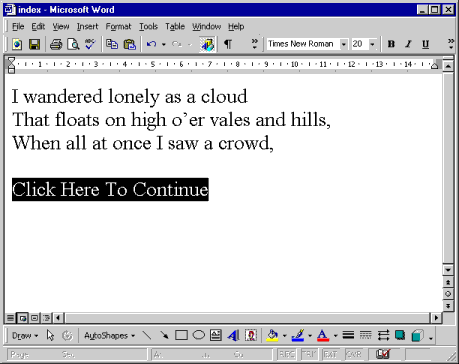
Select
the text that you just added using the mouse.
18.
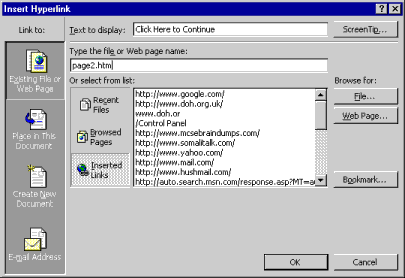
Click Hyperlink...
which is on the Insert menu.
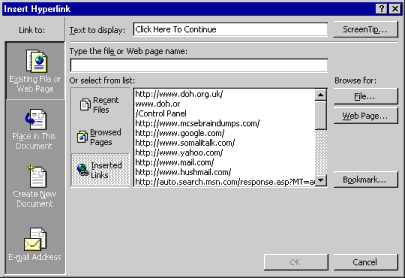
You will see this dialog box:
19.
In the
field labelled Type the file or Web page name you can enter a link to a
web site or to another file on your disk.
Always remember, for links that are between files that will make up pages of
your site, both files must be located in the same folder.
20.
For
this example, we might want to link to page2 (if that's the file name
you used for the second page of the site).
Click the File... button, navigate to source folder, for example Cmysite\source\,
and select the page you want to link to, for example page2, and
then click OK.
You should be returned to the Insert Hyperlink dialog, which will now
look like this:
Finally click OK on this dialog, and you have added your hyperlink which
will show up as blue underlined text.
21.
The
hyperlink that we just added leads from one page inside the site to another
page, also within site. We will now learn how to add a hyperlink that goes to a
web site.
Let's see how to add a hyperlink which goes to Yahoo!
22.
Select
the page you want to link from (for example - page2 - which is
probably numbered 2 on the Window menu).
23.
At the
bottom of the page, add some text that will eventually become the hyperlink.
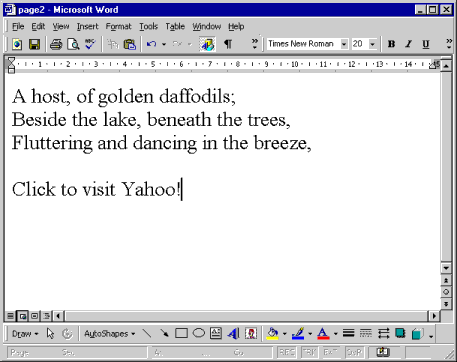
24.
Select
the text that you just added using the mouse.
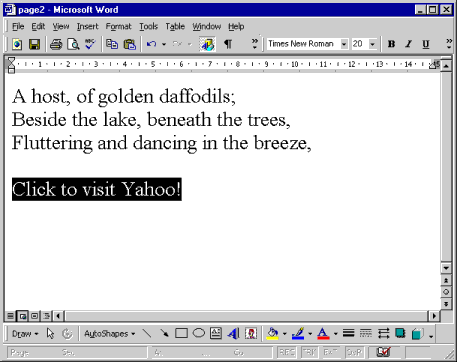
25.
Click Hyperlink...
which is on the Insert menu.
You will see this dialog box:
26.
In the
text field labelled Type the file or Web page name, we should enter the
URL of the web page or web site that the hyperlink will lead to. Always include
http:// at the beginning of the hyperlink.
For example, even though we commonly say www.yahoo.com or just yahoo.com,
the full URL is really http://www.yahoo.com - and we must always use the
full URL when setting up hyperlinks.
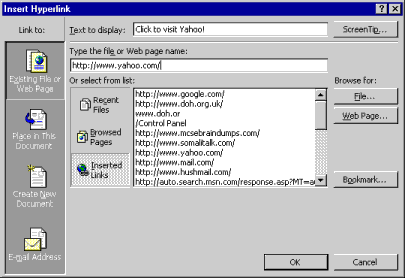
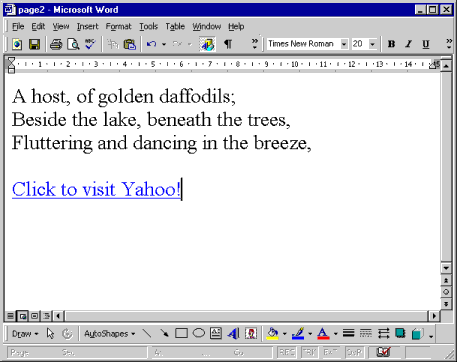
Click OK on the dialog, and you have added your hyperlink that will show
up as blue underlined text.
27.
Before
we finish, let's add an image to one of the pages. Move the insertion point
where you want to place the picture, hit Return a couple of times to add a
couple of blank lines, then click Clip Art... which you'll find on the Picture
submenu under the Insert top level menu.