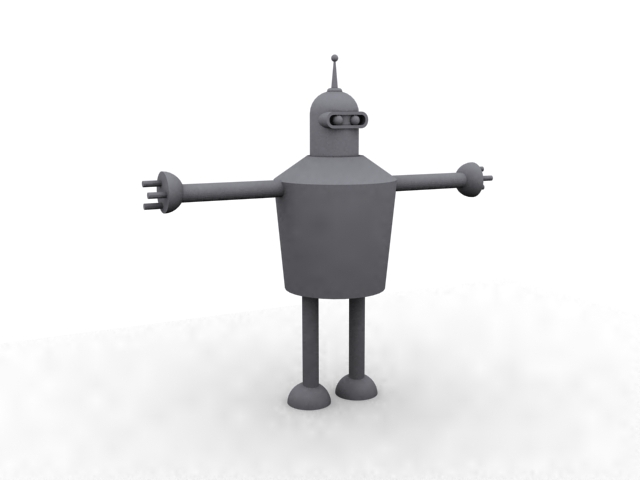
My name is Rohan I am not professional animator just working on my own I have many difficulties in my learning time and I am writing this tutorials to help those learner who get these problem .today we are going to make bender the cartoon character like this it is in nature mean buddy but I live it
First I am giving you some very much important tips .Remember
them and make them your nature so
1. Save your work every 10 mints.
2. Use Hold option when experimenting on some thing (I mean on your Model).
3. And keep some Cold drinks near u or else u get bored some time.
OK now let me start ham ham………
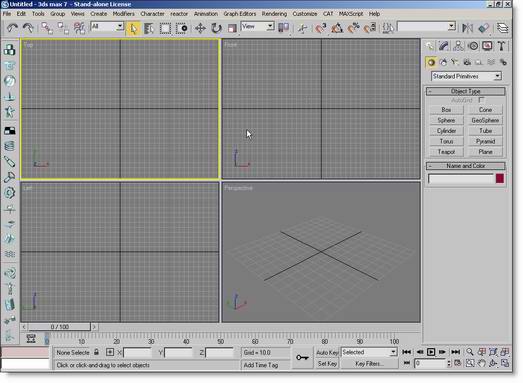
So first of all open your 3D Max and reset set it (well it is not necessary to reset it if it is new it is just some thing I noted in all tutorials).
Now ever good animator or 3d modeler has to do some blue print working so I have done some basic draws of my character THE BENDER these are only Ruff scathes to set my references.
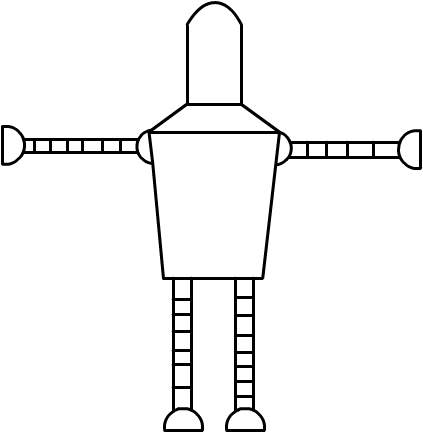
one thing more when you do your scathe work note your image
pixel size or use 3Ds max to see it do so this 1st
Go into Files => View Image File.
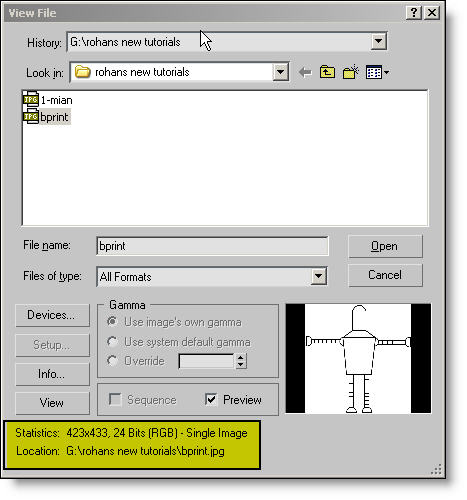
Image size here
Here navigate to your blue print image as with this tutorial and when you find your image just single click on it and you can see your image size damnations in that highlighted area .Note it and processed further.
Now create a plane from create menu or form create pallet
in Front view make it
211.5 x 216.5 (here we divide our original size with 2).
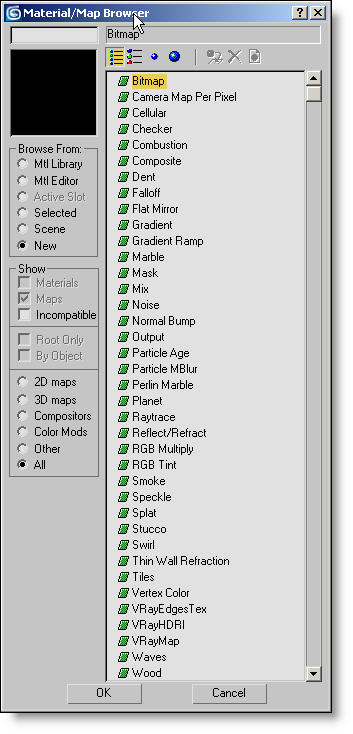
Now press M or open your marital editor here select one empty slot
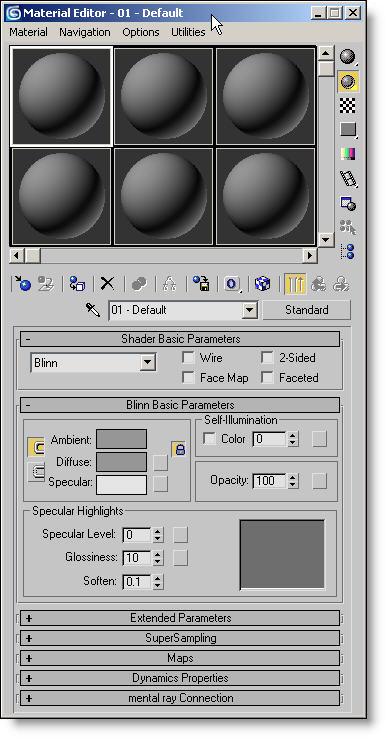
and in it’s defuse map button select Bitmap.
Now select your image and open it wala you have your marital ready.

Now drag and drop your marital on your plane well you can’t
see any thing yet but after clicking on show map![]() button you can see you image on your plane. So go on do it.
button you can see you image on your plane. So go on do it.
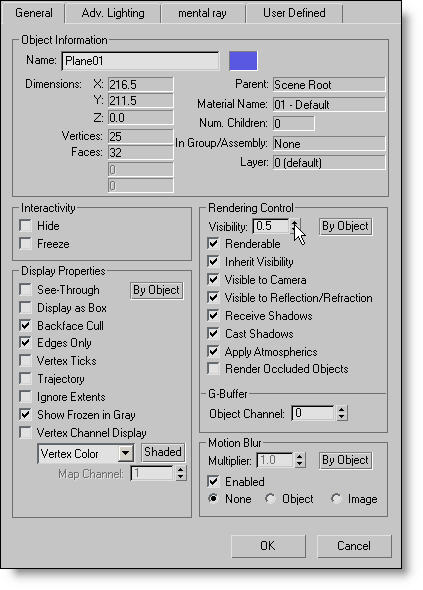
Now here is good tip when you model using reference image made it little bit transparent so you can see through it. To do it right click on your plane and select properties and then look for rendering control here make visibility to .5 and press ok .
MODLING STARTS
Ok now we are going to model our bender Dud so get up we
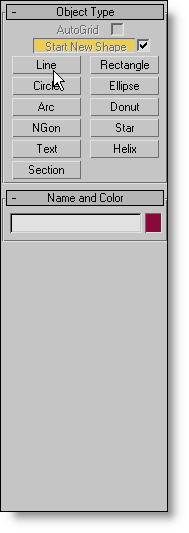
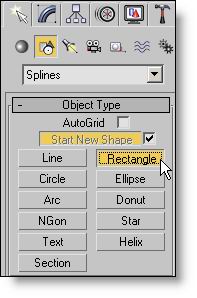
are using 2D to 3D method for modeling and it is affective now select
Spline from your shape menu ![]() in
Create palette.
in
Create palette.
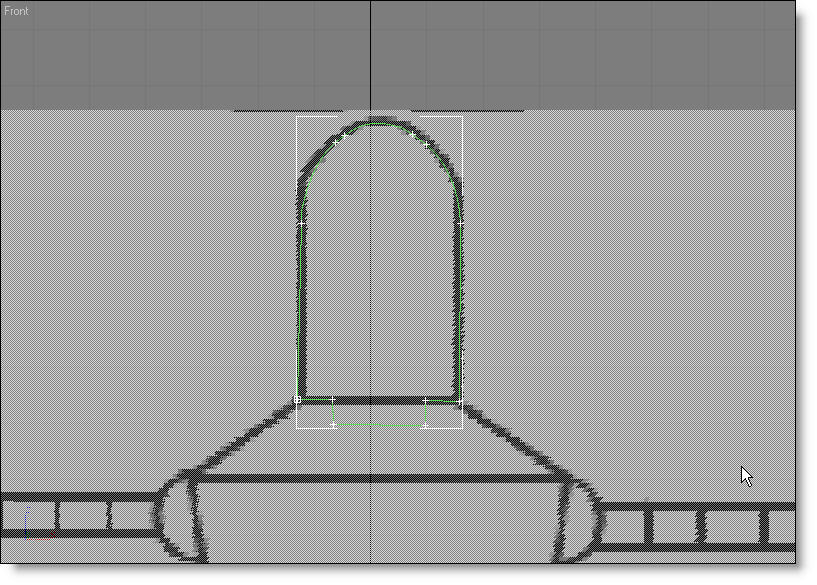
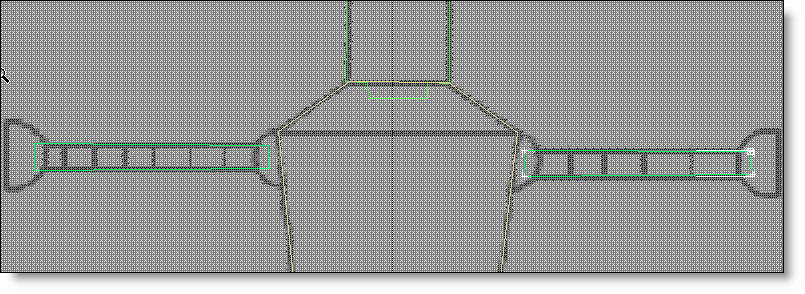
Zoom in a little bit and start with the Head do as I do copy this start
your line from this point and end it on this point make it rectangle (just
make this shape).
Now for body again use line for body and create outline with it. As

Now same new line for legs and arms left the shoulder we do them later.
Now for shoulder, foots and hands we will create some different shapes worry not not so different just see it.
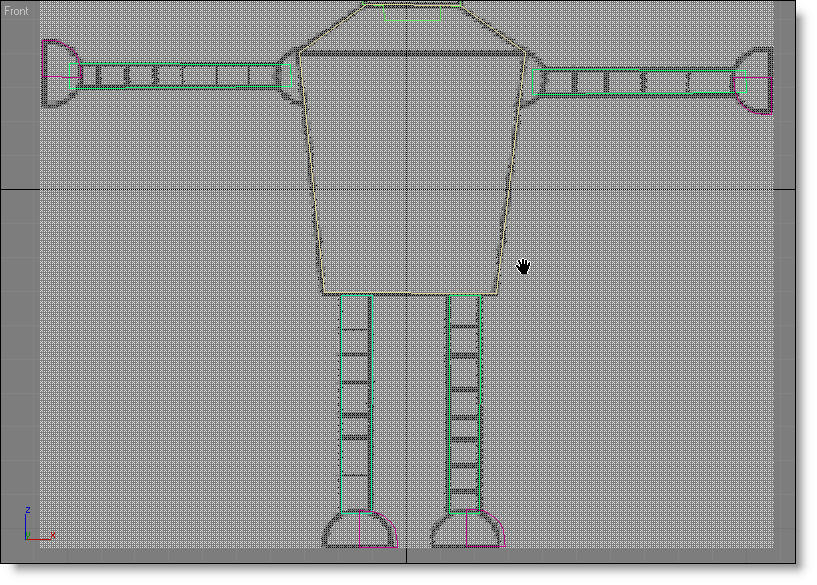
After making this shape copy it to other hand and foots
as this
So our modeling is complete ………………..caught
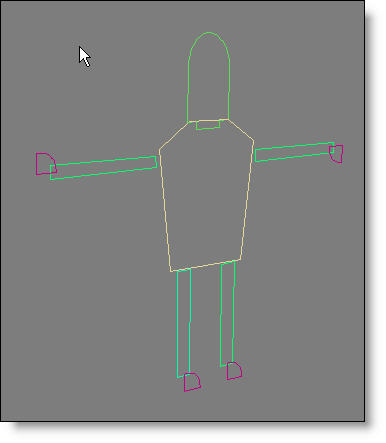
ya. Now we have our out line complete now hide your ref image from background
(Display panel => hide) or simple right click on it and select hide
selected.
Now we have something like that uuuuuuuuuuuu its uuugly so now we are making it 3D cool Han.
Start from head select head line and go in to modify => modifier list .and click on Lathe
.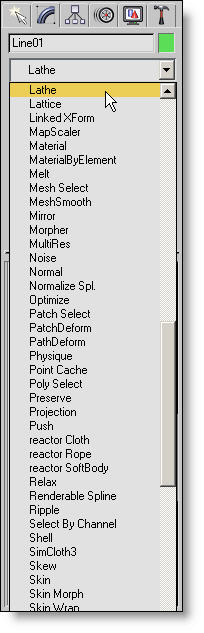
Here delete your arms hands every thing except your head and body ….. No really not joking I just want you to learn how to make 2d to 3d models .now you have this.

Now for arms and legs create simple cylinders like this
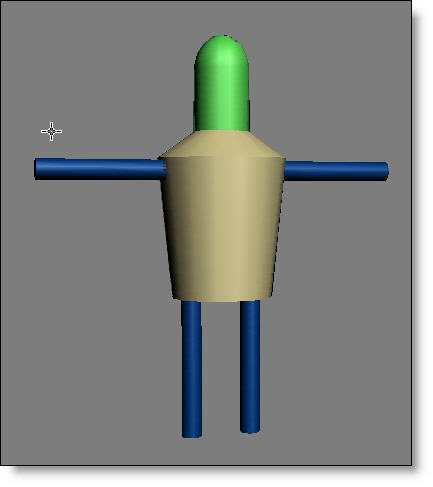
And after creating the cylinders your bender will look like this
For hands and foots and shoulder we can use simple spheres
create a sphere and place it on the tip on the rist like this do it for
both hands and foots.
Now it
Looks like this

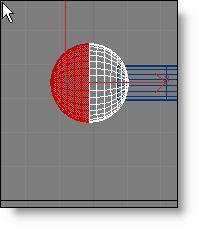
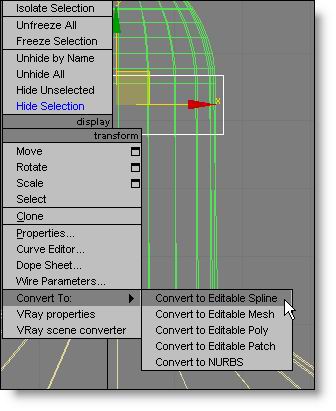
Now as our real bender has half spheres as his hands and foot

so we make our full sphere hands and foots Editable Poly and cut them half to do this right click on your one sphere hand and go into convert
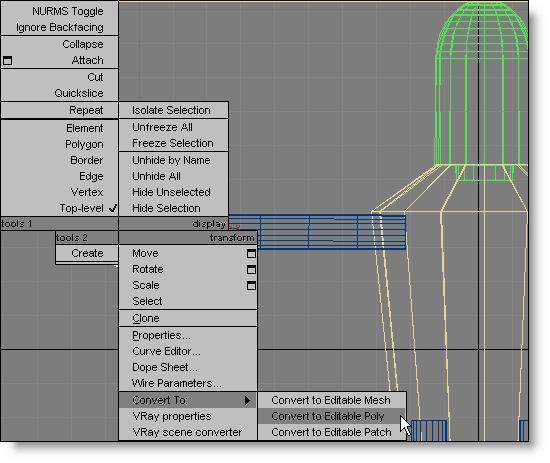
to for cut it in half select your poly hand and look for polygon in selection table in modify
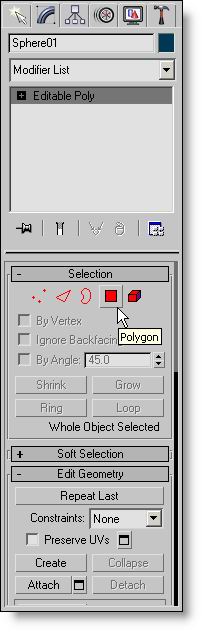
Then just drag a rectangle around your half sphere it will turn red and hit Del button.
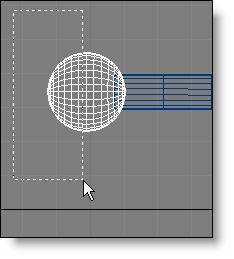
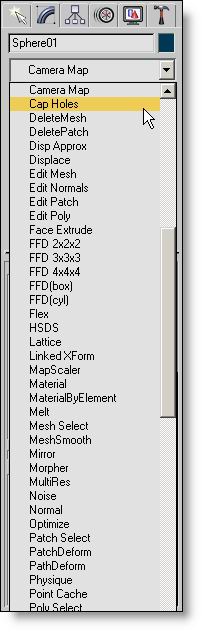
Do this process both hand and foots and apply the cap hole modifier to them like this.
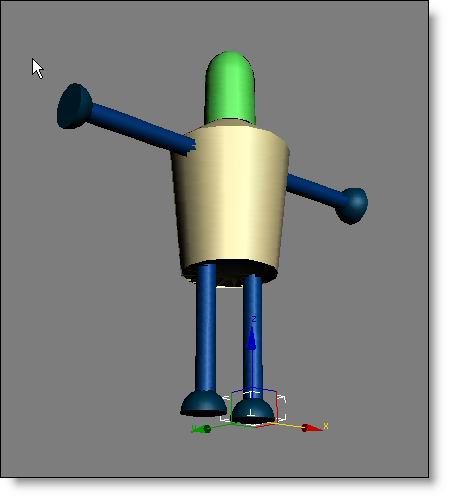
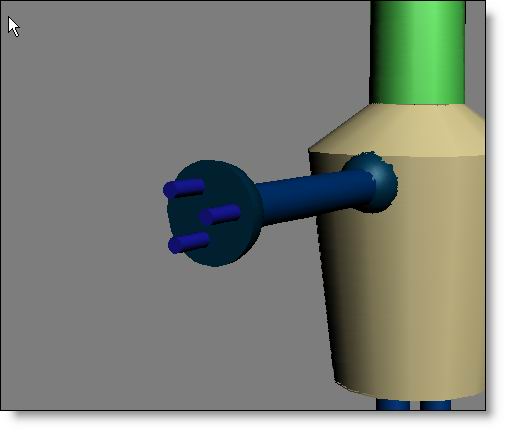
Now as our real bender it has two shoulders if you look at this real bender image actually him as same half spheres on his shoulders so copy one hand and put it on his shoulder like this.
To create fingers we need 6 cylinders 3 on each hand so it will look like this.
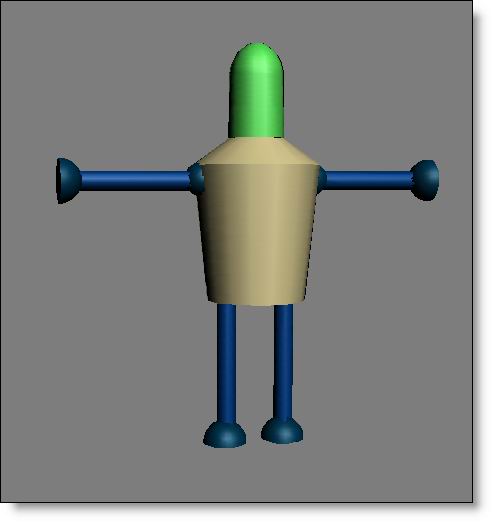
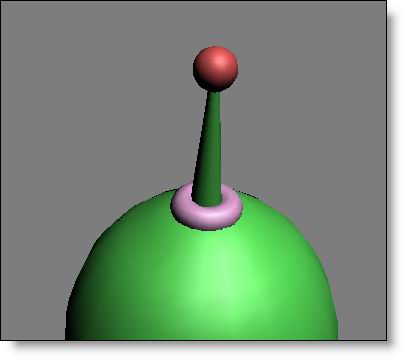
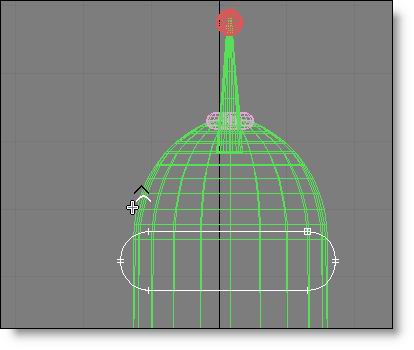
Now one thing more if you see our real bender it has a antenna on his
head

so we make It .make a tours on his head and create a cone in it like this
. 
So we have our basic bender complete it is rather ugly but it will get cooler after ok so moving on now if you look our real bender in this image it has a mouth
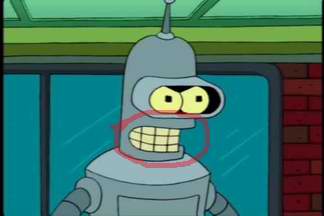
so make this need to make a 2d rectangle from shap pallate
in front of his eyes and convert it to Spline and select its all vertex
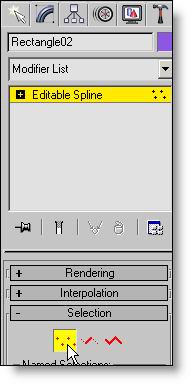
and then in modify fillet them

now apply extrude modifier to the line so and set extrude amount to 14
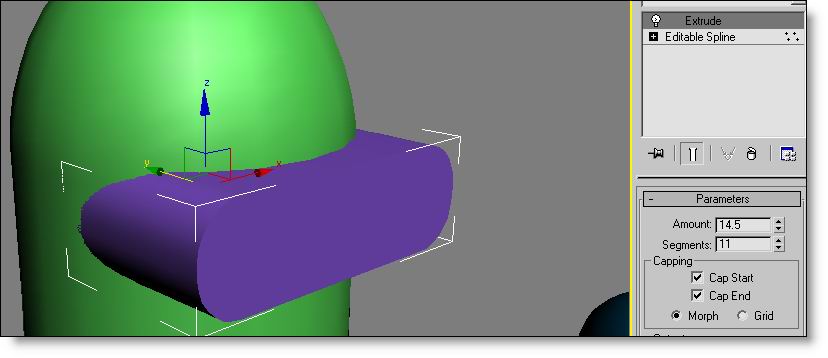
now you will get this .now for mouth copy eyes and place it on the sopt of mouth as this .
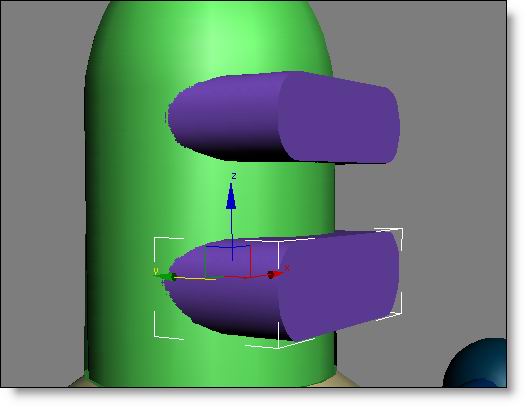
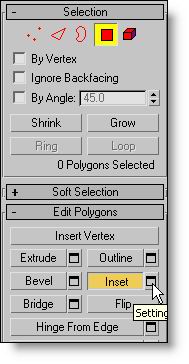
now more in depth to create benders eyes convert the extruded eyes into poly and then select polygon in modify and select the fron of his eyes and insert out line so it will look like this
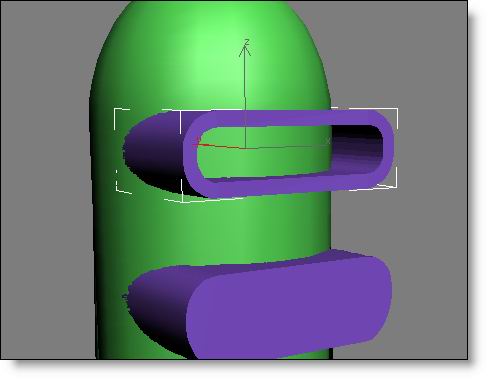
And now extrude the inner part more in like this
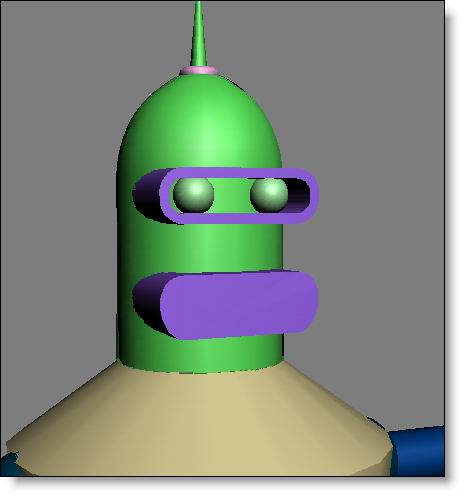
Now for eye balls create two spheres in eyes box like this
So now for mouth we will do some thing more different .so select your
mouth and in create menu or in create pallet scroll down to the compound
objects
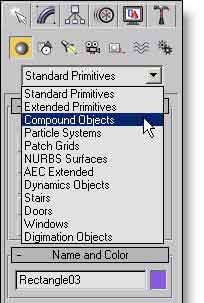
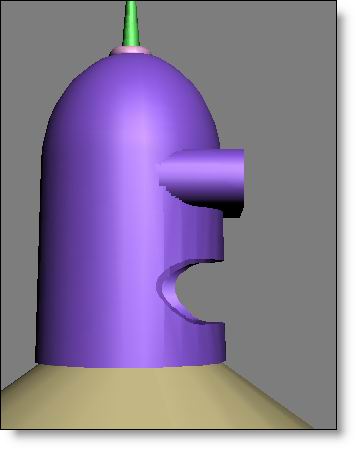
in it select Boolean and pick operand B head and make it subtraction (A-B)
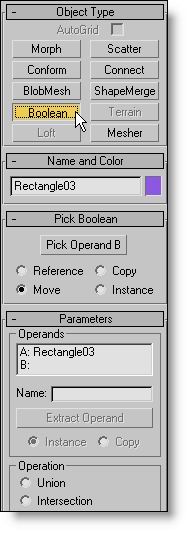
so it will look like this
Now convert your body into editable poly and in modify click on attach
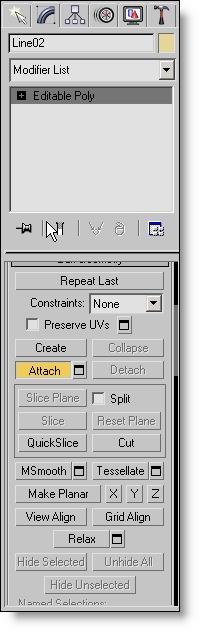 a
a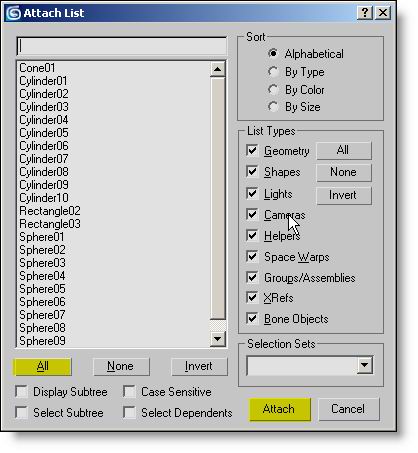
and in find dialog box click all and then attach wala you have your own bender
Like this
Next time I will teach you how to texture your bender and then how to
rig it and then how to animate it and then how to composit it in real
world and then how to get rid on new ideas so till then bye and Khuda
Hafiz and take care