Toyota Steering Box
The steering box in F-1's are prone to wear which leads to sloppy steering. In addition, rebuild parts for these 50 year old boxes are expensive. There are many kits available for adding power steering to these trucks. However, I wanted to avoid having a power steering pump on my flathead engine. I soon learned from a mailing list that the Toyota power steering box many companies are selling brackets for also has a manual variant. It looked simple and clean enough, so I decided to go for it.
I bought the bracket from an f-100 dealer in California, and I must say I was less than pleased. By the time I realized what a piece of crap it actually was, I had already drilled a hole in it...so it was mine. My advice to anyone out there considering this swap is to read this article and then make your own bracket. It's easier and cheaper!!!!
After getting the bracket, you need to find a steering box. From my limited research, it seems these boxes were used on 1979 to 1985-6 Toyota 4X4 pickups. They are easy to spot because the box is mounted in front of the front axle on the frame. Later models mounted behind the axle and are cross steering.
Clean the box real good, make sure it turns free, and replace the two oil seals. The oil seals can be bought at NAPA:
Worm Shaft Seal: Chicago Rawhide # CR7000
Sector Shaft Seal: Chicago Rawhide # CR12705
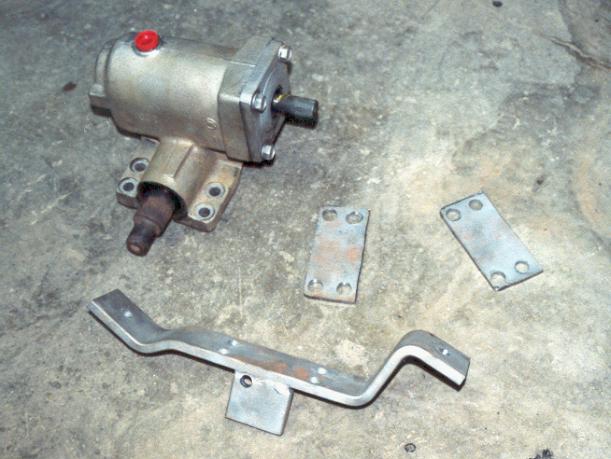
Below you will see a picture of the bracket, the steering box, and two spacers I had to make....we'll get to that later.
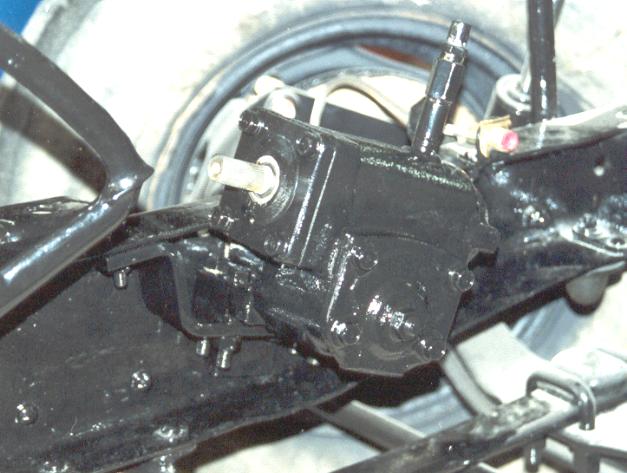
Like I said, the bracket was a piece of crap. I had to use the two spacers above to raise the steering box to the right level (about 1/4"), and struggled trying to get the alignment right. The thing basically just wasn't bent correctly. You can see in the picture how far off it really was, the hole drilled in the side is supposed to be right in the center of the square....it barely fits!!!!
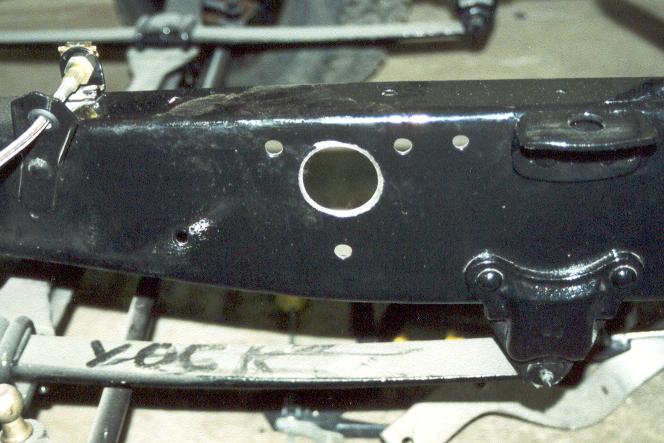
You also need to enlarge the hole in the side of your frame. The shaft of the box is exactly the same size as the hole and can rub if not in perfect position. While I was at it I drilled it off-center down and toward the front to help acomodate the bracket.
Next, you need to make your pitman arm. There are a few companies out there who are more than willing to rip you off with their custom pitman arms. However, beware...the splines on the manual box are different than the power unit, so their pitman arms will not work. Besides, it's not hard to make your own.
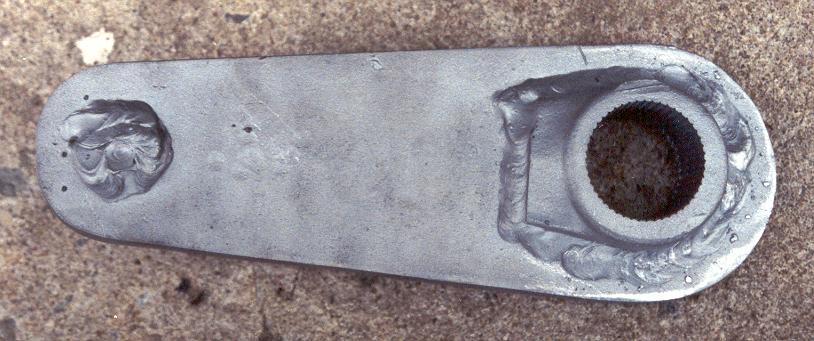
I made mine from a piece of 1/2" flatbar, more than adequate to sustain road shock!! :) Lay your design out and cut it with a chop saw or torch. You will cut the top portion of the Toyota pitman off and use it for your new arm. Below is a picture of the Toyota pitman arm and the flatbar with the design.

Cut the pitman arm out, weld in the top portion of the Toyota arm, and drill a hole for the ball stud. I chose to weld it also, but they can be pressed in. Make sure if you don't know how to weld, you find someone that does. The splines on the arm can be warped by the heat if you are not careful. Finally, use a grinder to clean up and smooth all of the edges. Below is a picture of the back of the pitman arm. The toyota arm is 3/4" thick, when you weld it into the 1/2" bar you want to make it flush in the front and stick out 1/4" on the back. This will give the arm adequate clearance away from the frame.
Add a little paint and the pitman arm is finished. This is the front of the arm, again, notice how it was welded flush on the front.

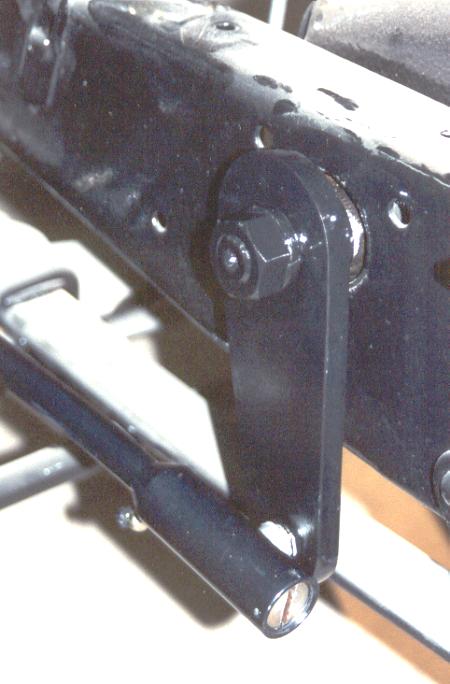
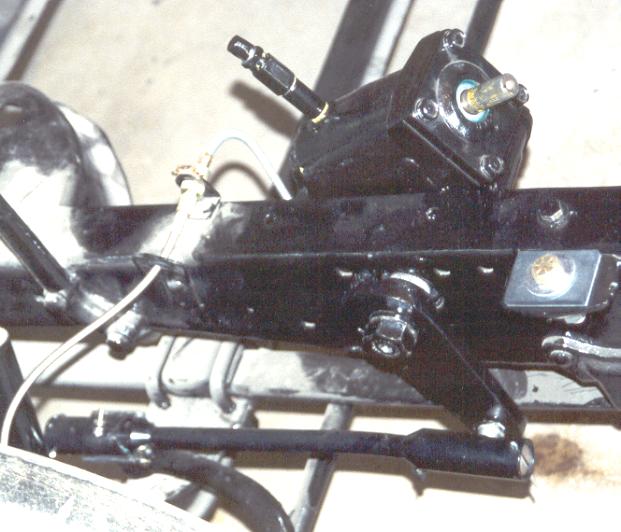
Here is the pitman arm installed on the steering box.
Below is a couple pictures of the finished assembly. Pardon the quality, black doesn't photograph well.....
That's about it. If you have any questions send me an email: