
During your adventure in the Ocarina of Time, you’ll meet some
of the most pants-wettingly exciting bosses you’ll ever have to face. Some of them will be pushovers just pretending
to be hard. Most of them, however, are
as solid as a rock that has been triple coated in a completely unbreakable
substance. That is, until you discover
their weak spot...
1. Parasitic
Armoured Arachnid – Queen Gohma.
The Queen
Gohma is the very first boss you’ll face in your quest, and being so near the
start of the game, she can seem quite daunting. You may only have three heart containers, but don’t worry! You can easily kill her! Enter the boss room Inside the Deku Tree,
and look around at the ceiling. When
you centre in on the glowing eye, a cutscene will take place, and the Queen
Gohma will descend in front of you.
Z-target her and hold your slingshot ready to fire. Wait for the eye to turn red, then quickly
fire your slingshot. This will stun
her, so quickly pull out your sword and either keep hacking away at her or
continuously perform jump-attacks. If
she isn’t dead yet, she’ll climb onto the ceiling and try to lay some eggs. Continue to Z-target her and hold your
slingshot ready. Keep her insight, and
her eye will turn red again just before she starts sending her hatchlings after
you. Hit her and she’ll fall down. Keep hitting her with your sword, and if
necessary repeat this process until she dies.
Spiritual
Stone Received: Kokiri’s Emerald (from the Great Deku Tree)
2. Infernal
Dinosaur - King Dodongo
Hmm. Boss numero dos. Quite scary after falling down that seemingly endless hole. This King Dodongo is basically an enormous
version of the other Dodongos you have previously seen in the Dodongo’s Cavern,
but can’t be harmed quite so easily.
He’ll start walking towards you, and when close enough will stop and
start to take a deep breath. When he
does this, throw a bomb in his mouth.
This will explode inside him and stun him. Quickly draw your sword and keep using jump-attacks on him. King Dodongo will then get up and start to
roll halfway around the room. When he
does this dash around in the opposite direction (staying close to the lava or
rolling through the gap between him and the wall so as not to get hurt) to meet
him at the other side and repeat the process.
Spiritual
Stone Received: Goron’s Ruby (from Darunia)
3.i Bigocto
Aha! The first mini-boss! This one can be quite tricky due to the
continuous movement of Big Octo (and his sudden changing direction) and the
moving spikes around the central platform.
You must use your boomerang to stun him, then hack away at the green
area on his butt. Z-targeting can be
quite tricky in this case – if you continue to Z-target it’s hard to catch up
with his behind, but if you don’t then Navi won’t always be ready to target him
for you. He’s pretty weak though, and
will soon die after a couple of jump-attacks.
3.ii
Bio-Electric Anemone – Barinade
This boss can be
extremely annoying for first time players.
Make sure you have a fairy or two if you’re not too confident about your
battling techniques. First of all,
target the tentacles reaching to the ceiling – one hit each to the three of
them and it’ll change its attack.
You’ll probably have noticed a lot of those giant jellyfish circling
around the Barinade. You have to get
your boomerang past them, or wait till they spread out a bit and roll between
them, and then throw your boomerang at the Barinade to stun it. Quickly target any nearby jellyfish and kill
them off with your boomerang. Try and
stun the Barinade again before it starts moving, so that you have more time to
kill some jellyfish. Otherwise repeat
the first process. After you finally
kill off all the jellyfish, some more will appear! Nooo! Don’t worry; just
use the same method as before. Now you
can finally start to kill that Barinade!
Hit its middle with the boomerang (while moving around to dodge the
electric rays) to stun it, then keep hitting it with your sword. Repeat this process till it dies.
Spiritual
Stone Received: Zora’s Sapphire (from Princess Ruto)
4. Evil Spirit
From Beyond – Phantom Ganon
Now
Link has grown up, his quest is becoming far more difficult, and the bosses can
seem to have too. You don’t have much
to worry about with this one, though, as his attacks are easily dodged. Do not stand in the centre of the room for
the first part of this battle, stay around the rim so that you won’t get hit by
the phantom’s attack. Take out your bow
and have an arrow at the ready. Look
around at the pictures to see the phantom riding around on his horse inside two
of them. One of them is fake and will
turn around at the last second – don’t shoot at this one. The real one will take a few seconds to come
out of the picture, and you’ll notice a purple portal forms before he
does. Shoot an arrow as soon as he
flies out of the painting. Keep doing
this until he loses his horse. Now you
have two options: You can either avoid
his projectiles and try and hit him with jump-attacks if he’s near the ground;
OR you can hit back the projectiles and play tennis until he (hopefully) misses
and get hits by them, which will stun him and make him fall to the floor. Dash over to him and keep hitting him. If you’re lucky he’ll stay collapsed for
long enough for you to kill him in one go.
Otherwise repeat the process.
Spiritual
Medallion Received: Forest Medallion (from Saria, the Forest Sage)
5.
Subterranean Lava Dragon – Volvagia
Some
people find this boss extremely hard, due to the attack Volvagia uses which
makes rocks fall down from the ceiling, and his fire breathing. There is actually a very easy way to avoid
his attacks, which surprisingly few people seem to know about – you can climb
down the side of the pillar you are fighting on and hide from Volvagia’s
attacks! He’s quite simple to beat
really – wait till you see fire flaring out of a hole and go towards it (later
on the flaring will change hole twice).
Volvagia will pop his head out and do a head-bang attack, then sit still
for a second. Now is when you should
hit him on the head with the Megaton Hammer to stun him. He’ll collapse for a while, so do jump-attacks
using your hammer. Repeat until he’s
dead.
Spiritual
Medallion Received: Fire Medallion (from Darunia, the Sage of Fire)
6.i
Dark Link
Dark
Link is the second proper mini-boss you have to face (the Poe Sisters and Flare
Dancers don’t count ‘cos there was more than one of them and they were too easy
to be classed as mini-bosses). Now,
there are a few different ways to kill this guy. If you have a lot of magic (and I mean having a green potion or
two plus the extended magic meter), then you can keep using Din’s Fire when he
gets near you. If you have the
Biggoron’s sword, then you can use jab attacks to hurt him – your sword’s too
long for him dodge! If you have neither
of these things, then this battle can be pretty tough. You’ll have to go on the tiny island in the
middle and try and hit him with the Master Sword or the Megaton Hammer.
6ii.
Giant Aquatic Amoeba – Morpha
This
one can be a right pain. Stay on the
rim of the room, not the central pillars, but be careful not to run into the
spikes. Target the brain thing and hold
your longshot ready. Keep moving in one
direction around the room when the tentacles are moving, otherwise they’ll grab
you and send you hurling into the water.
When one of the tentacles is stretched out near you, wait for the brain
thing to go up through it, and then release your longshot. It helps if you’re lined up in front of hit,
as it’s easier to hit. You can also use
Din’s Fire when the brain thing goes through the tentacle and is above solid
ground, not water, to evaporate the tentacle.
Whichever way you choose, keep hitting the brain thing as many times as
you can before it escapes. It can be
easier to get more hits by doing spin swing attacks, as they cover a wider
area. Repeat until it dies.
Spiritual
Medallion Received: Water Medallion (from Princess Ruto, the Sage of Water)
7.i
Dead Hand
OK,
so you can actually face this guy any time after the Forest Temple (learn the
Song of Storms when big, and drain the well as a kid), but the first time you
need the Lens of Truth is in the Shadow Temple, and the Bottom of the Well kind
of links in to it (they look similar anyway and they have the same music). And also you have to fight Dead Hand again
in the Shadow Temple, so there we go!
When you find Dead Hand, watch out for his many hands! – No matter how
many times you kill them, they’ll soon sprout up again. Charge up your sword and release it when
Dead Hand comes near you and bends his head down. When he disappears you’ll have to get caught by one of the hands
– as soon as he comes up keep whacking the A button to roll away! Repeat the process until he dies.
7.ii
Phantom Shadow Beast – Bongo Bongo
This
boss is probably the easiest boss in the entire game! Keep your hover boots on for this battle. When you land on the big bongo drum, you’ll
see Bongo Bongo for a brief period before his body and head disappear, leaving
only his hands visible. You can see the
whole of him if you keep the Lens of Truth on, but then you can’t use any other
magic, so I recommend you keep it off.
Target one of the hands and shoot an arrow at it, then as quickly as you
can target his other hand and shoot an arrow at it before it punches you. Then charge up a spin attack, and release it
as soon as the flying fists are on either side of you to knock out the beast. Now try and do as many jump-attacks to his
eye as you can. If you have the
Biggoron Sword you can kill him before he gets up! Otherwise repeat the process.
Spiritual
Medallion Received: Shadow Medallion (from Impa, the Shadow Sage)
8.i
Evil Sorceress Sisters – Kotake & Koume
Kotake
and Koume, the sorceresses of Ice and Fire, and also Ganondorf’s surrogate
mothers. Kotake uses fire magic and is
weak against ice attacks. Koume uses
ice magic and is weak against fire attacks.
Now then, you have recently acquired a mirror shield in this
dungeon. Any ideas? That’s right! You reflect the witches’ attacks onto each other. Keep running to different pillars on the
sides of the room, and make sure you can see both sorceresses. Crouch down and defend with your mirror
shield so that the ice or fire beam will hit it. Then move your shield around to try and hit the other witch. After you’ve done this a few times, they’ll
combine together to perform Kotake and Koume’s Double Dynamite Attack...
8.ii
Twinrova
Yes,
it’s the same people, but they’ve combined into one, and it even says the boss
name ‘Twinrova’ in white on the middle of the screen. If you’ve been wearing your hoverboots, take them off, as it’s
not easy to control side jumping quickly.
Target Twinrova and hold out your mirror shield to absorb one of the
attacks. You will need to absorb three
of the same attacks, then the built up charge of fire or ice will spurt of your
shield – run towards Twinrova holding your shield in front of you to hit her
with the charge. She’ll fall down on
one of the pillars, so jump over and do a jump-attack (press B towards the end
of your jump to save time), then keep hacking away at her. You can kill her in one or two goes with the
Biggoron Sword if you're quick. Repeat
the process until she’s dead. Don’t
absorb different attacks!! Mixing the
fire and ice will hurt you!
Spiritual
Medallion Received: Spirit Medallion
(from Nabooru, the Sage of Spirit)
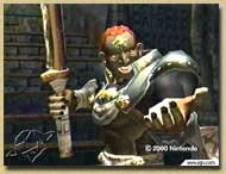
9.
Great King of Evil – Ganondorf
You’ve
collected the three Spiritual Stones, obtained the Master Sword, aged seven
years and now awakened the Six Sages.
Princess Zelda has been kidnapped by Ganondorf and is imprisoned inside
a magical barrier. The time has come
for you to fulfil your destiny as the Hero of Time. If you don’t kill Ganondorf soon, he’ll start to get a bit
trickier to kill. As soon as you can
move, run over to the edge of the room Ganondorf’s facing, as he’ll make the
middle tiles surrounding the pillar collapse.
(You can climb down to the room below to smash up some pots and refill
your health, magic and arrows if you need to.)
Ganondorf will start off by hurling bolts of energy at you. Hit them back and forth (as you did with his
Phantom), and wait for him to miss and get hit. You only have a few seconds now to shoot a light arrow at
him. When you do this, wait a second or
two for there to be a sort of mini explosion and a bright flash of light, then
jump to the centre pillar and press B just before you land to do a jump-attack. Now keep slashing him or doing jump-attacks.
When he gets up, jump back over to
where you were before. He’ll probably
use the same attack as before, but usually after the third time he’ll use a
different attack. He’ll either make
more tiles around the room fall (which can make fighting difficult), or start
creating a massive black orb of dark energy.
As soon as you see this happening, start charging up your sword for a
spin swing attack. The King of Evil
will release the orb, which will send five regular projectiles heading straight
for you. Release your sword the moment
you notice this. The orbs will reflect
back and hit Ganondorf! Now hit him
with a light arrow and chop him up until he ‘dies.’
10.
GANON
This
is it! The final showdown with the Evil
Incarnation of Darkness in the game.
You think you’ve finally killed Ganondorf, rescued Princess Zelda and
escaped from the tower, and you await the ending sequence. But wait!
What’s that noise? You go to
investigate, Ganondorf jumps out from under the rubble and entraps you in a
circle of fire! He then transforms into his ultimate form – Ganon, and knocks
away the Master Sword (!), which lands out of reach by Princess Zelda. I hope you’ve got the Biggoron Sword, as
otherwise this boss will be unbearably difficult. You can stun Ganon by shooting Light Arrows at his face when he
is not guarding it. Do this and run
around behind him and attack his tail with your best weapon (preferably the
Biggoron Sword – he’ll fall after about eight successful jump-attack
hits). A quicker and more magic-conserving
way to hurt him is to simply roll between his legs (without bothering to stun
him) and jump-attack his tail (be careful if your using the Megaton Hammer, as
it slows you down a bit). Ganon will
eventually collapse, but he’s not dead yet!
Zelda will tell you to hurry and get the Master Sword – do so. As you’re running back to face Ganon, roll
just before the point where the circle of fire was, otherwise you will get
knocked over by it as it reappears. If
you’re quick, you can hit Ganon’s tail one more time before he gets up. Repeat the first process, but this time
using only the Master Sword. After
about hitting his tail five times with jump-attacks, he will collapse again,
only this time Zelda will use her power to hold the Evil King. The Master Sword will glow and Zelda will
tell you to deliver the final blow. Do
this and then sit back to watch the simply amazing half-hour awe-dropping
ending.
Congratumalations! You’ve beaten all the bosses!! If there are any other enemies that you
don’t know how to defeat, or if any of the bosses are still giving you bother,
don’t hesitate to e-mail me at thezeldaguru@hotmail.com
- please put ‘enemies’ or something in the subject box to get a reply quicker.