
wwwwwwwwwwwwwwwwwwwwwwwwwwwwwwwwwwwwwwwwwwwwwwwwwwwwwwwww
<<<<<<<<<<<<<<< THE FIRST SPIRITUAL STONE
>>>>>>>>>>>>>>
mmmmmmmmmmmmmmmmmmmmmmmmmmmmmmmmmmmmmmmmmmmmmmmmmmmmmmmmm
= = = KOKIRI FOREST = = =
First, get out of your house and talk to Saria. After exploring the
forest for a while, Navi should start calling you to go to the Great Deku Tree.
If you try going to the Deku Tree on the east, Mido will be blocking your way.
He says that you need a sword and shield to go to the Deku Tree. He's right,
let's go find the sword first.
The forest training center is in the south of the forest on a small hill
(check the map if you can't find it). Go there. You'll learn about Z targeting
and some other stuff too. Crawl through the small passage on the wall. Be
careful for the giant rolling boulders! A short exploration of this area and
you should find the treasure chest with your sword
inside it. Now to get that shield...
The shield isn't free, it's gonna cost you 40 rupees. Go to Mido's house
and steal his money in the treasure chests :) If you still need more, cut
bushes and look around grasses until you have 40 rupees. When you have the
money, go to the store (the one with the red roof) and buy the shield. We have
the sword. We have the shield. Let's see what Mido has
to say now!
When you're all equipped in the equipment subscreen. Mido will let you
in to see the great Deku Tree. Practice fighting with the Deku Babas on the way
to the Deku Tree. Be sure to pick up the Deku sticks they leave behind. You'll
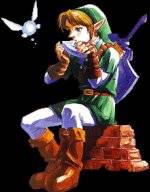
need them for the Deku Tree dungeon. After your short chat with the Deku Tree,
he'll let you inside him.
= = = INSIDE THE DEKU TREE = = =
When you enter the Deku Tree dungeon, you will be in the room that I
will refer to as the "tall circular room". Press the C-up button and
look up to see why I call it that ;)
First, turn left and go up the ladder. Follow the circular path up the
room until you get to a treasure chest. Open it to get the map. Continue on the
path and enter the door at the end. The door will lock up behind you, trapping
you in the room with a Deku scrub. Hold up the Deku Shield to bounce back the
seeds he spits out at you. When he gets hit, he'll bounce around the room. Now
chase and Z target him. He will give you a mildly useful tip and the door at
the end of the room will be unlocked. Continue through the door.
Jump on the platform and to the treasure chest. The platform will fall
behind you, destroying your exit. Get the Fairy Slingshot from the treasure
chest. Use the new slingshot to shoot the ladder hanging on the wall above the
door. The ladder will fall down to give you a new way out of here. Backtrack to
the "tall circular room".
Go down the circular path until you reach the area with vines growing on
the wall. Use the fairy slingshot to kill the all off those dangerous
skulltulas on the wall. Climb the vines to get up to the top floor of the Deku
Tree.
Look around the top floor until you find a door. Enter it. Step on the
switch and jump across the platforms that rise up. Get the compass from the
chest and go back to the "tall circular room" (use a Deku stick to
light the torch and open the door).
Kill the skulltulas that drop down by slashing their "soft
underside". See the spider web down there on the ground floor? Aim well
and jump down to it. If you fall on the hard ground you'll get hurt, of course.
Fall on the sides of the web and you'll bounce off. But hit it the middle and
you'll fall through the web to a watery basement of the Deku Tree. Perhaps
these can be called the Deku Tree's roots :)
Climb on to the platform with the switch (Note: Don't worry about
getting to the highest platform. We can go there later). Step on the switch to
turn on the light of the nearby torch. Take out one of your Deku Sticks and
light it up. Now, walk across the part of the water that is shallow, and go to
the other platform. Light up the spider web there (Burn baby burn!). Now you
can go to the door! I don't think I even need to tell you to go through the
door now...
Here's another Deku Shrub. Do the same thing you did to the last one. He
says that the pattern for beating his brothers in another room is "2-3-1.
Twenty-three is number one!". According to Nintendo's official Zelda site,
he might be referring to Michael Jordan: #23 is number 1! Hahahahahaha! There's
an eyeball switch above the door. Shoot it with a seed from your slingshot and
the door will unlock. Now proceed...
A water puzzle...cool! Dive down to the underwater switch. It's under
the log if you can't find it. To dive, hold down the A button in the water.
Pressing the switch will lower the water level. Hurry and jump on the
platform...under the spinning spiky log... and jump to the other side. Enter
the door, as usual...
Kill the Skulltula like before and push the block right as far as it can
go. Climb up and enter the door. Kill yet another Skulltula and use a Deku
stick to light the two torches. Enter the newly unlocked door. Now burn more
spiderwebs and go through the tunnel.
We are now on the highest platform in the flooded room! Push the big box
over the edge of the platform to create a bridge between the platforms. Go down
to the small platform. Light the Deku stick. And go back up to burn the
spiderweb (you need to swing the stick). Now jump down.
Continue and you will find three Deku shrubs. Watch out, they're deadly!
Kill them in the order that the other Deku shrub said: "2-3-1"
(middle, right, left).
Now fight the boss in the next room: QUEEN GHOMA. See the boss section
for further details about kicking his spidey arse. After the battle, remember
to get the heart container and step into the light...
You will be transported outside of the Deku Tree. He will give you a
story and movie of legends and other stuff. After which, he will give you the
first spiritual stone: Kokiri's Emerald! Then...he will die. There's no way to
save him so don't feel too bad. At least you get to see the beautiful cinema of
the life being sucked out of him.
wwwwwwwwwwwwwwwwwwwwwwwwwwwwwwwwwwwwwwwwwwwwwwwwwwwwwwwww
<<<<<<<<<<<<<<<
THE SECOND SPIRITUAL STONE
>>>>>>>>>>>>>>
mmmmmmmmmmmmmmmmmmmmmmmmmmmmmmmmmmmmmmmmmmmmmmmmmmmmmmmmm
= = = KOKIRI FOREST = = =
You can now leave the forest without anyone molesting you. Mido will think that YOU actually killed the Deku Tree. It's strange that he's not as mad as he should be.
Upon leaving the forest, Saria will stop you and give you the fairy
ocarina. Use it with pride. This is quite a sad moment where you and Saria
leave each other. Savor the moment. And run away...very predictable.
= = = HYRULE FIELD = = =
Right after you leave the forest, the mysterious owl (named Kaepora
Gaebora) will stop you. He'll give you a map of Hyrule and tell some other
things too. After the owl encounter, head north towards the market & Hyrule
castle. When it becomes night time, Stalchildren appear and attack. You can
easily outrun them... if you do decide to attack them, they leave behind
rupees. If it's night when you get to the market, the drawbridge will be down
and it will be raised in the morning. Be patient.
= = = MARKET = = =
The market is filled with people doing their own business. They all say
something interesting (or not...) but talking to them is not required. Check
out the stores and mini-games.
There's also a little girl with red hair named Malon. She says that her
dad is missing in the castle. Let's go find him.
= = = HYRULE CASTLE = = =
Continue along the path to the castle. A guard will be blocking the
path. He says that nobody can enter the castle. Now, follow the path to the
market until you find the red-haired girl, Malon. She'll give you a strange egg
to help find her dad.
Climb the vines behind Malon and make your way to the gate. Climb down
the ladder and step outside. Avoid the guards in the field. If one of them sees
you they will bring you back outside. Fortunately, these guards are
short-sighted and can't see anything more than a few feet in front of them. It
should be no trouble to pass them in a few tries.
After crossing the guards, you will find a ladder of stones on the left
side of the gate protected by guards. Climb it and swim inside the water until the
stairs. Get out and find the sleeping man. This is Malon's father: Talon. When
daytime comes, the strange egg would hatch to become a cucco. Use the cucco on
Talon to wake him up. He will then run off in a hurry, afraid that Malon is
angry with him. Notice the deformation of his arms as he runs :>
Now that the fat man is out of the way, push the two crates to form a
half bridge across the water. Now jump from the crates to the hole on the other
side. Make sure that it is daytime because its impossible to get passed the
guards inside there at night. So during the day, climb into the narrow passage.
Inside there, guards will be patrolling the area. Observe their pattern
and make your move at the right time. This is really easy if you learn the
pattern of the guard's movement. At the end of the guard avoiding thing, you
will at last reach the lovely Princess Zelda.
Zelda tells you about a whole load of stuff while the camera switches
around the place with dramatic scenes. She will also show you Gannondorf, the
future great king of evil (although no one realizes it yet). After the talk,
she will give you Zelda's Letter.
Walk back towards the guards and you will find Impa, Zelda's caretaker
and guardian. She will teach you Zelda's Lullaby: the most overused song in the
game. She will then escort you outside the castle and you don't need to worry
about the guards.
The next thing to do now is learn some songs for the ocarina. Go to Lon
Lon Ranch at the center of Hyrule field.
= = = LON LON RANCH = = =
When you enter Lon Lon Ranch, enter the first door you see on the left
side. Talon will be sleeping with some chickens. Talk to him and play the
"Super Cucco Finding Game" winning this game will give you a bottle
of Lon Lon Milk. The bottle can be kept for other super-useful purposes. Now
exit that room and go to the Malon in the horse place. Talk to her and show her
the ocarina. She teaches you Epona's Song. Playing this song summons Epona,
your horse. But you won't be able to ride her now since you're just a kid...
The next song is waiting in the Lost Woods on the hill of the northern side of
Kokiri Forest.
= = = LOST WOODS = = =
As the owl said, follow your ears. So the path with the loudest music is
the correct one. If there is something wrong with your ears, or you're just too
lazy to use them, here is the correct way to go: Right, left, right, left,
forward, left, and right. Now in the Sacred Forest Meadow, kill the wolf for a
nice purple rupee. Continue to find a maze area. Kill the enemies if needed and
Saria will be there playing a song on her ocarina. Talk to her and she will
teach you Saria's Song. This song will be useful for various reasons. The next
place to go is Kakariko Village, on the right of Hyrule Castle.
= = = KAKARIKO VILLAGE = = =
Explore the village! Talk to everyone! Buy everything! Or forget about
buying everything, but seriously, there's a whole bunch of stuff to do here. At
the right side of the windmill there is a lady looking for her chickens
(ahem... cuccos). Find all seven of them and get another ultra-useful bottle.
Locations of the chickens:
1. Near the lady looking for her cuccos.
2. Near the entrance of the village.
3. Somewhere around the gate blocked by the guard.
4. Behind the fence near the Skulltula house. To get there, grab a cucco
and float down to there from a higher platform.
Then throw down both cuccos.
Jump down there and put them both in the pen.
5. Roll into the box at the side of a house near the village entrance.
6. Grab a cucco and go to the place where the windmill is. See the two fences at the left side? Run at an angle and jump
with cucco in hand) towards
the fence on the left that appears to be higher. Throw the original cucco back
over the
fence you jumped over...and
get the one downstairs.
7. Follow the instructions of step 5. But after going down the stairs,
climb up the ladder on the wall (avoid that hole in
the ground, falling in there
will reset all cuccos to their original place!). Another cucco is waiting up
there.
The graveyard is near the lady looking for those chickens (*cough*...
cuccos). Go there next to find the Hylian Shield and the Sun Song.
= = = THE GRAVEYARD = = =
Behold the graveyard in all its spooky glory! Actually, the graveyard is
more of a relaxing quiet spot. There is a grave there with yellow flowers in
front of it. Pull the gravemarker back to reveal a hole. Did you buy the Hylian
shield for 80 rupees in the market? I hope not because inside this hole is the
Hylian shield...for free.
Make your way to the end of the graveyard. It starts to rain as you get
further to the back. Stand on the triforce symbol and play Zelda's Lullaby. The
stone in front of you will explode. Jump into the hole. In the first room, kill
all the bats to open the door. In the next room, just avoid the zombie things
and read the writing on the wall of the next room. You have just learned the
sun's song! Playing it will turn night into day, and day into night. You can
also freeze the zombies in the other room with this song. Now go back to the
main Kakariko Village.
= = = KAKARIKO VILLAGE = = =
Go to the gate with a guard beside it. He says you need the king's
permission to enter Death Mountain. Give him the next best thing, a letter from
Princess Zelda. He will open the gate and let you continue.
= = = DEATH MOUNTAIN = = =
Scale the mountain and you will get to Dodongo's Cavern. However, it is
blocked by a huge boulder. Continue up the mountain until you reach another
cave. Go inside to Goron City. City of Gorons. If you didn't know, that THING
you passed by going up the mountain... that was a Goron.
= = = GORON CITY = = =
Carefully walk across the narrow rope to get to a Goron. He says that
Darunia (a.k.a. Big Brother) locked himself up in his room with the second
spiritual stone: Goron's Ruby. Now, climb down Goron City until you are at the
bottom floor. Stand on that fuzzy welcome mat and play Zelda's Lullaby. The
door opens! Inside is Darunia's room. He looks pretty angry. Play the bouncy
tune of Saria's Song to cheer him up. Watch the cool cinema scene of him
dancing around. He still looks mad but now he'll give you the Goron Bracelet.
This will allow you to pick up bomb flowers! Exit Goron City...
= = = DEATH MOUNTAIN = = =
Exiting the city, you will see a Goron and a bomb flower on your right
side. Now that you have the Goron's Bracelet, you can pick up the bomb flower.
Throw the bomb flower over the fence. It will blow up the rock that was
blocking the entrance to Dodongo's Cavern. Now, prepare yourself to enter the
second dungeon of the game...
= = = DODONGO'S CAVERN = = =
[NOTE: It is a good idea to have the Hylian shield equipped in this
place because the flaming bats can easily burn the Deku Shield. Only equip the
Deku shield to fight lizalfos.]
First, pick up a bomb flower at the side and set it down at the brown
piece of wall in front of you [NOTE: Walls that look like this can always be
blown up with a bomb/bomb flower]. The huge room that you are in now is what I
will refer to as "Big room" because it is in the center of the
dungeon...and it's quite big too. There's an impressive Dodongo statue in front
of you. Very nice sculpting. Make's you think of how much work Miyamoto and his
team put into this game.
Head now to the platform on the right side of this room. Pick up the
bomb flower and blow up the laser eye thing. Now blow up the "bomb
wall" on the right. Enter the part that you destroyed with the bomb
flower. There are a bunch of fire breathing baby dodongos now. Killing them
won't give you anything good so just go around them. If you step on the switch
at the end of this hall, it will just pop back up when you get off. Use the
armos statue on the left to hod it down. The door now stays unlocked.
In this next room, you have to fight lizalfos. Like Navi says, use your
best Z targeting sword fighting techniques. And equip the Deku Shield! It helps
a lot. After beating both Lizalfos dudes, the door unlocks.
This puzzle is simple enough: Use a Deku Stick to light all the torches.
Now, for the third time in a row, the paragraph ends with a door unlocking...
And by the way, if you ran out of Deku Sticks, blow up the "bomb
wall" to find a Deku Scrub. He sells them at quite a high price but it's
better than going back to the Deku Tree for some!
Behold the glory! You have made a complete circle and arrived back at
the big room! But not to worry, your work has not been in vain...now you can
step on this switch. It allows you to open the door at the left side of the big
room. Go over there and into the door.
This room has the map. Its meaningless to even have the map if you use
this guide but even then... get the map and continue. Use the bomb flower on
the wall in this room and continue further. Now fight this armos statue: Wake
him up by touching him... then stun him with a Deku nut. Now you can use the
sword on him. It would be a good idea to get away from him now because he will
blow up soon. Get the compass he was guarding and go back to the room with a
lot of bomb flowers.
Pick up the bomb flower at the side of the door and set it at the part
in the line of bomb flowers where there is a missing piece. This sets of a
chain reaction that causes all bomb flowers to blow up one by one. This huge
explosion (and nice rumble pak effect) demolishes the pillar in the middle and
it sinks down to form a stairway for you. Climb the
stairs and enter the door at the top. Welcome to the second floor.
Move the armos statue blocking the ladder and climb up to step on the
switch. No need to fight the other statues... or even wake them up for that
matter. Just advance to the next room.
The big room again! Cross the bridge and go to some maze room of sorts.
Please be careful with where you're stepping to avoid getting too hurt. You can
see what's around the corner by holding Z and side-stepping. Doing this, it
should be easier to avoid the spiky things that move around the room. Cross the
room to the wall with the blue block and a ladder (you can pull that block to
earn a recovery heart). Climb the ladder to get to the bomb- destroyable wall.
Now turn around and jump to the tower with a bomb flower and a chest (the chest
has a blue rupee). Pick up the bomb flower...wait until it is ready to
explode... and throw it in such a way that it will destroy the wall on the
other side. Be patient and try again if needed.
Shoot the eyeball switch above the door to turn of the flames blocking
your exit. Well, that was easy wasn't it? Ahem...next room please...
Another pair of Lizalfos. Execute them like we did last time. Use the
Deku shield a lot and attack when they drop their guard.
Now in this room, two platforms are being blocked by two flames. Do what
you did before. The second eyeball switch is on the left of the first platform.
If you're all set, let us proceed to the next room... It’s a big chest with a
bomb bag! You can use bombs without getting one from a bomb flower! Great, now
c'mon to the next room.
Step on the switch. This will make the up/down platform get more upper.
Not too useful but anyway...Go to the bridge and throw bombs down into the
spaces and into the eyes of the huge dodongo statue. When both eyes are flaming
red, the statue will open up its mouth to let you come in. Use the high
elevator platform to get down to that statue and into the mouth.
Here in this room, a hole in the middle has a switch inside that doesn't
like to keep down. Since there is no heavy statue nearby, follow the other path
that you can go to now. Climb the blocks and cross the room. You have made a
complete circle and you are now back at the room with a stubborn switch. Push
the block off the ledge and into the hole. Next
room...
Bomb the center of the floor and drop down... Welcome to King Dodongo's
Room! Beating him shouldn't cause too much trouble for you. See the boss
section for more detailed info about this.
Remember to get the heart container after defeating King Dodongo and
step into the blue light. Darunia will be waiting there to thank you and he gives
you the second spiritual stone: Goron's Ruby! Two spiritual stones have been
collected. The goal of reaching the three pendants...err... stones is in sight!
Watch the cool cinema of Darunia and the "big Goron hug". Let's
proceed...
wwwwwwwwwwwwwwwwwwwwwwwwwwwwwwwwwwwwwwwwwwwwwwwwwwwwwwwww
<<<<<<<<<<<<<<<<
THE THIRD SPIRITUAL STONE
>>>>>>>>>>>>>>
mmmmmmmmmmmmmmmmmmmmmmmmmmmmmmmmmmmmmmmmmmmmmmmmmmmmmmmmm
= = = DEATH MOUNTAIN = = =
Like Darunia said, it is a good idea to go to see the great fairy about
now. Go to the path that is blocked by huge rocks. Use the bombs to destroy
anything that gets in your way. When it starts raining rocks, use the Hylian
Shield to protect yourself when necessary.
When you get to a climbable wall with skulltulas all around, kill the
skulltulas first before climbing up there. Now bomb the breakable section of
the wall (the one on the left side) and enter.
Stand on the triforce symbol and play Zelda's lullaby to make a
prostitute-looking great fairy appear. She'll give you the power of the sword
spin slash and a short magic meter. This information is also available in the
Great Fairy section. Another great fairy is available in Hyrule Castle. Go
there...
= = = HYRULE CASTLE = = =
Follow the normal path until you get to the sign that says "Dead
end". Bomb the rock behind this sign to reveal a passage. Enter through
here to get to the Great Fairy. Like before, play Zelda's lullaby to activate
the Fairy. She gives the power of Din's Fire (one of the three magic powers named
after the goddesses). The magic meter fairy and the Din's fire fairy are the
only fairies required to beat the game. Next stop: Zora's River.
= = = ZORA'S RIVER = = =
To get to Zora's River, follow the river in Hyrule Field upstream. That
freakin' owl will be waiting for you there. He'll tell you a whole load of
garbage. After his lecture, use bombs to destroy the rocks blocking your way. A
fat man will be selling magic beans beside a fence. Magic beans can be planted
in soft soil locations. In the future, a magic plant will have grown and it
might bring you to a piece of heart or something special. These magic beans
cost 10 rupees now...but next time they cost 20...then 30...then 40... Buy some
if you like.
Continue through the valley until you get to a waterfall. Step on the
thing and play Zelda's Lullaby. The waterfall will stop flowing and you can
jump into the passageway...of Zora's Domain.
= = = ZORA'S DOMAIN = = =
Wow, what soothing music. Zoras (the creatures you see all around) were
originally thought to be an alien enemy from early screenshots. Now we know
better :)
Go up and up to find King Zora... who just happens to be the king of the
Zoras! He says that her tomboy daughter, Princess Ruto (who happens to be very
sexy), is missing. Yeah. Now turn left and talk to the Zora to play the diving
game. If you win, come back up to get your prize: The Sliver Scale. This allows
you to dive underwater for up to 6 meters!
Somewhere around the place where you played the diving game, there is a
hole that happens to be exactly 6 meters underwater. Go dive down there to be
transported to Lake Hylia...
= = = LAKE HYLIA = = =
Wow, we're in Lake Hylia. In front of you at the lake bottom, there is a
bottle. Dive down there and receive "An empty bottle with something inside
it". It's a letter from princess Ruto. She's inside Lord Jabu Jabu! Now go
back to Zora's Domain the same way you got here. The warp thingy.
= = = ZORA'S DOMAIN = = =
Okay... and we're back! Before showing that letter to King Zora, go to
the shallow water and catch a fish in a bottle. Shallow water can be found
beside the store. To catch a fish, use the bottle as a C button item, go behind
a fish, and catch! There you have it... a fish in a bottle. The use of this
will be explained to you later. But now let's go to King Zora.
Stand on the platform and show him the letter from Princess Ruto. King
Zora will then move to the side (in a cinema scene that takes way too long). Go
up the path on the right side and into Zora's fountain.
= = = ZORA'S FOUNTAIN = = =
This is Zora's fountain. Do you see Lord Jabu Jabu there? Yeah. He's a
super-huge fish thing. Not quite what I was expecting...but nice never the
less. First, swim behind Jabu Jabu to the small island. Bomb the rocks and enter
the third great fairy fountain. This time, she gives you the ultra-useless
Farore's Wind.
Go back to the altar of Lord Jabu Jabu. He sure looks hungry. Show him
the fish and he will eat both you and the fish. Welcome to the third dungeon.
= = = INSIDE LORD JABU JABU = = =
[Note: It is a good idea to keep a good supply of Deku Nuts with you at
all times. Many enemies here are electric and cannot be defeated without it]
Behind you, it looks like Lord Jabu Jabu's mouth is closed but you can
actually exit the Jabu Jabu dungeon at any time. First, run forward, avoiding
the octorocks, until you get to the other side. Use the fairy slingshot to hit
the white switch on the ceiling. Now the door with unlock (the net will go
away). Run through the next room (ignoring the elevator lift) and straight to
the next room. Here you will find the beautiful Princess Ruto! She tells you
that she's fine and doesn't need your help. Then she falls through the hole.
Now be a man and jump in after her!
Talk to Princess Ruto again... and again... until she lets you carry
her. We will now have to complete most of the dungeon with her. Be careful not
to drop her in deep water because she will disappear and you will have to come
back to this room (or the room above) to get her back. You can also throw her
to switches. So if I say use the slingshot to hit the switch, remember that
throwing her to the switch can also be done.
Now proceed to the next room. Throw her to the platform on the other
side, and hit the switch to let the water come up. Swim to the other side where
Ruto is. Make sure not to drop her in the water! Now hit the switch (...) and
proceed to the next room.
This is the bottom of the elevator room we ignored earlier. Wait for the
elevator to come down, and go up with Princess Ruto. Remember this place? Now
continue to the room where you first met Princess Ruto... the one with holes in
the ground. Avoid those holes and cross the room to the door on the other side.
Now take the path on the right and put Ruto down on the switch. The door will
stay open and you can enter...
Now, kill all of the stingers hiding in the room. The easiest way is to
use Z targeting to find them and using the slingshot to finish them when they
fly out of the ground. After they are all dead, a big treasure chest will
appear...and the boomerang inside it! This will help you in beating all those
dumb bubbles, jellyfish, and all monsters in the dungeon! Exit the room and
pick up Ruto.
Go to the left side of this hellish place and set Ruto down on the
switch. Inside the room is a big... thing... hanging from the top of the room.
You need to kill this now: Use Z targeting to target the part of him that you
need to hit. Hit it with the boomerang. Get close to him to make him come back
down, and attack again! Continue until he collapses to the floor and dies. Take
the map and exit the room.
Looking left, you will see that the electric thing that was previously
blocking the path is now gone. Pick up Ruto and go to the room there. You now
have 40 seconds to defeat all the bubbles in the room! Quickly use Z targeting
on each one and finish them off with the boomerang. The prize for your bubble
busting is the compass... Now exit the room and go down another hall and into
the door.
Defeat the tentacle thing hanging from the top. After killing him, one
of those electric blocking things will disappear. Now go back tot the room with
the holes and drop down the one closest to the door so that you fall down on
the highest platform in the room below.
Now enter the door and... the third spiritual stone is there! Throw Ruto
up to get it (...but why Princess Ruto?). The platform will bring her up and a
boss will come down. This isn't the main boss of the dungeon but it's included
in the boss section anyway. Go there for details about Big Octo.
After killing Big Octo, climb up on the platform and it will bring you
up to the higher level. Now freeze the electrified jello with the boomerang and
cross the room by jumping on the stunned jello thing.
Jump onto the platform and it will lower down to the elevator room. Now
you can step on the switch and... What? It won't stay down? Go to the other
side of the room and bring the boxes back to the switch. They don't seem that
heavy but it works. Put the box down on the switch and enter the door.
Now climb the vines at the side of the wall up to the top. See the
switch behind the semi-transparent wall? With really good aim, throw the
boomerang to the side of the wall in such a way that it will move to the switch
as it comes back to you. This might take some time. Now go through the door
that just unlocked.
This is Brinade, the final boss of Jabu Jabu's Belly. Go to the boss
section for explicit... err...detailed information about killing Brinade.
After the battle, collect the heart container and step into the blue
light with Princess Ruto. She really look scary in the light. Well... you'll be
transported out to Zora's Fountain and Ruto will give you Zora's Sapphire, the
third and final spiritual stone! It's also her "most precious
possession" given by her mother. We have all three spiritual stones! Head
to the Temple of Time to open the door of time.
= = = HYRULE FIELD = = =
As you approach the drawbridge to Hyrule Town Market, you will see a
cinema of Zelda, escaping Gannondorf on horseback. She throws something into
the water. After the Gannondorf encounter, dive into the water to get... The
Ocarina of Time! Great, now go to the temple of time. It's on the right of the
Happy Mask Shop. [Before going there, it's a good idea to find as much stuff as
possible in the past: Gold skulltulas, pieces of heart, etc. You won't be able
to go back to the past for a while...]
= = = TEMPLE OF TIME = = =
Silence please, this is a sacred moment. Zelda will teach you the song
of time telepathically. Now stand in front of the altar and play...the song of
time. The three spiritual stone will spin around and the door will open. Enter
to get the master sword. I'm too lazy to type out the terrific cinema that is
presented to you now. You won't notice it, but after the Gannondorf thing,
seven years will have passed.
wwwwwwwwwwwwwwwwwwwwwwwwwwwwwwwwwwwwwwwwwwwwwwwwwwwwwwwww
<<<<<<<<<<<<<<<<<<
THE FIRST MEDALLION
>>>>>>>>>>>>>>>>>>
mmmmmmmmmmmmmmmmmmmmmmmmmmmmmmmmmmmmmmmmmmmmmmmmmmmmmmmmm
= = = CHAMBER OF SAGES = = =
You are now at the Chamber of Sages with a fat guy: Rauru (I still don't
know who he is). He will explain your goal in the future and give you the Light
Medallion, the first of the six medallions to collect. Luckily, you'll need to
EARN the rest of them. This "first medallion" section was really
short. I bet Miyamoto wanted to make another dungeon for this but ran out of
time.
You will also see Shiek, a mysterious survivor of the Shiekahs. At the
end of the game, you will find out his (her?) TRUE identity.
Get out of the temple of time and-- whoa! This place is scary! Pass by
the Market (...) avoiding the zombies all around. Now head for Lon Lon Ranch to
get the horse, Epona.
wwwwwwwwwwwwwwwwwwwwwwwwwwwwwwwwwwwwwwwwwwwwwwwwwwwwwwwww
<<<<<<<<<<<<<<<<<<
THE SECOND MEDALLION
>>>>>>>>>>>>>>>>>
mmmmmmmmmmmmmmmmmmmmmmmmmmmmmmmmmmmmmmmmmmmmmmmmmmmmmmmmm
= = = LON LON RANCH = = =
I shouldn't really include this in the walkthrough since its not
required to finish the game. Oh well... Lon Lon Ranch is now run by the tyrant
Ingo. He kicked out Talon. Malon says he will treat the horses badly if she
disobeys him. What a pity...
First, go to Ingo and pay him 10 rupees to ride the horses. Instead of
riding to horse prepared for you, play Epona's Song (you DID get Epona's Song
in the past, right?) to summon Epona. Get on and practice riding around the
place until the time runs out.
Now pay another 10 rupees to Ingo and get back on Epona. This time, Z target
Ingo and he will offer you to race him (with a tiny 50 rupee bet...). Race him
and win [see the mini-game section for details]. After beating him, race again.
This time, the prize is THE HORSE! Beat him again and get Epona.
Now you have Epona but can't leave Lon Lon Ranch. Could you? Build up
speed and jump over the gate blocking the way out. Congratulations, you just
got the horse! Go now to the Kakariko Village graveyard.
= = = GRAVEYARD = = =
Go to the tombstone on the left side with flowers in front of it. It's
Dampe's grave. He's dead. Pull back on the tombstone and jump into the hole.
It's the spirit of Dampe...and he wants you to race him [also in the mini-game
section]. At the end of the race is the hookshot.
The is a blue block blocking the exit of this grave. And guess what? It
has the symbol on the door of time on it. Play the song of time to make the
block disappear. Now we are in the windmill (a piece of heart is there). Go
down and talk to the crazy windmill guy. He says something about an ocarina kid
that played that song in the windmill a long time ago. I don't know who he's
talking about, but he teaches you the song of storms. Next stop: Kokiri
Village's Lost Woods.
= = = LOST WOODS = = =
Go to the sacred forest meadow where you learned Saria's Song. The path
is: Right, left, right, left, straight, left, right. Somewhere along the path,
Mido will block your progress. Play Saria's Song to prove that you know Saria.
He'll be surprised and let you through to go to the forest temple.
In the maze area, giant monsters will charge at you as soon as they
realize you're there. To kill them without hassle, use the hookshot to kill
them. In the long corridor, a monster with some kind of ax will be hitting the
ground. To kill him, move to the left and right to avoid the red shockwaves on
the ground. Use the sword when you're close enough to hit him.
Continue to Saria's "normal spot" and Shiek will be there,
waiting for you. He will teach you the Minuet of the Forest. Playing this song
warps Link to the triforce symbol in front of the Forest Temple. Now use the
hookshot on the tree branch to get to the Forest Temple entrance...
= = = FOREST TEMPLE = = =
Kill the wolves in this room and climb up the vines on the left. At the
top, jump across the tree branch and onto the other tree branch on the left
side. Open the chest to find the first small key (K:1)! Old Zelda players
should have noticed there was something missing in the dungeons of the past :)
Now kill the giant Skulltula in the next room and...
Go through the door to see the "Torch room". The four
multi-colored Poes stole the fire and the elevator in the center goes down.
Find and kill the four Poes to restore the light and reactivate the elevator! Ahem...
let's first go strait ahead to the room in front of you. Kill the fire skull
and continue to the next room. Now you'll have to fight two Stalfoses. Use the
shield (and Z targeting) to defend yourself. Right after he swipes at you with
his sword, attack him with your own sword. After killing them, get the small
key (K:2) and go back to the "Torch room".
Go to the blue block with the symbol of time, and make it disappear by
playing the song of time. Enter the door. Go to the right side wall with the vines
growing all over it. Use the hookshot to kill the Skulltulas that you *can*
kill before climbing. The highest one is too far up to reach with the hookshot
so just carefully avoid it. Climb up the vines (cautious of the Skulltula) to
the door at the top.
Now kill the Fire Skull to receive the map. Next room... use the
hookshot to hit the white diamond on the right side wall. You will be pulled
toward the diamond and fall on the platform. Now step on the switch to drain
the water out of the well. Now jump down to the ground and go down the well.
Beside the stairs at the well bottom is another small key (K:3). Backtrack to
the torch room.
Enter the locked door at the side of the room (K:2). Kill yet another
giant Skulltula and enter the door. Now climb the ladder to get to some kind of
maze. This is going to be hard for me to explain but I'll do my best: Push the
blue block to the little hole in the floor. Just follow the arrows on the floor
and it should be easy. When the block gets to a place where you cant push it
anymore, go around to the other side of the block. Now just slide it into place
and climb up to the next floor.
This time, *pull* the red block until you are squished between the block
and the wall. Now jump back to the lower floor and look around for a ladder. Go
up the ladder and push the red block against the wall. Mmmmkay... go back down
the ladder and climb back up the blue block. Push the red block all the way.
Climb up the red block and enter the locked door (K:1).
This room is all twisted! Go through it normally and enter the locked
door on the other side (K:0). Fight the Stalfos like before [NOTE: You can't
walk on the hole like he can]. After killing him, a platform will come down
with two more Stalfoses. When one is defeated, his remains will lie on the
floor and come to life in about a minute. They must both be dead at the same
time! When they're both gone, get the Fairy Bow from the chest. Go to the next
room.
There are three paintings of Poes in this area. Use the bow to shoot them
quickly. If you take too long or you get too close, they will notice you and
transfer to another painting. Shoot all three of them to make a real Poe fight
you. Defeat him with either the bow, hookshot, or sword and get the compass
from the chest that appears. Go back to the room that you passed by before with
the three Poe paintings. Shoot the Poes in the paintings just like you did in
the other room. Fight the red Poe that appears and get the small key from the
chest (K:1).
Okay, now go to the room behind the twisted one. Shoot the eyeball
switch above the door to untwist the twisted room. Now it's a normal hallway!
Pass through it and fall to the ground. Open up the ever-so-nicely-decorated
treasure chest and get your first Boss Key. The Boss Key functions just like
the big key/nightmare key in other Zelda games: To open the door leading to the
boss. Now drop down the hole in the floor of that room.
Kill the blue fire skulls in the room and enter the door. Kill a big
Deku Baba and enter the first door you see on the *right* side. There is a hand
on the floor. Ohhhh...scary. Be quick and slash it until it breaks up into
three smaller hands. You have to kill the small hands super-quick so they don't
grow back into big hands. Kill all three small hands and get the small key from
the resulting treasure chest (K:2). Exit the room and enter the door on the
right-hand side.
Make the journey to the room before the hallway that we untwisted. Now
shoot the eyeball switch to make it all twisted again. Go through that room.
Make your way to the room that is jumbled up (after the second Poe painting
room). Then enter the door. Run through the straight hallway and into the next
room. This is an interesting puzzle...a switch is frozen in ice. There are two
ways to solve this: (1) Stand on the turning platforms and wait until the fire
is directly between you and the switch. Then fire an arrow through the fire to
melt the ice around the switch. (2) The other solution is to simply stand next
to the switch and use Din's Fire. After hitting the switch, exit the room and
pass through the twisted hallway.
Drop down into the hole in the jumbled room to find a chess board room.
Observe the holes in the ceiling very carefully and step on the block below the
hole. You will not get damaged when the ceiling falls down! Make your way to
the switch to unlock the door...and enter that door, of course :)
See that picture of the green Poe on the wall? Shoot it and arrange the
blocks that fall down to match the picture on the wall. Five blocks come down
but you'll only need four to complete the picture. The other block is only a
decoy. Only 60 seconds are allowed to arrange the blocks so there's no time to
waste! If time runs out, the blocks will flip onto the side and you'll need to
start over again. When the blocks are in place, the green Poe will
appear.........you fight her like the other Poes. Enter the unlocked door and
jump down to the center of the torch room, where the last Poe is waiting...
No picture shooting this time. Just fight the purple Poe! He multiplies
into four pieces but only one is the real Poe. Just use the bow and shoot the
true Poe spinning around you (take a wild guess at which one it is). After the
destruction of the final of the four Poes, the fire will return to the torch.
Now that all four torches have all four fires, the elevator will come up. Get
in there and let it bring you down to the bottom floor.
Alright, push the "handles" on the wall to the side to make
the entire wall turn. The holes in the wall will also change position, allowing
you to access the different rooms and hallways behind the wall. Sounds
confusing, no? Here's a simpler explanation: Just push the handles of the wall
and go to the small rooms that you can go to. Then, hit any switch you may find
there. Continue turning the wall and hitting switches until you get to the door
with a lock on it. The boss key is
used for this door, so open it and fight the boss...
Enter the room and go up the stairs to the platform. There are paintings
all over the room. Nothing interesting here, so exit the platform and-- the
gate closes. See the boss section for details about fighting Phantom Ganon.
Kill him, get the heat container, and step into the blue light.
After Phantom Ganon is dead, you will go to the Chamber of Sages. Saria
awakens as a sage and adds her power to your own. You have the forest
medallion! Only four medallions left! Now you are transported outside, and a
plant pops out of the ground! He's a Deku sprout and he knows a lot about you.
For example, he tells you that you are actually.... NOT A KOKIRI! Disappointed?
Me too, but it's a fact of life. Just accept your Hylian self.
wwwwwwwwwwwwwwwwwwwwwwwwwwwwwwwwwwwwwwwwwwwwwwwwwwwwwwwww
<<<<<<<<<<<<<<<<<<
THE THIRD MEDALLION >>>>>>>>>>>>>>>>>>
mmmmmmmmmmmmmmmmmmmmmmmmmmmmmmmmmmmmmmmmmmmmmmmmmmmmmmmmm
= = = TEMPLE OF TIME = = =
You saw the banner up there. Go to the temple of time. Run to the place
where you got the master sword and Sheik will appear. Now he will teach you the
all-useful Prelude of Light. Another warp song to add to your collection. The
next medallion is found in the Fire Temple. But first, stop by Goron City on
Death Mountain.
= = = GORON CITY = = =
If you're looking for Gorons in this city, you're out of luck. But
fortunately, one Goron is still remaining. Find him on the third floor. Use a
bomb or bomb flower to stop his rolling and talk to him. Guess what-- he has
the same name as you! Darunia thought you were so brave that he named his son
after you (how cute...). Talk to him and he will give you the fire-resistant
Goron Tunic.
Go down to Darunia's room and pull on the statue where Darunia used to
be. Enter the passage behind the statue to find Death Mountain Crater. This
place is hot-- so put on the Goron Tunic!
= = = DEATH MOUNTAIN CRATER = = =
Go left and use the hookshot to cross the broken bridge. Say hello to
Mr. Shiek and he will teach you the Bolero of Fire: A song that reflects the
power of the heart. Continue to the left and down the ladder to get to the next
temple of the future: The Temple of Fire.
= = = FIRE TEMPLE = = =
Watch out for the fire bats and go up the stairs to the *unlocked* door
on the left side. Darunia is there, waiting for you! He says some story things
and enters the door behind him. Go now to the left side wall and step on the
switch to free the Goron in there. Talk to him and get the small key (K:1). Now
that we have the key, exit the room the way you came in and go straight forward
into the locked door (K:0).
Cross to the other side of the bridge and cross the narrow wooden plank
at the right. Go to the right side of the room (corresponding to the map). You
may observe the bombable section of the wall... Bomb it! It's another Goron.
Talk to him and get the small key from the chest (K:1). Alrighty, go back to
the LEFT side of the big lava room. Enter the door there. It is yet *another*
Goron. Talk to him and get the key in the chest (K:2). Now we have two keys. Enter
the locked door at the other side of the bridge (K:1).
From here, jump across the river of lava and climb the fence on the
other side. Climb up to the top and push the block down on top of the hole with
fire erupting from it. When the block goes down, jump on it and it will bring
you to the second floor. Enter the locked door (K:0).
Ignore the trapped Goron for now and climb the ledges on the side. Watch
out for the torch slugs and jump to the other side where the diamond switch is.
Push the block down, jump down and pull it as far as possible. Make your way
around to the top of the block and jump to the fence. Climb up there. The fire
is preventing you from climbing the fence! Go to the level just above that
diamond switch and toss a bomb down to it. Run over to the fire. When the bomb
explodes and hits the switch, the flames will go away. Quickly go up the fence
because the fire will come back soon. Enter the door at the top.
Now, turn left and go along the wall until you get to a Goron. Talk to
him and get a small key from the chest (K:1). Go to the wall on the opposite
side of the room. Another Goron is waiting there. Talk to him and get the key
from the chest (K:2). Search the room for a locked door and enter it (K:1).
Use the C-up button to look what's down there-- it's that big lava room
on the first floor! Try not to fall down, mmmkay? Take out the fairy bow and
search the walls for an eyeball switch. Shoot it and enter the door that
unlocks. Take the map from the big chest and go back to the room before. Enter
the locked door (K:0).
Cross the grate to get to the other side of the room. Oh yeah, watch out
for the wall of fire that gets activated as soon as you step on the grate.
Enter the door on the other side. Remember this place? It's the maze room. But
this time-- we're on top! First, go to the platform with a big crack in the
floor. Well? Blow it up! Go down there, talk to Mr. Goron, and get the key
(K:1). Climb the fence all the way back up. Jump to the platform with the
switch and step on it. Now go to the gate that just opened. Talk to him, and
get another small key (K:2). There was a locked door at the fire wall, right?
Go back there.
Now, we're back in the firewall room. There IS a locked door on the
wall... but how do you get there? The answer is simple: jump. It doesn't seem
like you can jump up there, but its very easy from the floor beside it. Enter
the locked door (K:1). This place may SEEM very spacious, but there are
invisible firewalls that only appear when you get close to them...so move
carefully. Walk along the wall on your right side, go around the firewall, and
get to the door. Enter that door and get the
compass in the chest. Go back to the big room.
Turn left and carefully go to the locked door on the opposite side on
your left. Use the last key and enter it (K:0). Ignore the trapped Goron and
cross to the other side of the corridor. And..... we're back in the opposite
side of the fire room! Look around for a switch and step on it. This will cause
the big flame on the side to disappear for 5 seconds. Hurry up and get up on
the platform that used to be blocked by the flame. You'll need to go around
some firewalls. The door you first see up there is an enemy. Bomb it and enter
the door behind it.
Now we have arrived at the half-boss of the fire temple. You know...
boss? Get over to the boss section for details about defeating the fire-
dancer. After finishing off the fire-dancer, climb on to the platform and it
will raise you up you the upper floor.
Enter the door and climb the fence. Stand on the part above the diamond
switch and throw a bomb down there. This will cause the flames surrounding the
fence to disappear. Climb up and enter the room. Step on the switch. This
causes the fire to go away from the chest way up there at the top of the
stairs. Run up there... just be fast and don't fall. If you made it in time,
open the chest to receive the megaton hammer! Yeah baby! Go down to where the
switch was (be careful about the bats). There is a small flat block with a
picture of a face on it. Use the hammer and fall down.
Use the hammer on the statue and enter the door that was behind it.
Watch out for the bats and hit the little block with the hammer. This causes
the floor to collapse into a stairway. Get one of the nearby boxes and use it
to hold down a switch at the bottom of the stairway. Enter the door please.
Hammer the block and ride it down to get to the fire room. There's a
switch there for you to step on, but it seems a bit rusted (thank you Navi).
The obvious answer is to smash it down with your new megaton hammer. Enter the
door that unlocks. Now, play the song of time to the blue block to use it as a
platform. Get over to the another rusted switch and hammer it. This causes the
release of the Goron. Jump down to him and get from the chest... a key (K:1)!
Go back out through the way you came in. Hammer the block and fall down. It's a
pretty big fall!
So now, we're back in Darunia's room. The boss door is right there...
but we don't have the boss key! Exit this room to go back to the entrance room
of the fire temple. There's another statue waiting for you at the right side of
the stairs. Smash it and enter the locked door that was hidden behind it (K:0).
That was the statue the Goron said "couldn't be destroyed with the Goron
special crop".
Kill all of the enemies in this room to make the door open. You can get
the bombs from the chest. Enter the door that unlocked. Here's yet another
fire-dancer. Go see the boss section if you really need to. You might not since
this is your second encounter with him. After the fight, enter the door.
Another rusted switch? Hammer time! The final Goron is free and there's a chest
waiting for you. Open it for... the boss key!
Now go through the next door to get back at the entrance room. Go up the
stairs through the left door. Jump across the platforms and enter the boss door
to fight the boss of the fire temple: Volvagia. See the boss section for
lessons on beating him. When he's all done, get the heart container and step
into the blue light. You are now transported to the
Chamber of Sages.
Darunia awakens as a sage and adds his power to your own. You have the
fire medallion. Only 3 medallions left!
wwwwwwwwwwwwwwwwwwwwwwwwwwwwwwwwwwwwwwwwwwwwwwwwwwwwwwwww
<<<<<<<<<<<<<<<<<<
THE FOURTH MEDALLION
>>>>>>>>>>>>>>>>>
mmmmmmmmmmmmmmmmmmmmmmmmmmmmmmmmmmmmmmmmmmmmmmmmmmmmmmmmm
= = = DEATH MONTAIN CRATER = = =
Now that you're here and you have the megaton hammer, you might as well
go get the great fairy. Somewhere around the place where you entered the Death
Mountain Crater, there is a group of red rocks all hunched up together blocking
a cave. Use the megaton hammer to destroy the rocks and enter the cave. Inside
the cave is a great fairy. Play Zelda's Lullaby on the triforce symbol to
activate the great fairy. She gives you a longer magic meter. Now you can use a
lot of magic. Cool, huh?
Navi said that she feels an arctic wind blowing in from Zora's Domain...
*arctic* wind? Get your butt over to Zora's Domain and investigate!
= = = ZORA'S DOMAIN = = =
So we're entering Zora's Domain and... Everything has turned into solid
ice! Everything! The King is frozen, the shop is frozen. Try playing the diving
game :) Get over to Zora's Fountain
behind King Zora. Lord Jabu Jabu is gone. Jump across the ice platforms to
reach the ice cavern on the left side of the water.
= = = ICE CAVERN = = =
This isn't actually a temple. We're just going here to get the blue fire
and iron boots. First, go forward and destroy the all three ice-blowing
statues. Enter the door that opens up. Now you're a room with a giant
helicopter-type blade spinning around in the middle of the room. Watch out for
the blade and collect the silver rupees in the room. One of the rupees is in
the air. You need to jump of the platform to get that one. After collecting all
of the silver rupees, enter the door that opens up.
Continue and you will soon reach a big room. Kill the enemies in the
room so they won't disturb you (like killing you). Now, climb up to the torch
with the blue fire coming out of it. It doesn't seem natural... empty all of
your bottles and fill them up with blue fire. The blue fire will be used for
melting the red ice found all over the place. For example: The red ice that is
surrounding the chest up there. Walk up to the red ice and use a bottle of blue
fire. The ice will melt and you can now open the chest to receive the map. Fill
up the used bottle with more blue fire and exit the room and return to the room
with the helicopter blade.
Two areas of the wall in this room are covered with red ice. First, melt
the one at your left (exiting the previous room). Watch out for the icicles.
Melt the red ice and get the compass and heart piece. Also get the nearby gold
Skulltula if you want. Fill up all the bottles with more blue fire and exit the
room. Enter the other passageway covered with red ice directly in front of you.
Pass through the tunnel to reach a room with bats and a blue block in
the middle. Kill the bats. Push the block all over to reach the silver rupees
in the room. One of the rupees is trapped in red ice. If the block gets into a
bad position, push it into the holes at the corners of the room. Another block
will appear to replace the old one! After collecting the silver rupees, move to
block towards the left side and climb to the door.
Use more blue fire to melt the ice blocking your way. Fight the snow
wolfos and... receive the Iron Boots! These boots will allow you to sink into
deep water. Now, Sheik will appear and teach you the song that will warp you to
the water temple in Lake Hylia: The Serenade of Water. After that beautiful
cinema, equip the new iron boots and sink down into the water. Make sure you
have at least one bottle of blue fire. Follow the path and exit to Zora's
Domain.
= = = ZORA'S DOMAIN = = =
King Zora was frozen in red ice, right? Use the blue fire to melt
it.Talk to King Zora and he will give you the Zora Tunic! This will allow you
to stay underwater without drowning. Play the Serenade of Water to warp to Lake
Hylia.
= = = LAKE HYLIA = = =
In case you haven't noticed, the water level of Lake Hylia is way lower
than it was in the past... and it's raining too! Before diving into the water temple,
go first to the scarecrow that you met in the past. Did you play a song to him
in the past? If so, play the exact same song back to him. You will have learned
the scarecrow's song. Remember it because it doesn't appear in the subscreen!
Playing this song at some places causes a scarecrow to appear as a hookshot
target. Not really required to beat the game, but I just thought I should
include it here.
Swim over to the hill in the center of the lake. Equip both the Iron
Boots and the Zora Tunic to sink down to the bottom of the lake. Look around
for the entrance of the water temple blocked by a gate. Just above the entrance
to the water temple is a diamond. Equip the hookshot and shoot the diamond. It
will float out of its place and up to the surface. The gate will open and you
can enter into the water temple...
= = = WATER TEMPLE = = =
[NOTE: For many puzzles of this temple, the hookshot will be used. Just
keep in mind that this is the *only* weapon that can be used underwater.
Another thing, there are different places in this temple where you can play
Zelda's Lullaby to change the water level.]
Once you are inside, unequip the iron boots to float up to the surface.
Climb up and you are now in the main room of the water temple. Equip the iron
boots again and sink down to the very bottom floor. Enter the door on the right
side. Waiting there for no apparent reason... is Princess Ruto! Boy, she's
grown a lot. She says a few embarrassing things and floats up. Unequip the iron
boots and follow her up to the surface. At the top you will find a triforce
symbol on the wall. Play Zelda's Lullaby there and the water level will go down
to the bottom.
Enter the door and defeat all enemies in the room. Open the treasure
chest to get the map! Go back to the previous room and fall down the hole. It's
a big drop but strangely you don't get hurt. Hmmm... There are two torches at
the bottom of your fall. Use din's fire to light them both at once. If you
don't have the magic to spare, shoot arrows through the torch at the center of
the room. Now enter the door. To kill the clams on the floor, Z target them and
use the hookshot when they open up to reveal the "soft underbelly".
When they're all gone, get the key from the chest (K:1) and backtrack to the
main room (the one with the tall pillar in the middle).
Go to the wall on the opposite side of the pillar. Climb up the little
block and push the block until it drops down. Drop down the hole and sink down
with the iron boots. Go through the passage and float up at the end (unequip
the iron boots). Hit the diamond switch with whatever to make a water platform
spout up in the middle. Jump onto the water and to the other side. Enter the
door.
This room may be a bit confusing and frustrating. First, use the iron
boots and sink to the bottom of the water. The water is actually moving in a
cyclone manner. Hit the diamond switch in the dragon mouth to open the gate.
Quickly get up to where the gate is. Forget about beating the clams. Just
unequip the iron boots and float up above the clams. Take the small key (K:2)
and hit the diamond switch to open the gate again. Go all the way back to the
main room.
Look around the center pillar for a locked door and enter it (K:1). Look
around for a hookshot target (look UP). Well? Take out the hookshot and get up
there (You need to hit the upper part of the target). Play Zelda's Lullaby
beside the triforce picture to raise the water a bit. Put on your iron boots
and sink down into the place where the brown block used to be covering. Go through
the tunnel until you reach a wide underwater room. Hit the diamond switch with
the hookshot to open the gate above and bring down the enemies. Kill the
enemies one...by...one and the other gate in the ceiling will open. Go up there
and get the key (K:2). Now go all the way back to the pillar room.
Get out of the pillar and put on the iron boots to sink down. Go to the
room where you met Princess Ruto (...just look around for it...). Take off the
iron boots and float up to the surface. This time, the water is lower so you
will be brought to a room with a big crack in the wall. I'm sure you know what
to do next........... BOMB! Get the key and go back to the main room (K:3).
Float up to the surface. Look around for a passage with a hookshot
target over it and WITHOUT A DOOR. Go into that passage and through the tunnel.
Hookshot to the target. And hookshot again to another target. Now you will find
a chest covered by water, and a diamond switch. Get close to the chest and
*shoot* the diamond switch from there. The water will disappear for a very,
very, very short time so be quick and open the chest. Inside is the compass.
Now, as usual, go back to the main
room.
Swim around the pillar to find a locked door. Enter it (K:2). Stand on
the spurting water and shoot the diamond switch from there. The water will
raise up, bringing you to the upper level. Play Zelda's Lullaby to the triforce
picture and the water shall raise to the top level. Enter the door . Go to the
passage directly across from where you are right now. Go through the tunnel.
There is a big red block there. Pull it back until it clicks into place. Now
return to the main room.
Enter the locked door at the opposite side of where you are now (K:1). This
room has some sort of waterfall and block platforms going down it. Jump down to
the bottom-most platform (the one moving up and down). Get the hookshot ready
and fire at the moving hookshot targets when they get into range. Hookshot your
way up, and up, and up until you reach the top. Enter the locked door at the
top (K:0)
The diamond switch in the middle controls the water level: Hit it once
to make the water level rise...and hit again to make the water go down. For
now, hit the switch to make the water level rise. As the water rises, the
dragon statue on the other side will also. Hookshot to the target on the dragon
statue. Shoot the diamond switch again to lower the water. Go to the platform
on the side by using the hookshot on the target on the wall left of the dragon
statue. Climb to the other side of the dragon statue and shoot the diamond
switch (again...). Hit the hookshot target on the dragon statue to get to that
platform. Hit the diamond switch (yet again...) to lower the water. Climb up onto
the dragon statue and raise the water by hitting the diamond switch (...). You
will be carried up by the dragon statue as it rises along with the water.
Use the hookshot on the ceiling to cross the spikes. But maybe you
should lure the Like Like to the side first... Enter the door to reach what
seems like the outside! Actually there are invisible walls blocking your
escape. There is a door on the other side but it's barred shut! Well, go to the
tiny island in the middle to start your fight with the mini-boss of the water
temple: Dark Link. He's Also known as Shadow Link from Zelda 2 on the NES.
Check out the boss section for details
about him. After defeating Dark Link (or whatever he's called), enter
the door on the other side.
Open up the big treasure chest to get the longshot! Now your hookshot
has a much longer range! Play the song of time to the blue block behind the
chest. Fall into the hole to reach a river with a whole bunch of
"vortexes" in it. Swim through the river avoiding the vortexes until
you reach a dry platform. Whip out the fairy bow and shoot the eyeball switch
on the wall. If there's no eyeball switch then you're on the wrong
platform...go look for another one. Longshot over to the chest behind the gate.
Inside is a small key (K:1). Fall into the hole behind the chest. Now we're
back in charted territory. Make your way back to the main room of the temple.
Put on the iron boots and sink down to the bottom floor. Enter the room
on the right (check the mini-map) and float up. Play Zelda's Lullaby to the
triforce picture to lower the water level to the bottom. Fall back down the
hole and enter the middle pillar. Longshot yourself to the higher platform and
play Zelda's Lullaby to raise the water to midway. Get out of the pillar.
Look around for the passage with a gate covering it, a longshot target
inside it, and an eyeball switch below it. Shoot the switch with an arrow to
make the gate open. Quickly use the longshot on the target to pull yourself
there. Inside the water is a large block. Push it as far as it goes and enter
the passage to find a chest with a small key (K:2). Go back to the main room.
Sink to the bottom and enter the passage on the northern side (check the
map). Float up and use the longshot to get over the spikes. Enter the locked
door on the other side (K:1). Whoa... there's a whole bunch of Tektites in the
room. Kill them with the bow clear the way for yourself. Now watch out for the
vortexes and swim across to the other side. Enter the door.
Kill the stingers in the water before they cause any trouble. Bomb the
two walls that look out of place near the corners. They will both collapse
revealing a tunnel with a big block in it. Also note that there is a switch
underwater that doesn't keep down. Push/Pull the block so that is falls onto
the switch. The water will rise and you can now exit.
Kill the two Tektites on the opposite side with arrows. Step on the
switch and use the water spouts as platforms to cross the gap. Enter the door.
Now you are beside a tunnel with boulders passing through it. Right after a
boulder passes by you, run to the right side where the boulders are coming from
and sink to the bottom of the water. Go through the tunnel, up to the surface,
and enter the locked door (K:0). Open the decorated chest and get the boss key!
Go to the main room.
Enter the door on the right and float to the top. Play Zelda's Lullaby
to raise the water. Get out to the main room. At the top floor there is a
hookshot target on a platform. Longshot over there and enter the door. Now
there is a slippery titled path with three spiky things moving left and right.
Run up the slope avoiding the spikes without stopping! If you stop, you will
slide all the way back down. This might be hard to do but be patient and try
again. Enter the boss door at the top.
Fight the boss of the water temple: Morpha. Check the boss section for
details about this. After beating Morpha, get the heart container and step in
the blue light. You will be transported to the chamber of sages.
Princess Ruto awakens as a sage and adds her power to your own. You have
the water medallion. Only two medallions left!
wwwwwwwwwwwwwwwwwwwwwwwwwwwwwwwwwwwwwwwwwwwwwwwwwwwwwwwww
<<<<<<<<<<<<<<<<<<
THE FIFTH MEDALLION
>>>>>>>>>>>>>>>>>>
mmmmmmmmmmmmmmmmmmmmmmmmmmmmmmmmmmmmmmmmmmmmmmmmmmmmmmmmm
= = = LAKE HYLIA = = =
After the encounter with Shiek, you will be on the island in the middle
of the lake. And the water is back to normal level! There should be a small
marker on the ground. It reads "When water fills the lake, shoot for the
morning light" That's what it says. Well, water HAS filled the lake. When
morning comes, literally shoot the sun with an arrow. A small object will come
down. Swim to it and receive the fire arrows! Go now to Kakariko Village.
= = = KAKARIKO VILLAGE = = =
Holy macaroni, the town is on fire! Shiek is there. He will teach you
the Nocturne of Shadow. Also, some sort of evil just popped out of the well in
the middle of the village. Go to the windmill.
The insane windmill guy says something about a boy who messed up the
windmill by playing an ocarina. Ocarina? You have an ocarina! Stand in front of
him and show your ocarina. He will teach you the song of storms. Now you need
to come to Kakariko Village of the past. Play the Prelude of Light to go to the
Temple of Time. Drop the master sword into place, and come back to Kakariko
Village as a little boy.
= = = KAKARIKO VILLAGE (past) = = =
Go to the windmill. Stand in front of the windmill guy and play the song
of storms that he taught you in the future. The windmill will start turning
around abnormally fast. This causes it to drain out all the water from the well
in the middle of the town. Get out of the windmill and enter the well.
= = = BOTTOM OF THE WELL = = =
Surprise! You have just discovered the Bottom of the Well dungeon! We
are here ONLY to get the Lens of Truth. If we tried getting all the gold
skulltulas and treasures then the difficulty of the level will double. So here
goes.
Go through the tunnel until you get to what *seems* to be a dead end.
You can go through that wall, so go through it. Follow the water all the way
around until you get to a triforce symbol on the ground of the opposite side.
Play Zelda's Lullaby and all the water will drain out. Go back to the part of
this room where you entered. Jump down into a large hole that used to be
flooded. Enter the tunnel. Kill the Skulltula at the end of the tunnel and
climb the vines behind him.
Enter the door.
You will now have to fight Dead Hand. To start the fight, allow yourself
to be grabbed by one of the four hands. A monster will pop out of the ground.
Break free from the hand and go to the monster. When you are close enough, he
will lower his head to try to bite you. Luckily, he moves quite slowly and you
can easily attack the head with your sword. Repeat the process until he's dead.
After killing him, a treasure chest will appear. Open it to find the
Lens of Truth! This is what we came here for. It will be used extensively in
the Shadow Temple. Now play the Prelude of Light, warp to the future and play
the Nocturne of Shadow to warp to the Shadow Temple.
= = = SHADOW TEMPLE = = =
You not actually INSIDE the Shadow Temple yet. Stand on the tiny
platform in the center of all the torches. Use Din's Fire to light them all up.
Now you can really enter the Shadow Temple.
Go forward until you get to a large hole. Use the longshot to get to the
other side. As you walk close to the wall, you should hear a voice that says
something about the eye of truth. Use the lens of truth to discover that this
wall is fake! Go through it. Continue using the lens of truth on the skulls in
this room. Only one of them is a real skull. Push the bird statue until it is
facing the "skull of truth". The door at the end of the big gap will
open. Sorry, you can't get there YET. Use the lens of truth again to discover a
path in this room (just make sure it isn't the one you entered through). Enter
that path.
Continue through this room until you find a fake wall on the right side
(fake: this means keep the lens of truth on). Enter the door. Kill all the
enemies in the room to make a treasure chest appear. Open it to find the
dungeon map! Get out of this room the way you came in. Look on your right side
and use the lens of truth. Enter the fake wall to get to a room... that
looks... just the same as the other room.
Use your shield to protect yourself from the flying pots in this room.
Keep the lens of truth on to find another passage in the wall. Enter the door.
Now you will need to fight Dead Hand. Remember this guy? After defeating him
(it should be a bit easier now that you have a better sword), a treasure chest
will appear. Inside you will find the treasure of the dungeon: The hover boots!
Oh yeah! Return to the room with the bird statue and the skulls.
Now equip you hover boots. When the boots are equipped, run ACCROSS the
large gap to the door on the other side. Yes, that's right, I said run across
the gap. Don't worry cause the hover boots just lift you up! Really cool... if
it lasted a little longer than 2 seconds :( Enter the door.
Continue until you reach a room with a laser eye. Hurry and go through
the wall on the right side, it's fake. Enter the door there. Kill the mummy
(it's just like a zombie). Open the chest for the compass. Exit to the laser
eye room and enter the fake wall straight ahead of you. This room looks a lot
like the blade room in the ice cavern level, don't you think so? Well, get all
the silver rupees in the room. Some of them require the longshot. When all the
silver rupees are collected, enter the pass that just opened and get the small
key from the chest. Exit the room to the laser eye room. Blow up the wall on
your left side and enter the locked door behind it.
Be careful in this room, a lot of giant skulltulas pop down from the
ceiling (you should be able to see their shadow before the jump down on you).
Avoid the giant skulltulas, and continue along the path avoiding the dropping
blade things (I forget what they're called). Soon you'll get into a fight with
a Stalfos. Ignore him and use the hover boots to get to the platform at the
side.
This platform has a laser eye (they're actually called
"Beamos") and a spike thing revolving around it. Pick up all of the
silver rupees in the area. One of them is inside the Beamo. After that, enter
the door. Use the lens of truth to see the block in the wall. Pull out the
block. Now, push into a position so that it is preventing BOTH of the falling
spiked blocks from squashing you into the ground. When that's happening, switch
to the other side of the block and PULL the block to the end, past both falling
spikes. Climb up the block to get to the higher place. Use the spiky blocks as
a bridge to get to the other side. Hit the switch to make a chest appear on the
other side. Use the hover boots to get there and open the chest for a small
key. Exit to the huge room.
Use the lens of truth and look at the large empty space at your left
side (after exiting the spike room). You'll find that the empty space isn't
really empty at all! Make your way to the end of the platforms and enter the
locked door [NOTE: Try turning of the lens of truth while riding the invisible
platforms. Looks like you're riding on air!]. In this next room, use the lens of
truth to see the spikes. Collect all the silver coins. A lot of them require
the longshot. When the rupees are collected, enter the newly unlocked door.
Go up the stairs and pick up a bomb flower. Throw it *inside* the skull to
make the skull explode. A small key comes out! Get the key. Kill all of the
bats in the room to make it open up and exit the room. In the invisible spike
room, use the lens of truth and longshot to the target at the top of the room.
Use your key to enter this locked door.
Now, equip the IRON boots. You'll need the iron boots to stop the fans
from blowing you away. Continue through the tunnel until you get to a large
gap. Wait for both the fan at your side and the fan in front of you to turn
off. When the time is right, equip the hover boots and float across the gap.
Now you are at a narrow path with three fans blowing from the sides. Equip the
iron boots and go to the part where the third fan is blowing (beside the door).
[NOTE: If any fire comes your way, swing your sword to stop the burn]. Wait for
the fan beside you to blow hard, and equip the hover boots. The wind from the
fan will blow you to a secret passage in the wall! Enter the door...
Kill the mummies in this room to make a chest appear. Open it to find...
rupees!? That's not really what you want, is it? Well, bomb the little mound of
dirt on the side. In side it is an *invisible* treasure chest. Use the lens of
truth to see it. Open the chest to find a small key! Use that key to exit
through the locked door in this room.
Look right, there is a ladder you can't reach. Look left, there's a
block that you can climb up. What are you waiting for? Pull the block on the
left so that is forms a step to reach the ladder. Climb up the ladder and jump
on to the big boat. Stand on the triforce symbol and play Zelda's Lullaby. The
boat will start to move! Two Stalfoses will come and start to fight you on the
boat. You can ignore them if you want to. When you see dry land at the side of
the boat, jump to it. Enter the door at the side.
This is a confusing maze room (use the lens of truth, it really is a
maze). Watch out for the floormasters infesting the grounds. First, look for a
room with two walls that close in and try to squish you. Use Din's Fire to burn
those two wooden walls. Then open the decorated chest to find the one and
only-- Boss key! Go back to the maze room. Now look for a room with an
invisible floormaster (keep the lens of truth on). Kill this guy to make a
chest appear. Inside the chest you shall find a small key. Go back to the maze
room.... then go further back to the room where you jumped off the boat.
Across the gap you shall find a bird statue surrounded by bomb flowers.
Get as close as possible and shoot one of the bomb flowers surrounding the
statue. This causes all the bomb flowers to explode, making the bird statue to
fall over and create a bridge. Cross the bridge and enter the locked door on
the other side.
Equip the hover boots and use the lens of truth. Now you can easily
glide from platform to platform until you get to the other side. Open the boss
door. Fall into the hole to start the fight with Bongo Bongo. Check out the
boss section for details.
After Bongo Bongo is dead, you will go to the Chamber of Sages. Impa
awakens as a sage and adds her power to your own. You have the shadow
medallion! Only ONE medallion left! Hell yeah!
wwwwwwwwwwwwwwwwwwwwwwwwwwwwwwwwwwwwwwwwwwwwwwwwwwwwwwwww
<<<<<<<<<<<<<<<<<<
THE SIXTH MEDALLION
>>>>>>>>>>>>>>>>>>
mmmmmmmmmmmmmmmmmmmmmmmmmmmmmmmmmmmmmmmmmmmmmmmmmmmmmmmmm
= = = GERUDO VALLEY = = =
Go to Gerudo Valley on the west side of Hyrule Field. You will find
there a broken bridge. There are two ways to cross it: (1) Use the longshot on
the wooden thing over the opposite side of the bridge. (2) Use Epona to jump
over the bridge.
On the other side you shall find the leader of the carpenters from
Kakariko Village in the past. It happens that his four lazy carpenters have gone
to Gerudo Fortress to become thieves. It's your responsibility to rescue them
from Gerudo Fortress (note: they were taken prisoner). Follow the path until
you get to Gerudo Fortress.
= = = GERUDO FORTRESS = = =
FIRST CARPENTER:
There are guards infesting the area. Go let one of them see you, Link
will quietly surrender, and you will be brought to a prison cell. To escape,
use your hookshot on the bright piece of wood outside the window. From there
you can jump down to safety. But wait, the place down there has guards that
will just bring you back! You can kill the Gerudo guards by shooting them with
an arrow. They will collapse to the ground. Don't be frightened by their
body... they won't wake up. Jump down to the ground (not to the ledge) and enter
the door on your left.
Continue forward and a Kakariko Carpenter will call you. Talk to him and
he'll tell you that these are evil women and all that. After the talk, a will
have to fight a guard. She's quite dangerous, if she uses her spin slash jump you'll
be captured and brought back to your cell. Z target her and use the Biggoron
sword (if you don't have that, check out adult Link's trading sequence in the
side-quest section... NOW!!!). Only attack her when you have a clear shot at
her. Also, right after she does her spinning jump slash she'll be frozen in a
position for about two seconds. This is the perfect time for you to attack!
After she is finished, get the key from the chest and use it to free the
carpenter. Exit this room. Still three carpenters left...
SECOND CARPENTER:
You should now be outside with a few crates. Enter the tunnel at the
left (Link's left after exiting the previous room). Inside, walk forward and
turn right. Wait a while and you'll see a guard stop at the corner. Kill her from
afar with an arrow. Now, go through the hallway until you find an exit on the
right side wall. And... go through the exit. You're outside again! Don't be in
a rush to go around the corner because a guard is there. Use the Z button to
see what's on the other side. When the guard's not looking, take out your bow
and get her. Then enter the tunnel nearby. This room has another of those
carpenters. Talk to him and defeat the Gerudo guard, just like you did before.
Remember to get the key and save the carpenter. Exit this room.
THIRD CARPENTER:
After exiting the room, you should be outside. You should also be able
to see some vines growing on the wall. Go climb down them (or jump down for all
I care...). Enter the tunnel at the bottom of the vines. Whoa, it's another
carpenter! Save him just like you saved the other two. Then, exit the room
THROUGH THE SAME WAY YOU CAME IN.
FOURTH CARPENTER:
After exiting the room, climb back up the vines and enter the door at
Link's left side. Stay up on the top of the ledge and kill the two Gerudos here
with an arrow. When they're both dead, make your way up the slope on the
opposite side of the room. Exit this place. You are back outside again! [NOTE:
You can get a heart piece here by longshotting to the chest on the high ledge.
You can also get a gold Skulltula at night on the back wall.] Jump down to the
lower area and go through the door. Watch out here because a Gerudo guard will
be passing by. Hide behind the crate and kill the guard as she passes by.
Continue to the right and you'll find the fourth carpenter. Talk to him, beat
the guard, get the key, and save the carpenter.
If you got all four carpenters, a Gerudo lady named Nabooru will come
in. She is second in command to Gannondorf although she hates his guts. She'll
give you the Gerudo Membership Card which allows you to walk around without
being captured by the guards! Now you can do a whole lot of stuff. You can go
to the Gerudo Training Center to try getting the ice arrows by finishing the
difficult training of the Gerudos. Or you can play the horse archery game in
the path to the right of the training center (I came here with 500 rupees, came
out with 0).
Go over to a large closed gate. Climb up the ladder on the right side of
the gate and talk to the person at the top. He will open the gate for you,
allowing you to enter the Haunted Wasteland. If you're finished all you want to
do in Gerudo Fortress, enter the gate...
= = = HAUNTED WASTELAND = = =
At the beginning, there is a big sandy thing blocking your progress. Use
the longshot on the crate at the other side. Now follow those red flags. After
following the flags for a while, you will come to a small stone structure. Go
on top of it and use the lens of truth. There is a Poe waiting for you there.
This Poe will be your guide to the Spirit Temple. Don't be afraid to use Z
targeting on him, he won't disappear. Follow him around and around in circles
until you reach the Dessert Colossus.
= = = DESSERT COLLOSSUS = = =
In the far distance you can see a stone statue of a woman. This is the
entrance of the Spirit Temple. But before you go there, walk along the wall on
your right until you find two palm trees and a crack in the wall behind it.
Bomb the crack and enter the tunnel. This is the fifth great fairy fountain!
Stand on the triforce symbol and play Zelda's Lullaby. The fairy gives you the
(useless) power of Nayru's Love. Now get out of here.
Enter the Spirit Temple and just exit right away. Walk forward a few
steps and Shiek appears. He tells you some of his inspirational message and
teaches you the Requiem of Spirit. Then disappears into the sandstorm. To
progress through the Spirit Temple, you need to come here as a child first.
Play the Prelude of Light, warp to the past, and play the Requiem of Spirit to
come back as a child. Enter the spirit temple.
= = = SPIRIT TEMPLE (past) = = =
This dungeon isn't particularly hard, its just hard to explain in so
many areas. Please bear with some of my vague descriptions and unclear
instructions. I'll try to explain this as best as I can.
Go up the stairs. There's a woman at the left, talk to her. Hey, it's
Nabooru. But she doesn't remember you because she met you in the future. After
a while, she says that she's looking for the silver gauntlets found in the
Spirit Temple... she can't fit in that little tunnel! Do a favor for her and
get her the silver gauntlets! Enter the little tunnel.
In this room, kill the two bats and the laser eye thing. Go through the
left door. Kill the Stalfos and the green flaming skull monster. There's a
diamond switch at the other side of this fence. Hey, you faced a puzzle like
this in Jabu Jabu's Belly! You should know what to do... aim carefully and
throw the boomerang so that it goes around the fence and hits the diamond
switch as it returns to you. The fence will drop down and form a bridge. Cross
the bridge and enter the door.
Kill the two fire monsters by using either Din's Fire or the Fire
Arrows. If you don't have either of those items, you really suck ass. Go get
them. After killing them both, enter the door that opens. Now, light the
torches (any way you like) to make a chest drop down. Open it to get a small
key. Great, now get the silver rupees in the room. Remember you can climb the
fence for some. A piece of the fence will drop down, enter the door on the
other side.
Now you're back in familiar territory. Go through the little tunnel.
Enter the locked door at the end. There's a bunch of normal Skulltulas infesting
the wall. Kill them and climb up. Enter the door at the top. In this room
there's a weird rock on the wall. Z target it and throw a bombchu at it. The
rock explodes, the light goes through, the sun is happy! (NOTE: You can hit the
diamond switch for a bombchu in case you don't have any). Enter the door that
opens up for you.
This room has a huge statue in it! I'll call it the statue room... push
the armos statue at your left side off the ledge. It will fall down and land on
a switch that opens a door above. But before you go up there, drop down and use
Din's Fire between the two torches. They will light up and a chest appears, get
the map inside it. Now climb up the wall to get the place where you were
before. Climb up the stairs and enter the door at the top.
Kill the laser eye things so they won't piss you off later. Now, collect
the silver rupees. When the rupees are all done, a torch will light up. Proceed
to the obvious action: Take out a Deku Stick and use the lit torch to light up
the other torches. When they're all lit, a chest will drop down. Get the small
key inside. Then go over to the group of gray blocks. Move the one with a sun
face to the light. Behold, the door opens! Enter it and climb the stairway to
the next room.
There's a metal thing guarding the exit, go hit him with the sword. Whoa
dude, he lives! To defeat him, use Z targeting. The shield is worthless to his
attack! Geez, this guy is strong! Hit him with the sword and backflip when he
tries to hit you. Soon, he loses his armor and chases you around like crazy.
Continue hitting him until he dies. Then go through the exit. Climb up the
stairs and go outside.
The owl! We haven't seen him in a long time! And this'll be the last
time you see him... After talking to him, open the treasure chest for get the
sliver gauntlets! Now return them to Nabooru -- but she's being captured by the
witches! Oh fudge... Play the prelude of light, take out the master sword, and
play the Requiem of Spirit to return to the Spirit
Temple as an adult.
= = = SPIRIT TEMPLE (future) = = =
Okay, so we're about 1/3 through with this place. Enter the Spirit
Temple and go up the stairs. There's a big gray block at the right. You
couldn't move it before... but now you have the silver gauntlets :) Push it
until it falls.
Kill the laser eye (they're called "Beamos"). Hit the diamond
switch at the ceiling with the hookshot or arrows. Enter the door at the left.
Defeat the two wolfos here and play Zelda's Lullaby on the Triforce symbol. Holy
cow! A chest appears! Longshot to it and open it for the compass. Go back to
the diamond switch room and enter the door on the right of the locked door.
Avoid the boulders and get the sliver rupees. Use the hoverboots to get
the one in the air. Enter the door that unlocks when you get all sliver rupees.
Kill the Like Like and get a small key from the chest. Now go back to the room
with the diamond switch. Enter the locked door there.
Avoid the Like Like and climb the wall behind him. Use the lens of truth
at the top to discover an invisible floormaster. Kill him. Now push the mirror
so that it points at a sun. Be careful! Some of the suns release those terrible
Ceiling Masters that bring you back to the entrance. So if you see a big shadow
under you, run around like crazy. One of the suns open the door when you shine
the light on it. Shine the light on the correct one and enter the door.
Avoid the armos statue, it's alive. Go up the stairs to the top and jump
to the triforce symbol on the statue's hand. Play Zelda's Lullaby, obviously. A
chest drops down on her other hand. Use the longshot to get there. Open the
chest to find a small key. Now drop down to the ground and use the longshot on
the target at the ceiling where you entered. Go up the stairs and use your key
to enter the locked door.
Kill all the Beamos and monsters in this room. Enter the door that
unlocks. In this room, there is a switch that doesn't stay down, and four armos
statues. The problem is that they come alive when you touch them. Here's how to
do this: Stand beside the doorway. Take out your fairy bow and shoot the statue
on the upper left. He will start chasing you AND he'll step on the switch! He
doesn't stay there forever so hurry up and enter the door.
Go up the stairs and enter the door on top. Oh darn, you'll need to
fight another Iron Knuckle. But this time it's easier since you can use the
Biggoron sword on megaton hammer. The Biggoron sword helps a lot because of its
increased power and range. And killing Mr. Iron Knuckle, enter the door at the
back. Continue to the outside and open the big chest for the mirror shield!
Whoa, two great items in one dungeon! Return to the room with four armos
statues.
Okay Link, step into the light... Use your newly acquired Mirror Shield
to reflect the light to the sun face on the wall. Enter the door that opens and
get the small key there. Return to the place where you killed the guys with
fire arrows. Enter the locked door found there.
Kill the Beamos with bombs. (Hmmm... Beamos with bombs. Sounds nice :).
Now look at this moving wall. You COULD climb it up properly like a good boy...
but there's an easier way. Longshot yourself up to the top part of the wall!
Whew, that was easy. Enter the door. Stand on the Triforce symbol and play
Zelda's Lullaby for it. Enter the door that opens.
All the doors in this room (besides the one you came in from) are just
fake. But one of the doors hides a secret. Behind one of the fake doors is an
eyeball switch. Shoot the switch to make a block of ice appear. Use the
longshot on the target on the ceiling to reach the ice. Step on the switch to
turn of the fire. Open the nicely decorated chest and you'll find what you
always find in nicely decorated chests... The boss key! Now exit the room to
the room where you played Zelda's Lullaby on the triforce to open the door.
Turn right and enter the door there.
Watch out for the flying pots! In this room, you find a diamond switch
behind a gate. Do a spin slash attack to hit the switch. Enter the door that
unlocks. Defeat the Lizalfos first. Make sure that the snake mirror is facing
the mirror in the other room. There is a part of the wall with a large bump,
it's rather difficult to see. Bomb that to reveal another room. Adjust the
three mirrors so that the third mirror shines the light through the gate and
onto the large mirror on the wall. Now the large mirror should be reflecting
the light to the floor. Go around to the floor with the light shining on it.
Use the mirror shield to reflect the light to the sun face on the wall. The
floor you're standing on will be lowered down to the middle of the statue room.
Use the mirror shield to reflect the light from your platform to the
face of the statue. Keep the light shining on the face for a few seconds. The
face will crack open! Longshot yourself to the fence on the statues face. Once
you're there, the fence will raise and you open the boss door.
Now you'll have to fight yet another Iron Knuckle. After defeating this
guy, you discover that it's actually a girl: Nabooru! Under the control of the
witches for SEVEN YEARS! And she still remembers you! How sweet... Go through
the door at the back of the room. Climb up to the middle platform to start the
fight. Oh, and check out the boss section for details!
After the fight, you'll see a rather funny cinema sequence. Remember to
get the heart container, and step into the blue light to be transported to the
Chamber of Sages. Guess who's the sixth sage... it's Nabooru! Nabooru awakens
as a sage and adds her power to your own. You have the spirit medallion. And by
the way, YOU HAVE ALL SIX MEDALLIONS! Oh hell yeah! Only thing left to do is
kick Ganondorf's ass. But first, play the Prelude of Light to transport to the
Temple of Time.
= = = TEMPLE OF TIME = = =
After a long revealing story sequence (in which Shiek transforms into
Zelda) you will receive the light arrows from Princess Zelda herself. You need
these to beat the final boss. After all has been revealed, Zelda will be
captured by Ganondorf. Go to Ganon's Castle.
Outside Ganon's Castle, the sages will use their power the form a cute
rainbow bridge across the lava going the Ganon's Castle. Well, the final stages
of the game are in there. If you're all prepared, cross the bridge and enter
the castle...
wwwwwwwwwwwwwwwwwwwwwwwwwwwwwwwwwwwwwwwwwwwwwwwwwwwwwwwww
<<<<<<<<<<<<<<<<<<<<<
GANON'S CASTLE
>>>>>>>>>>>>>>>>>>>>
mmmmmmmmmmmmmmmmmmmmmmmmmmmmmmmmmmmmmmmmmmmmmmmmmmmmmmmmm
= = = GANON'S CASTLE = = =
Ganondorf is holding Zelda captive in the main tower in the center of
this room. However, the center tower is protected by a force field that is
supplied by the six sources of power within the six barriers. One barrier for
each medallion. So enter the main room and destroy the barriers one by one.
-=FOREST BARRIER=-
Stand in the center of the four torches and use Din's Fire to light
them. There's still another one above the door! Shoot a fire arrow at that one
and the door will unlock. Continue to the next room...
You'll need to collect all the silver rupees. First, equip the hover
boots and float in front of the left fan when its blowing at full speed. You
should be pushed to the platform beside the Beamo. Oh, and destroy the Beamo
with a bomb so he doesn't cause any trouble. Hit the switch to make a hookshot
target above the door, allowing you to get the silver rupee. Get the others and
enter the door.
This is the source of the forest barrier. It's the round object that
looks like a peach in the middle of the green flowing energy. Shoot the peach
thing with a light arrow to destroy it. Saria will appear and tell you to hurry
up. You will be transported to the main room.
-=SPIRIT BARRIER=-
Collect the silver rupees. Watch out for all the moving spikes in the
room! For some of these you need to move the armos statue so that the spikes
aren't moving back and forth between the wall and the statue. Use the longshot
to reach the one in the center of the room on the ceiling. After collecting all
silver rupees, enter the door.
First, kill the fire monsters here. Hit the diamond switch at the other
side of the gate by using a spin slash attack. A chest drops down, bombchus
inside it. Did you notice there is a hole at the top of the gate? Aim a bombchu
so that it climbs up the gate, through the hole, down the other end, and
explodes hitting the diamond switch. You might need to hit the torches on the
sides of the switch since the bombchus don't explode upon contact with the
switch. Continue to the next room.
Shoot the spider web on the ceiling using a fire arrow. Behold the
light! Use the mirror shield to reflect the light onto the different sun faces.
Only one of them is correct. Watch out because reflecting light on the wrong
one causes a ceiling master to drop down. Enter the door.
Hey, it's the spirit barrier. Shoot with light arrow like you did to the
forest barrier. Nabooru appears and tells you to hurry up. You are transported
to the main room.
-=SHADOW BARRIER=-
First, kill the green skull with the bow and arrow. Okay, now look at
the wall on the right for an unlit torch. To light this torch, take out your
fire arrows and shoot it! When the light is on, some ice platforms will appear
forming a path for you to get to the island with the Like
Like! Be quick because the light goes out rather quickly. And be sure to
carefully avoid the Like Like on the island (if he gets you, he'll spit you
down into the deep beyond). When you reach the island with the Like Like, the
torch will have already turned off the light. Turn around and light the torch
again with a fire arrow. Continue on the path of platforms to reach a switch
down under. Hit the switch and come back up. The switch made a big chest appear
on the island with the Like Like! Get over to the chest and open it for the
Golden Gauntlets! Now look around for a path that you can only see with the
lens of truth. Follow on that path the reach a switch. Hit the switch with the
Megaton Hammer to open the exit. Use the longshot on the torch beside the exit
to get there. Umm...yeah. Now exit through the exit. Yay, it's the shadow
barrier! Shoot it with the light arrow to destroy it. Impa appears and tells
you to hurry up. Now you're transported to the main room. Before you go and
destroy the other barriers, it's a good idea to get the sixth great fairy. Exit
the castle and go to the place where you got the power of Din's Fire. Use the
Golden Gauntlets to get rid of the huge black pillar. Enter here and play
Zelda's Lullaby on the triforce symbol to meet the great fairy. She gives you
the power of Double defense. Go back to the castle and continue.
-=LIGHT BARRIER=-
Do you know how to get here? It's behind the big black stone pillar. You
need to have gotten the Golden Gauntlets from the Shadow Barrier. Just walk up to
the pillar, press the A button, and throw the stone away (whoa... this is great
with the rumble pak...).
In the first room, use the lens of truth to see all the invisible
enemies. Kill all of them to make a small chest appear. Inside the chest is a
small key. Don't open the other chests! Some of them contain ice and will
freeze you upon being opened. Use the key to open the locked door and exit.
Stand on the triforce symbol and play Zelda's Lullaby (this can't get any
simpler). A small chest will fall down. Get the key from the chest and enter
the locked door.
Collect all silver rupees in 1:00 minute. I'm pretty sure you can do
this on your own. The silver rupees are so easy to find that having any
difficulty in this room would be a crime! All of the rupees are done? Then go
into the next room.
The light barrier... is missing! Then use the lens of truth to find that
the back wall here is fake. Go through the wall to meet the REAL light barrier
room. As usual, shoot it with a light arrow to destroy it. Rauru appears and
tells you to hurry up. You are transported back to the main room.
-=FIRE BARRIER=-
First, put on your Goron Tunic to prevent getting burned by the hotness
of the room. You'll have to collect all the silver rupees in the room. Go from
platform to platform collecting all the easy silver rupees first (Do I really
need to get detailed on this?). Go to the big black stone pillar and lift it up
using the Golden Gauntlets (you must have gotten it from the Shadow Barrier
earlier). You'll throw the pillar behind you and it will form an island. Get
the rupee that was under the pillar. Now go to the platform with a torch slug
on it. Kill the slug and get the rupee on that platform. Then jump to the
pillar that you threw and get the rupee on the platform. If you got all the
silver rupees, Longshot yourself to the exit.
In the next room is the Fire Barrier. Again, shoot the peach thing to
destroy the barrier. Darunia appears and tells you to hurry up, brother! Now
you're brought back to the main room.
-=WATER BARRIER=-
If front of you there is a blue flame surrounded by spiky ice things.
Get rid of the ice and store all your bottles with blue fire. Now, open the
chest on your LEFT. Don't open the right chest because there's freezing gas
thing (?) inside. The left chest has a key! Use it to open the door...
This is another ice block puzzle like the one in the ice cavern. You
only have two minutes to figure this one out. And two make things worse,
there's TWO blocks for you to work with. Oh fudge. Remember, all directions
refer to when you are entering the room. First go to the block farthest from
you and push it to the ice rock on the left. Then, go behind the block and push
it into the hole. Now go to the other block. Go to the left side and push it to
the right. Now push it to the place with the blue fire. Yehey! Climb up the ice
block and get the blue fire. Use it to melt the red ice. Push the switch to get
rid of the bars. And exit...
Here's the water barrier! Take out your light arrows and do that thing
you do. Princess Ruto appears and tells you to hurry up (notice a pattern
here...?). You are transported back to the main room.
-= FINISHED WITH ALL THE BARRIERS! =-
When you're finished destroying all six barriers, the barrier around the
central tower will go away. Now you can enter it... But first, make sure you
have some kind of medicine that revives your magic, the final boss requires a
lot of it.
Go up the stairs, and up, and up. It's pretty fine if you just ignore
the Keese in each room, they don't give you anything good. On the way up,
you'll encounter a pair of Dionolfos. Beat them and the door will unlock,
allowing you to continue your stair climbing. Keep going and you'll find a pair
of Stalfos. Beat them to receive the boss key. Continue and soon you'll have to
fight two iron knuckles. Finish them and continue up the stairs to reach
Ganondorf. "These toys are too much for you. I command you to return them
to me!". Navi goes away and you begin the fight. So see the boss section for
juicy little details.
After the fight, Ganondorf will use his last ounce of strength to
destroy the castle. Now you have 3:00 minutes to escape with Princess Zelda.
Follow her and she'll open every locked door for you. Along the way, Zelda will
be trapped in fire and you'll have to fight two Stalfos to free her. Just go
crazy with you Biggoron sword to kill them. Follow Zelda some more. At the
bottom, you'll encounter a ReDead. He'll freeze you. Tap any button to continue
out the exit.
You and Zelda will both watch as the castle collapses, rumbling in all
it's glory. It's quite a nice effect. After the castle collapses into a
perfectly flat arena, you will hear a noise from the rubble. Check it out. As
you get close, the seemingly immortal Gannondorf will arise and use the
triforce of power to transform into the final boss: GANON. For the last time,
visit the boss section for the final details on beating the final boss.
Woohoo! You beat the game! Sit back and relax as you watch the beautiful
seven minute ending.
~
The End ~
I would like to thank Michael Gonzalez
<mike@yeayea.com> for writing this walkthrough.
If you have any further questions about the game or are
still stuck somewhere, please e-mail me at thezeldaguru@hotmail.com.