I've had a few request for a "Bootable CD" walk-through. Never one to disappoint, here you go. This guide is structured around Nero Burning ROM application.
Images are provided for reference after each step is detailed.
Launch Nero Burning ROM (NOT Nero Express)
Select CD-ROM (Boot)
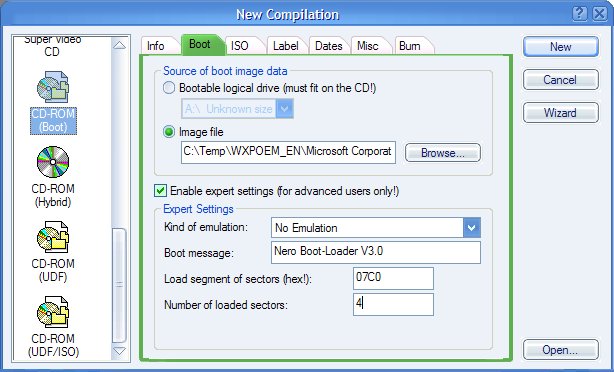
You should start on the Boot tab.
Source of boot image data: Select Image file. Browse to where you saved the file. If you downloaded from me, it will be named Microsoft Corporation.img and you will have to change file type to "ALL" to select it.
You want No Emulation, Boot message Nero Boot-Loader v3.0 (should be defaulted to that).
Load segment of sectors (hex!): 07C0
Number of loaded sectors: 4 (Very important!!)
Now proceed to ISO tab.
File/Directory name length: ISO Level 2 (Max. of 31 chars)
Format: Mode: 1
Character Set: ISO 9660
Check: Joliet
Select all boxes under Relax ISO Restrictions.

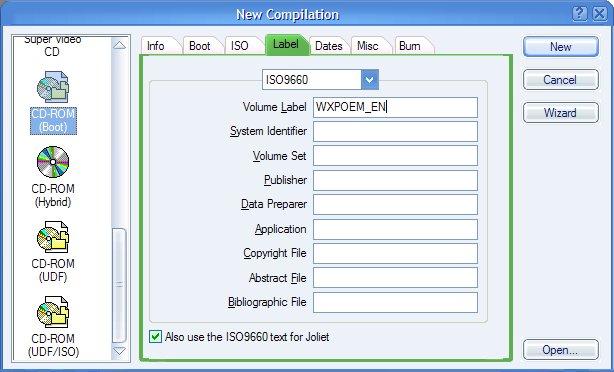
Move on to Label tab.
Set Volume Label. (Note: My installation CD now has SP1 incorporated so the volume name is different from a XP CD without SP1.)
If SP1 included: WXPOEM_EN
If SP1 NOT included: WXPVOL_EN
Ignore all other boxes...leave blank.
Click New.
Select files from C:\Temp\WXPOEM_EN folder and drag to ISO1 window.

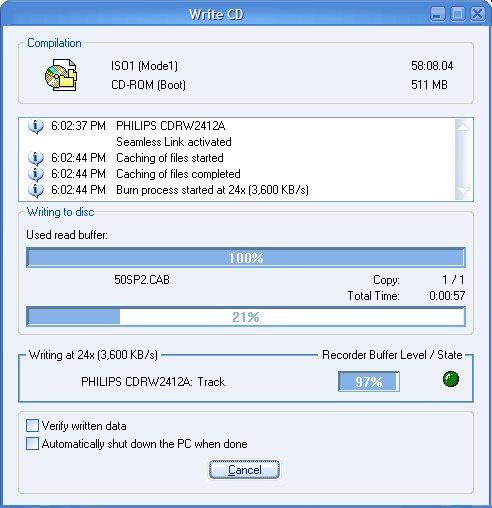
Go to File - Write
Under Action select: Write and Finalize CD
Write Speed: Depends on your CDRW burner.
Write Method: Disc-At-Once
Check Seamless Link
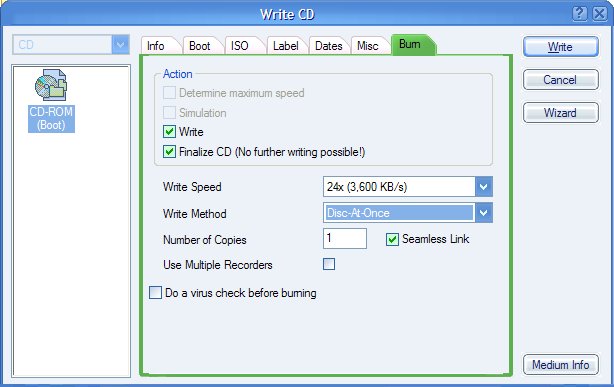
Click on Write
XP CD will now burn to blank CD.
Burn finished.
That should be it save some unforseen problem.
Enjoy XP!
Zran
Updated: 10.15.03
Back to Manifest Parse Error Fix
