|
Using
Samba as a PDC
Mastering
a Domain with Samba
by
ANDREW BARTLETT
 You
might think that Samba is useful because it allows Windows users
to access files or printers on a Unix system. Indeed, Samba does
this perfectly well, but that's only part of what this facility
can do. You
might think that Samba is useful because it allows Windows users
to access files or printers on a Unix system. Indeed, Samba does
this perfectly well, but that's only part of what this facility
can do.
Whether you have a small growing site, a large
established one, or just a home network, you can use some of
Samba's other features to help increase productivity, decrease
costly downtime, and lower your total cost of ownership. Let's
find out how.
Defining a
Domain and a Controller
In the Windows world, a collection of networked
computers is typically called a workgroup. As a network grows, it
often becomes desirable to turn it into a domain. By creating a
domain, you gain an important feature.
Within a domain, there is a single system called the
Primary Domain Controller (PDC). The PDC provides user
authentication for all the other systems within the domain. It
also stores information about the users within the domain.
Together, the domain and PDC allow for a concept known
as "Single Sign On." Any user can log on to any computer
in the domain using a Samba username and password and need only do
this once per session. This is also known as the domain logon.
Each user has only a single profile, so the desktop, start menu,
and any other personal settings will be the same on every system.
And, the user can access any other system in the domain without
needing to ask the system's owner to create an account or
re-authenticate. The PDC will authenticate the access request on
behalf of the system being accessed.
Samba is quite capable of acting as a PDC. Over the
years, it has demonstrated good performance, reliability, and
scalability. It can run on very modest hardware, and there are no
licensing issues. This article will show you how to reconfigure
your Samba installation to have a PDC up and running in no time.
We'll also talk about some important authentication issues.
Some Caveats
As Microsoft introduces new and varied versions of
Windows, the protocol used to communicate between clients and the
PDC tends to change in very subtle ways. The Samba developers have
managed to keep up with the changes, but because the protocol is
closed, Samba does not always offer the latest functionality.
However, always running the latest version of Windows, and keeping
yourself out on the bleeding edge, can often end up being more
trouble than it's worth. At the same time, you don't want to find
yourself falling too far behind, as the changes Microsoft
continuously makes to the protocols will eventually render your
current setup obsolete.
At the time of this writing, Samba can neither be nor
use a Backup Domain Controller (BDC), and the default user
information backend is not able to store the full range of
information that a PDC running on a Windows system can. Both of
these issues are being addressed, but you may have to wait awhile
for the implementation of these new features to become available.
And while Samba will honor a user's Unix groups on the
PDC itself (for file access), it will not communicate this
knowledge back to the domain client correctly. As such, machines
in a Samba domain cannot do effective Unix group-based access
control. Similarly, group file permissions are difficult to set
from Windows clients.
Fortunately, many of Samba's limitations can often be
worked around or aren't serious to start with. For example, having
a BDC isn't nearly as important under Samba, because who needs a
backup when the Primary Domain Controller is so stable?
Before You
Convert
You must have at least version 2.2.0 of Samba running
on your PDC-to-be. At the time of this writing, the most recent
version was 2.2.2 (see the sidebar about Samba 3.0). If you're
running an earlier version, you'll need to update or build Samba
from the source.
|
|
Samba 3.0
The first alpha release of Samba 3.0 appeared just as this
article went to press. While the code is still under active
development, it contains the following new features:
Native connectivity with
Microsoft's Active Directory Services using LDAP and Kerberos
authentication
A completely rewritten and very
configurable authentication system
A Microsoft-like net
command for command-line access to various network resources
Improved Windows 2000 printing
support
Many bug fixes and small improvements
More features will likely be added by the time you read this.
|
|
You should also have a PC running Windows to assist in
the testing process. However, this scenario is not absolutely
necessary.
Finally, you must make sure that no other
computer on the network is acting as a PDC, because there can only
be one PDC per domain. You may be able to use the nmblookup
program, but it would probably be best to contact your Windows
network administrator. At the very least, choose a name not
already in use on the network.
|
|
Configuring
Samba as a PDC
The following is an overview of what will have to be
done to turn your server into a PDC.
Server Configuration: First, your Samba
installation will need to have its configuration modified to
accept domain logons.
The netlogon Share: A PDC provides a place to
store system policies and per-user configurations. The netlogon
share (kind of like an account) is where these things are stored,
so you'll need to set this up as well.
Adding Accounts: Authenticating users is an
important part of what a PDC does. The next step is to add
accounts into Samba's password file. One interesting thing you'll
see is that in addition to user accounts, the computers in the
domain will need accounts too.
Client Configuration: If you get this far, then
you have a working PDC on your hands, so it's time to get the rest
of the network on board.
Server
Configuration
We first start by modifying Samba's configuration
file. Distributions usually put this in /etc/samba/smb.conf,
but if Samba were built from source, it would probably be in
/usr/local/samba/lib/smb.conf.
Listing One shows the options in the [global]
section that need to be reconfigured. We enable domain logons;
we specify that we want to encrypt passwords; and we
change the name of our workgroup to FOOBAR.
Also, members of the Unix group admins will be treated as
domain administrators.
|
|
Listing One: smb.conf
[global]

domain logons=yes
encrypt passwords=yes
workgroup=FOOBAR

domain admin group=@admins
|
|
After making the modifications to smb.conf,
there's a useful program called testparm that will check
smb.conf for internal correctness. Simply run testparm
and it will report any errors or inconsistencies in the
configuration. If testparm reports no errors, then Samba
should be ready to start.
There are many ways to do this. On a Red Hat box this
is as simple as typing service smb start at the command
line. Other distributions have their own scripts (typically in
/etc/rc.d/init.d/samba). Samba can also be started and
stopped from within SWAT (Samba Web Administration Tool). (See the
Using SWAT sidebar for more details.) Keep in mind that any
time you modify the smb.conf file, you must restart Samba.
|
|
Using SWAT
|

|
|
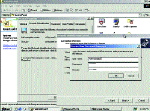
SWAT Team: SWAT lets you configure Samba.
|
Many users find editing their smb.conf by hand a
bit daunting, particularly given the number of options that are
available. Fortunately, there is SWAT, the Samba Web
Administration Tool, which comes with Samba. SWAT is particularly
useful because it provides context-sensitive help and all the
Samba documentation.
It normally lives on port 901 and can be accessed with any Web
browser by going to http://localhost:901/.
For security reasons, it is usually disabled by default. There are
two ways to enable it, dependent on if you use xinetd or
inetd.
For xinetd users, /etc/xinet.d/swat must be
edited to read disabled = no. Note that if you intend to
use SWAT from a remote location, the only from line must
also be modified to define the places from where SWAT may be used.
When you're done making changes, make xinetd reload its
configuration by doing killall -HUP xinetd as root.
On systems with inetd, /etc/ inetd.conf and
/etc/services must be changed. In /etc/services, be
sure the following line exists:
swat 901/tcp
In /etc/inetd.conf, the following line should be inserted
with /path/to/swat replaced with the actual location of the
swat program. Then type killall -HUP inetd as
root to have inetd reread its configuration file:
swat stream tcp nowait.400 root
/path/to/swat swat
Although SWAT is very convenient, it does have some problems.
SWAT requires the Samba root password to do anything useful, and
to make things worse, it sends it over the network in the clear.
While this isn't an issue for localhost connections (no
wire exists to sniff), you may wish to make remote connections
secure HTTPS connections by using an SSL wrapper like stunnel
from http://www.stunnel.org/.
A HOWTO on this topic is available on your local Samba mirror
(http://www.samba.org/samba/docs/swat_ssl.html/).
Another thing to be aware of is that SWAT will change your
smb.conf file, rearranging entries as it sees fit and
removing comments altogether. The man page warns, "If you
have a carefully crafted smb.conf, then back it up or don't
use SWAT."
|
|
|
Once Samba is started, anonymous connections should be
possible. To test this, run the following command on the PDC,
substituting host with the hostname of the PDC:
# smbclient -L //host -U%
This will attempt to make an anonymous connection to the server
and list the shares that are available. If it doesn't respond
immediately, wait a few minutes. The name resolution system used
in SMB can take a little while to get moving. If nothing happens
in a minute or two, ensure that the smbd and nmbd
processes are indeed running and retry. If it still fails to
connect, you can consult additional diagnosis instructions in the
file DIAGNOSIS.TXT in the source distribution.
|
|
Adding
User and Machine Accounts
Now that Samba has been configured, accounts must be
created. This topic is complicated; there are two kinds of
accounts that need to be created in two password files (Unix and
Samba) -- user and machine. Let's take a look at the four
combinations. Some of these steps may have already been performed
when Samba was first set up.
1. USER ACCOUNTS IN THE UNIX PASSWORD FILE
All the users in your domain should have Unix
accounts. You will need to create them if they don't already
exist.
2. MACHINE ACCOUNTS IN THE UNIX PASSWORD FILE
Every Windows client system will need to have a Unix
account. These are also known as "trust accounts" and
are used as part of the authentication process.
The login name for each account is the name of the
machine with a $ appended to it. There is no need for a
home directory, shell, or password. They can be easily created via
a shell script that repeatedly calls the command:
# adduser -g machines\ # group
   -c NTMachine \ # gecos
   -d /dev/null\ # home dir
   -s /bin/false\ # shell
   -n 'hostname$'  # trust account name
where hostname is replaced by the name of each Windows
client system. In this example, the Unix group machines
is assumed to have been created. The group nobody could
also be used instead.
This process can be completely automated if desired.
See the Automatic Creation of Unix Accounts sidebar for
more information.
|
|
Automatic
Creation of Unix Accounts
The add user script option in smb.conf can be used to
automatically create accounts in the Unix password file. However,
because the script attempts to create both user and machine
accounts, if the new Unix user isn't already in the Unix password
file, then their account would be created and placed in the same
group as the machine accounts. The option would look like:
add user script = /usr/sbin/useradd \
   -d /dev/null\
   -g machines  \
   -s /bin/false \
   -M %u
|
|
3. USER ACCOUNTS IN THE SAMBA PASSWORD FILE
Every user in the domain also needs an account in the
Samba password file. It would be nice if there were an easy way to
convert your Unix password file, but there isn't one (see the
Authentication in a Windows World sidebar for more detailed
information). You'll need to run the following command for every
user, replacing user with each user's Unix login:
# smbpasswd -a user
You will need to create a root account. It is the
equivalent of root on your Unix system, so keep the
password safe. To test if authentication works, try the following
command on the PDC, replacing host with the PDC hostname
and user with any Unix logon. Enter the correct password
when prompted:
# smbclient //host/homes -U user
|
|
Authentication
in a Windows World
The NTLM (NT LAN Manager) authentication system allows remote
users to establish their identities to the server in a way that
does not reveal their passwords to either the remote server or any
other person observing the conversation.
This is done using a challenge-response encryption method. The
principle behind this is that if both sides know the password and
do a mathematical calculation based on it, then both sides will
get the same result.
This result is then supplied to the server for checking. The
"challenge" part of this ensures that the mathematical
output is always different (so another computer cannot sniff the
encrypted password and supply it later -- the challenge would be
different).
Unfortunately, the NTLM system does not allow the remote server
to authenticate itself, and it is possible to masquerade as an
NTLM server.
Furthermore, this system requires that the remote server know
the password in advance -- hence the need for the smbpasswd
file. The values contained in the file are "password
equivalents." That is, you don't need to know the actual
password to conduct operations; you only need to know the values
in the smbpasswd file. This differs from Unix; in Unix, the
values in the password file are not immediately useful for an
attacker.
Because the values in the smbpasswd file are directly usable by
an attacker, this file (and the PDC that stores it) must be kept
secure. If the security on this file were to be compromised, an
attacker could compromise the entire Windows domain.
|
|
|
Authentication
Issues
However, there is still a maintenance issue. Users
will want to change their Samba password, and an observant reader
will have already noticed a potential problem with multiple
password files.
There are several ways to change a Samba password, but
the method most users will use involves the client interface on
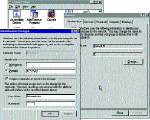
their respective workstations. On Windows 9x and ME platforms,
this is accomplished through the Passwords control panel.
On Windows NT, 2000, and XP systems, this is done through the
Change Password button on the dialog box that appears
after simultaneously pressing Control-Alt-Delete.
This brings up a potential problem. Although the Samba
password will have been changed, the Unix password won't be.
There's a similar problem if users change their Unix passwords.
The passwd program will not also change the Samba password.
This inconsistency can be solved in several ways.
SYNCHING VIA SAMBA
The smb.conf file offers an option, unix
password sync = true, that will automatically change the Unix
password whenever the Samba password is changed. This file uses
the fact that root is permitted to run passwd without
being prompted for the old password and relies on the correct
configuration of the passwd chat parameter to work as
it's supposed to. The value for the passwd program must
also be defined, probably to something like /usr/bin/ passwd
%u.
[global]
unix password sync = true
passwd program   = /usr/bin/passwd %u
passwd chat    = \
   *password* %n\n \
   *password* %n\n \
   *successful*
SYNCHING VIA PAM
It's also possible to use the Pluggable Authentication
Modules (PAM) system with Samba. For more information about PAM,
consult our June 2000 issue, online at
http://www.linux-mag.com/2000-06/guru_01.html/.
You may use the parameter pam password sync = true
together with unix password sync = true to utilize the
existing PAM libraries to change the password instead of
interfacing with /usr/bin/passwd. This is much less
error-prone and easier to debug. It still requires that the passwd
chat option be set, but the default value often works, and
the passwd program option does not need to be set.
Samba must have been built with the --with-pam
option to use this method. Unfortunately, it is currently very
difficult to tell if Samba was built with this flag. If you did
not build it yourself, then you will have to ask whoever provided
the binaries for you. Samba version 3.0 is designed to have a
command-line flag to emit the options that Samba was built with.
The file /etc/pam.d/samba needs to be
configured for this to function. Check to see that the PDC has the
/etc/pam.d/ system-auth file and that the /etc/pam.d/samba
file contains:
#%PAM-1.0
auth   required pam_nologin.so
auth   required pam_stack.so
      service=system-auth
account required pam_stack.so
      service=system-auth
session required pam_stack.so
      service=system-auth
password required pam_stack.so
      service=system-auth
The smb.conf file also requires the following entries:
[global]
unix password sync = true
pam password sync = true
GOING FROM UNIX TO SAMBA
The previous options work fine to change the Unix
password when the Samba password is changed, but do not handle the
opposite case. If you change the Unix password, then Samba won't
know about the change.
Password synchronization needs to be a two-way street
if it is to have any real meaning. The pam_smbpass.so
module provides this functionality. It allows the user to change
both Samba and Unix passwords at the same time, regardless of
which one is changed first. It also has the ability to snoop
clear-text passwords during PAM logins (like SSH) and can use this
information to migrate them into /etc/ samba/smbpasswd.
The PAM module pam_smbpass.so works within
the existing PAM infrastructure on the system. As with all PAM
modules, it requires only config file changes to implement.
Unfortunately, as a relatively new module, it isn't available in
the Samba RPMs yet; however, it can be built into Samba with the
--with-pam_smbpass configure option.
For the more ambitious, pam_smbpass.so can
also be configured to do Unix authentication. The module can be
used instead of pam_unix.so to do the password checking
for the rest of the system; this lets you maintain only one
password database, in /etc/samba/smbpasswd. This means the
passwords in /etc/passwd or /etc/shadow won't be
needed anymore.
As with any change to the PAM configuration, use of
the pam_smbpass.so module must be tested thoroughly. In
particular, make sure your system supports the /etc/pam.
d/system-auth file; then, make the changes there. This way,
all of your changes will be applied consistently throughout the
system.
Configuration for pam_smbpass.so is described
(with examples) in the included documentation. It is available
beginning with Samba 2.2.1.
Power and
Flexibility
By now it should be clear that Samba is very capable
of being a PDC. With only minor changes to its typical
configuration, a Samba server can quickly control a domain
containing hundreds of Windows clients. Samba is also flexible
enough that it can be configured to meet whatever your specific
needs are -- and best of all, it's free.
|
|
Resources
SAMBA http://www.samba.org
USING SAMBA (Online Book)
http://www.oreilly.com/catalog/samba/chapter/book/index.html
MICROSOFT OFFICE RESOURCE KIT (Office system policy
templates can be found here) http://www.microsoft.com/office/ork
The Win9x and NT system policy editors are in the respective
resource kits found on the Microsoft installation CDs.
|
|
Andrew Bartlett is an undergraduate student at the
Australian National University and a part-time network
administrator. He can be contacted at abartlet@samba.org.
|