|
The rendering of a three dimensional landscape, portrait or still life on a two dimensional surface is to some people a trick, and we know tricks are mostly magic! As with magic some people are content to just observe and wonder at the skill of the magician, others want to know how the trick is done, while a few want to do it themselves.
|
If we lived in a yellow two dimensional world and a blue ball passed through
we would experience something like this:

Fortunately we don't, instead ...
|

Let us imagine we live in a giant room where the floor is the ground and the sky is the ceiling. I have drawn the room with two rectangles and four lines.

Add a door and a window... and we create a space.

I shall add some lines to help put tiles on the floor and suggest cornice around the ceiling.
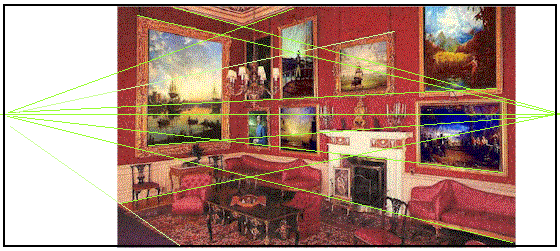
Please refer to the lesson in the 'drawing' section called 'room interior CVP' for a more detail and practical instruction.
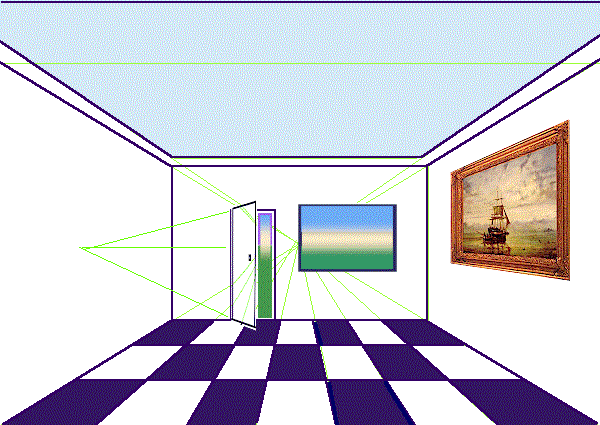
Let us extend a few lines and add some detail. You will note that if you extend the lines forming the top and bottom of the open door they will meet on the same level as the other convergent lines.
Given the basic structure you could practice adding things yourself.
This example is called 'two point perspective'. Complete the 40min. lesson called 'room interior two point perspective' in the 'drawing' section and keep this page as an introductory theory sheet.
Now let's now go outside ...
|
|