| Remember the first lesson on the importance of really looking at things and studying them? Well this lesson is a reminder of that and will also give you an understanding of how a painter must analyze the smallest things so as to best understand how to paint them in the biggest way. Nothing is more important than understanding this. You might think the figures I put into the following painting are the key. Not so, it is the study of the wave that makes this painting unique.
|
|
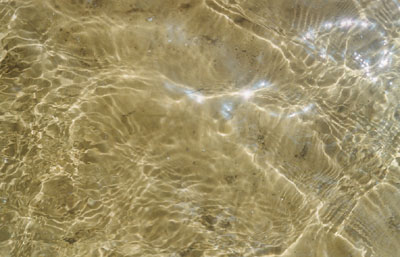
Have you ever wondered how those bright lines on the shallow end of a swimming pool come into being - or when you wade in shallow waters, on a sunny day, how the patterns rippling across the sand are made? Well so did I. So I took myself to the seaside on a sunny day and looked and looked (all in the nature of an artist's everyday grind).
Right is a photograph I took so you will can see what I mean. Below is another with an analysis of the reflected light that operates on the surface as the eye is raised. |
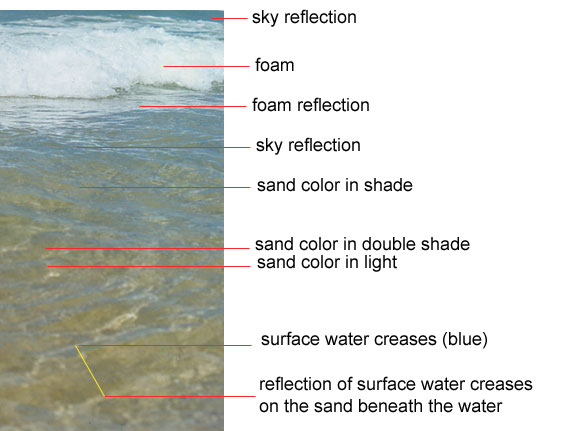
Note the yellow line that shows how the little blue wave top is parallel to the pattern in the sand.
|
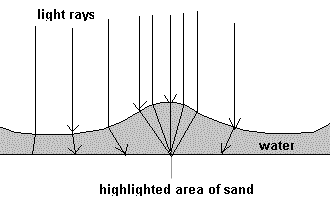 |
So, how do these bright lines form on the sand? Well they form because the top of the wave is not sharp, but curved like a lens and like a lens, it focuses the light like a lens(see diagram opposite).
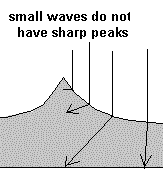
Were the wave 'peaked' the difference might occur as shown in the second diagram.
|
 |
OK, so now we know that small waves are usually rounded. The more scientifically minded might say the were flattened by gravity or that water finds its own level. Whatever the case I want you to consider the information in the photograph below and understand how the total structure of sand, wave, light and reflected light works and how we might transpose that to any painting we might do of a wave.
|

Let's not waste too much time on the beach (why not!) but get back to the studio and see what we can make from the information we have learnt, gathered and understood.
GO TO .... waves part 2
lesson menu
|