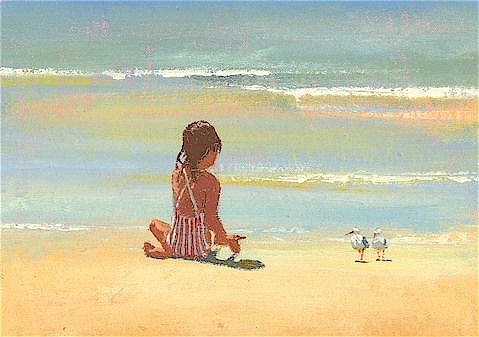
| Here is a simple little (12"x 14") painting that anyone
can do if they have a favourite figure they can plonk on a beach somewhere.
I will show you how it is done then you will be able to see what happens
when you paint thin over thick.
1. You will note a pinkish underpainting peeking
through the waves. This is because I pre-painted the canvas with a mixture
of light red and alizarin red with a little white to lift it up. At the
time I painted this it was my usual background for seaside studies and
I would prepare many such backgrounds all at once. When it was dry I went
to step 2.
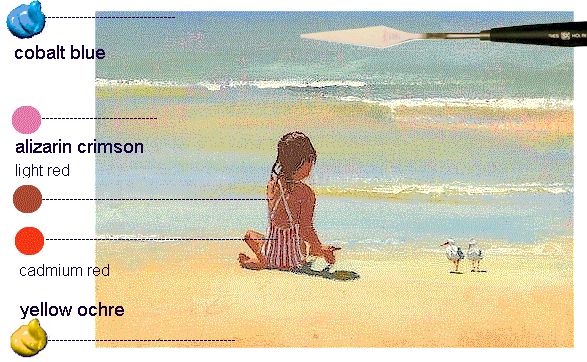
2. I squeezed out some Cobalt blue/flake white on the top
half of the canvas and some yellow ochre on the bottom and using the flat
of the pallet knife I sawed the paint back and forward across the canvas.
Here and there I added more dollops of white to lighten them but just kept sawing
back and forth with the knife. The secret is to blend, blend and when you think you have blended enough ... blend some more.

Obviously in some places where I mixed them
a lot I made the green you can see, in other places the yellow dominated.
I did this fairly haphazardly only lightening the effect towards the center
of the painting. Where it gets thin the background comes through and gives us a beautiful mauve tint.
3. At this stage everything was fairly bland
but I could begin to see shallow water and deeper water, sandbanks and
dry sand,.and a shore line. I just needed to define them. Up till now the
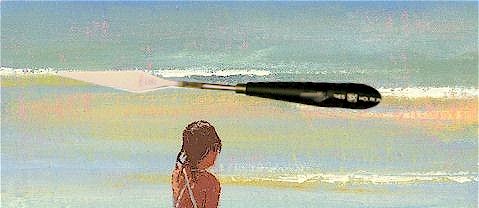
paint was fairly thick in places an the only painting implement I had used
was a knife. Next I loaded up the edge of the knife with white/tint of yellow ochre and dragged it across the canvas tilting it slightly and letting the white be dragged off
to form the waves. (See below)
Note: I placed the waves just above the sandbanks
and shallow water. Why? Because waves are formed as deep water meets shallow
water. Where the sand meets the water it gets a little darker. Observing
things like that is what painting is all about. I have probably spent a
little too much time observing little things like that instead of .....
3. For some strange reason I sustained an interruption
at this stage of this painting and it was a few days before I returned to it
and plonked in the little girl and the seagulls. For this I used a brush
and the darker colors you see. So what happened when the paint began to
dry? (Below) Well the thin brushed on darks of the girl dried faster than
the thicker lights of the background paint. The cracks thus formed allowed
the whiter underpainting of the background to show through.
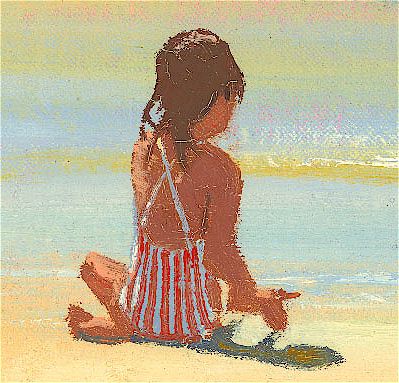
A few artistic points: Note how I painted a
cool shadow but warmed up its center to give it a little vibrancy. You
can do this with larger shadows. Also the costume colors and stripes I
added purely for effect. The cadmium red needed to offset the greens in
the water and the cool and warm whites for sparkle.
I have kept this picture to remind me
of my stupidity in ignoring a basic principle. It also reminds me of the
days I painted many similar paintings using this particular technique.
Strangely enough they were quite popular in the colder climes.
STUDENT ACTIVITY: Copy the painting above replacing the figure with one of your choice if you like. Allow 40min.
|