

PUT IMAGES INSIDE AUTOSHAPES WITH WORD 2000
Do you want to make your Microsoft WORD 2000 documents more interesting? Try using an AutoShape (like the Cloud Callout above) with a picture inserted to spice up your flyer. Thanks go to Toni Saddler-French from Microsoft for the tip.
Here are the simple steps to create such a picture for yourself:
-
Create a new document and hit the [Enter] key several times. (Sets up where you'll begin the typing later.)
-
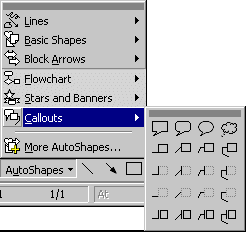
Move the cursor back to the top of the document and select a shape from the AutoShapes button on the Drawing toolbar.
-
The Cloud Callout is on the top right side of the cascading Callout menu under AutoShapes.
-
Click on the Cloud Callout shape then return to the top of the document. Your cursor will become a thin black cross. Click once on the upper left side of your paper then drag the cursor diagonally to the lower right side. This will result in a box with a drawing of a Cloud Callout inside, during the dragging you will begin to see how the cloud takes shape. You may need to adjust the shape to fit your needs before you go on.
-
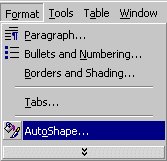
Choose Format from the Main Menu, then click Format AutoShape...
-
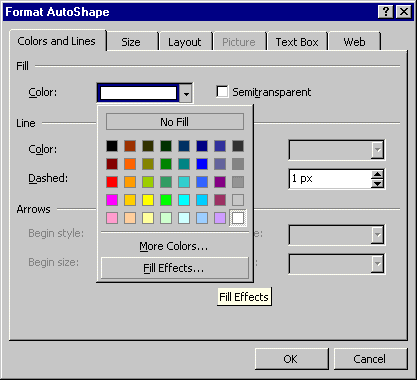
Click the Colors and Lines tab.
-
Under Fill, click Color, and then click Fill Effects...
-
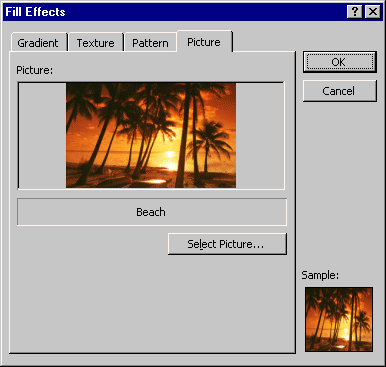
Click the Picture tab, and then click Select Picture. Switch to the folder that contains your pictures, and then click the picture you want.
-
You may wish to experiment with several pictures until you find the perfect one for the AutoShape. Don't forget any AutoShape will work, not just the Cloud Callout. Have some FUN trying this one!
Copyright © 2001 & 2002 Professor Al Fichera
Back to MS WORD 2000