Klingon Claw Gloves and Wrist Protectors
Making Scratch
The Klingon claw gloves are reasonably easy to make. You will need a
pair of cheap vinyl gloves, some vinyl scraps, a square empty water
bottle, a pair of scissors, clothespins or paper clips, black thread, a
needle, and an awl.

Take the vinyl gloves and cut off the fingertips. Then turn them inside
out and pull the lining away from the vinyl. Make a small cut and then
proceed to cut the lining all around the wrist. Don't discard. You can use
it to do a dry run of the pattern.
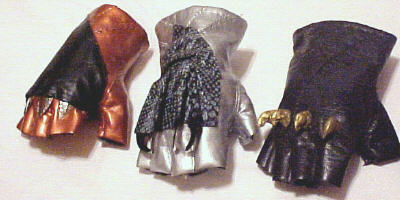
3 different styles made from these directions.
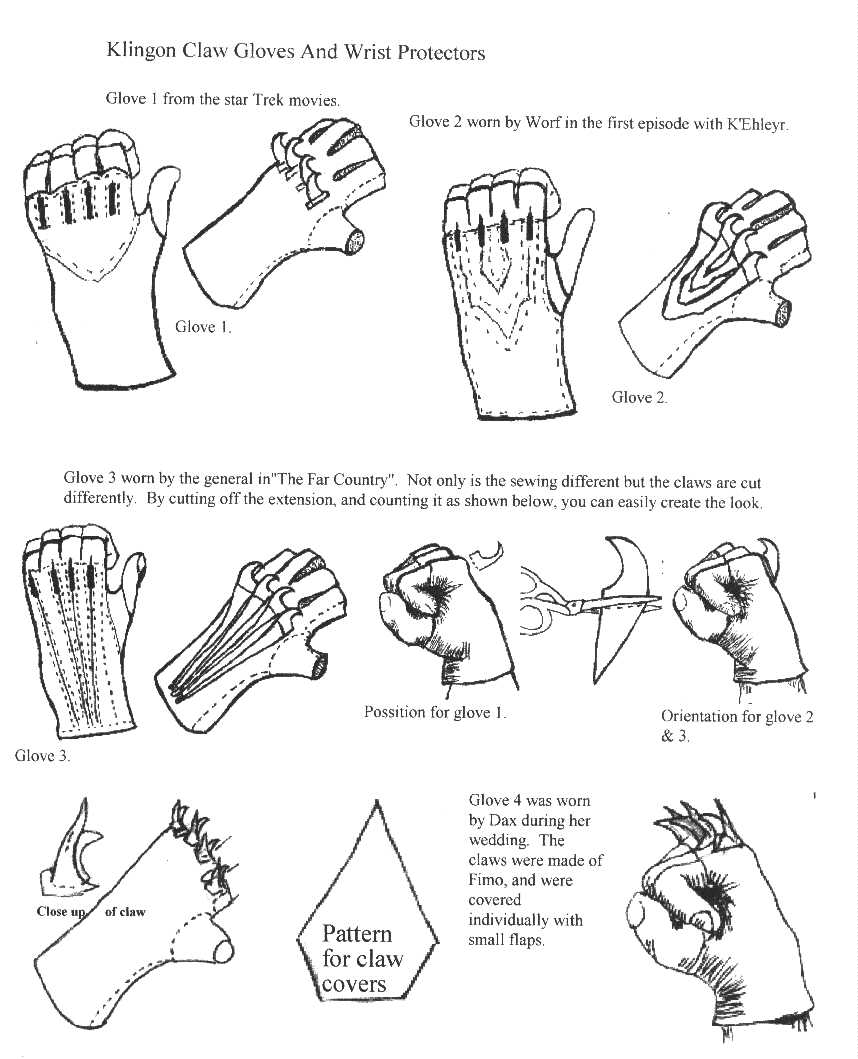
After going blind watching the videotapes of the ST movies, the Next
Gen. klingon episodes, I found three different patterns to complete your
gloves with. The first is of the ones used in the first four films. The claw
ridges extend all the way past the wrist and disappears under the wrist
protectors. The second, Worf wore gloves that tightened into the pattern
shown, (the first K'Ehleyr episode). The third is from the most recent film,
which had a number of different styles including this one. The main
difference between all of them is how you sew the vinyl to the
gloves.Graphic herglove.jpg

Click here for the full-size pattern.

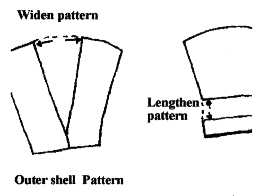
I have made a claw outer shell pattern for my hand size. This should fit
pretty well for most female warriors. The second pattern is made for a
man's glove, size large. It should be all right for most other members of
the Empire. If you have to enlarge the pattern, do so by cutting it in half
down the doted line. To make it larger, keep the B sections touching.
Open the A section and add the extra width there. Graphic 1d.jpg

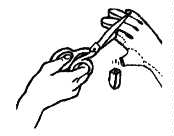
Cut up the water bottle. (One bottle could do four pairs of gloves. Buy
one yard of vinyl and you have an easy group project.) Cut out eight
claws using pattern C as a guide. Anyone who has seen Chil's claws
knows that the claws can run the gambit of being reasonably discrete to
outrageous. I painted mine black with a few coats of black nail polish.
This way I know that if they chip, I can fix them easily at a convention.
graphic 1e.jpg

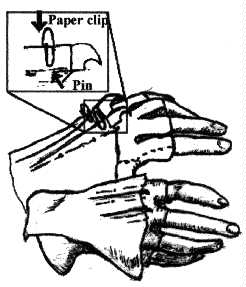
To estimate where you want your claws placed, put on the lining, make a
tight fist, and mark the knuckles with a marker. At this point you use the
claw outer shell pattern and cut out it out of paper towel, or some stiff
fabric. Using cloths pins or paper clips, clamp the claws to the shell and
see if they are where you want them. If there is too much fabric, mark it
with a marker and cut off the excess. When you have the correct
spacing, and claws pinned into the right spots, mark each off the tops of
the claws and the folds at the bottom of the claw edge. Graphic
gloveclip.jpg
Carefully remove the pins and cloths pins, and spread out your
personalized pattern. Transfer the pattern to the vinyl. Use white out to
mark your vinyl. Let it dry before handling. You will have to work at
removing the white out after the glove is completed. Note. White out
can not be removed from any other fabric. Run a bead of Barge glue, or
crazy glue (for fast drying time) or velcro adhesive, down both sides of
your plastic claws. Insert your claws and clamp them with clothespins. Let
the claws dry thoroughly before proceeding to the next step (yes you can
skip the gluing altogether, but it will not have the same clean lines the
glue gives it. Graphic 1f.jpg

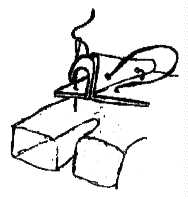
Use an awl to put two holes through the vinyl and each plastic claw (if
you do not have an awl, use a hammer and a nail.) Put the claws where
you want them on the glove, and begin to sew across the top, and then
down the sides. Use the holes made by the awl to let you go from one
claw to another. The extra bit of sewing guarantees that the gloves will
not come apart, halfway through an event. Graphic 2b.jpg
You then sew the inside two claws and begin to extend the ridges to the
wrist of the glove. Graphic 2a.jpg
Click here for the patterns and construction techiques of the
typical wrist protector.
Click here for a gallery of various styles of wrist protectors.

{$HOME}/FONT>