Building the Forms
Hull Stripping
Deck Stripping
Fiberglassing
Coaming and Hatches
Finishing Steps
Launching
Fitting Out and Customizing
Materials Sources

| Shawn's Guillemot 18
Click on any picture in this page to see an enlarged view
Building the Forms Hull Stripping Deck Stripping Fiberglassing Coaming and Hatches Finishing Steps Launching Fitting Out and Customizing Materials Sources |
|
 |
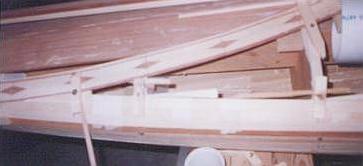
I carved inner forms from 1/2" cedar. I wanted the gluing capacity of an inner stem, but not the weight of a hardwood inner stem. The inner stems have been hot-glued to the end forms. |
 |
The sheer strips have been screwed to the forms, and the following strips have been glued to the sheer strips without staples. After the sheer strips, I only used 4 or 6 screws and 2 staples on the rest of the hull. |
 |
With the sheer strips attached, the forms, 6 strips, and the 2x4 strongback become a very rigid system. |
 |
These photos show the stripping of the hull. |
 |
|
  |
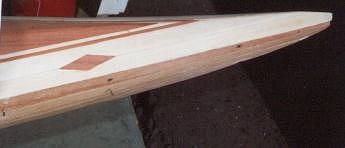
In the right-hand photo, I have just installed a lighter colored cedar strip. All of the preceding strips on the entire hull were ripped out of one 4"x4" x 8' piece of clear cedar that was lying in my back yard when I bought my house! |
 |
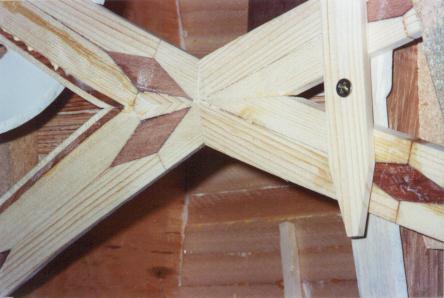
I glued up accent strips with sawn sections of 1x4. Once the epoxy cured, I sliced the accent strips into 1/4" thick bands. I had to use scrap strips screwed to the form to clamp the accent strip to the forms. The curved, flat accent strip wouldn't conform to the curvature of the deck, so I steamed it with a regular household iron. I simply wet a clean rag with hot water, laid it flat against the strip, and pressed the iron (on high setting) against the cloth until it steamed into the wood. The top of each strip was clamped, and I used pressure from my left hand and a bungie cord stretched under the hull to pull down the outside/bottom of the accent strip. I found I had to avoid the diamond areas with the steam or the heat would cause the epoxy to "let loose". I steamed only the 4.5" long areas of pine between the areas, but that seemed to be enough steamed area to help the strips conform. Once I got a strip bent enough to touch the form, I used another scrap strip to screw it down. Once the entire accent strip touched the forms, I re-steamed it in place to make sure it stayed that way. |
 |
The strips have been steamed and clamped against the forms. |
 |
Clamping the inside pine and redwood thin bands inside the cockpit area. I needed to use almost all the "Cheap Clamps" I had for this part. |
 |
This photo shows the spot on the aft deck where the accent
strips cross. The thin pine and redwood bands inside the accent strip around
the cockpit area have just been glued in.
I have now edged the accent strips with pine and redwood bands and I'm currently filling in the open areas. |
 |
Filling in the open areas. Redwood on the interior, and pine on the sides. |
 |
Generous use of masking tape, clamps, and scrap strips screwed to the forms take the place of all staples. |
 |
I like how this accent strip sweeps toward the stern. |
 |
 I
almost have my first area filled!! The image on the right shows this
area, filled with pine. I
almost have my first area filled!! The image on the right shows this
area, filled with pine. |
 |
Note that I flipped the kayak end-for-end for better access to the starboard side, so all images below this point are looking at the starboard side. Most of the images above this one were of the port side. |
 |
Accent strips crossing on the aft deck. |
 |
  The
recessed compass mount on the foredeck. The image on the left shows
the compass ring before trimming. I then inset a redwood strip plate
in the bottom of the ring to mount my compass on. I plan to use the
Aquameter Skipper. The
recessed compass mount on the foredeck. The image on the left shows
the compass ring before trimming. I then inset a redwood strip plate
in the bottom of the ring to mount my compass on. I plan to use the
Aquameter Skipper. |
 |
 Fully
stripped stern and bow. I plan to add stainless steel u-bolts to
attach painters, decklines, and grab toggles. Stainless steel isn't
as beautiful as wood, but it is strong and safe. Any suggested alternatives? Fully
stripped stern and bow. I plan to add stainless steel u-bolts to
attach painters, decklines, and grab toggles. Stainless steel isn't
as beautiful as wood, but it is strong and safe. Any suggested alternatives? |
 |
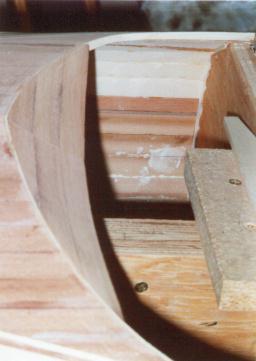 Stripping
the cockpit recess. I steam-bent the strips in the aft part of the
recess to lower the coaming to compensate for the raised deck. I
don't want the coaming so tall that it interferes with layback rolls. Stripping
the cockpit recess. I steam-bent the strips in the aft part of the
recess to lower the coaming to compensate for the raised deck. I
don't want the coaming so tall that it interferes with layback rolls. |
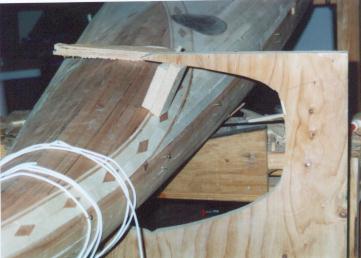 |
Installing the LAST STRIP! I'm using a scrap of plywood
left from cutting forms as a clamping jig. There were no forms left
showing to screw clamps to.
I used the white cord to hold the ends of other strips while glue dried, but the last strip took a bit more pressure. |
 |
Filling the tiny gaps around the diamonds in the accent strips with epoxy thickened with baking flour--it made a great pine-colored filler. |
 |
Deck glassed |
 |
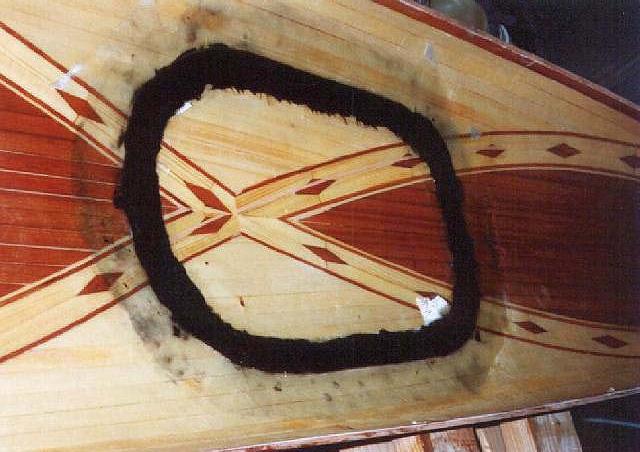
Cockpit recess before cutting |
 |
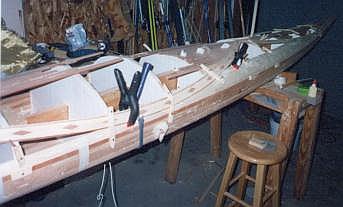
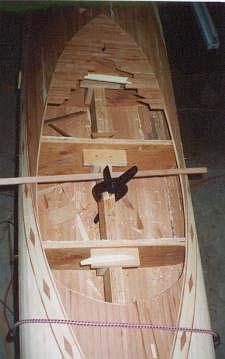
Hull and deck clamped on forms after inside glassing to prevent distortion |
Chapter 5: Coaming and Hatches
 |
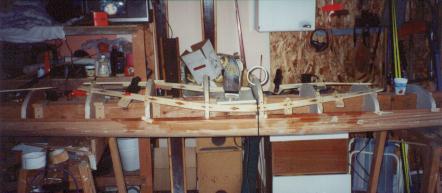
Coaming riser form |
 |
1/16" mahogany and maple veneers epoxied together and clamped to form. I will repeat again: sometimes you need a LOT of clamps!! |
 |
 Hatches
covered with shipping tape (outer edges only) which was then waxed.
Hatches were hot-glued in place and covered with "black gelcoat".
I mixed copy toner and silica fume into the resin and painted it onto the
waxed tape. I then laid in 3 layers of the 5.5 oz glass I used for
everything else. By covering the wet-out glass with saran wrap, I
was able to squeeze out the air bubbles, eliminating the need for any fill
coats (or so I thought!) I should have put more glass on at that
time, but I thought that those 3 layers of 5.5 oz would be enough.
It wasn't, so I added another layer of the 5.5 oz and a layer of 15 oz
stitched biaxial, for a a total of 4 layers of 5.5 oz. woven cloth and
1 layer of the 15 oz. biaxial. Hatches
covered with shipping tape (outer edges only) which was then waxed.
Hatches were hot-glued in place and covered with "black gelcoat".
I mixed copy toner and silica fume into the resin and painted it onto the
waxed tape. I then laid in 3 layers of the 5.5 oz glass I used for
everything else. By covering the wet-out glass with saran wrap, I
was able to squeeze out the air bubbles, eliminating the need for any fill
coats (or so I thought!) I should have put more glass on at that
time, but I thought that those 3 layers of 5.5 oz would be enough.
It wasn't, so I added another layer of the 5.5 oz and a layer of 15 oz
stitched biaxial, for a a total of 4 layers of 5.5 oz. woven cloth and
1 layer of the 15 oz. biaxial. |
 |
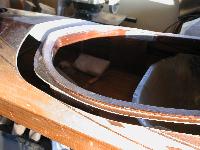
 The
completed glass hatch lips before trimming. The front hatch was trimmed
to 9" x 14" and the aft hatch to 12" x 16.5". I really didn't like the
Chesapeake's hatch cutout design--there was too little front-to-back distance
to allow me to stuff longer drybags into the compartments. After 2 trips,
I really like these hatch sizes. The
completed glass hatch lips before trimming. The front hatch was trimmed
to 9" x 14" and the aft hatch to 12" x 16.5". I really didn't like the
Chesapeake's hatch cutout design--there was too little front-to-back distance
to allow me to stuff longer drybags into the compartments. After 2 trips,
I really like these hatch sizes. |
 |
 Laminated
coaming before glassing Laminated
coaming before glassing |
 |
 Boat
before deck/hull seam and U-Bolts. Boat
before deck/hull seam and U-Bolts. |
 |
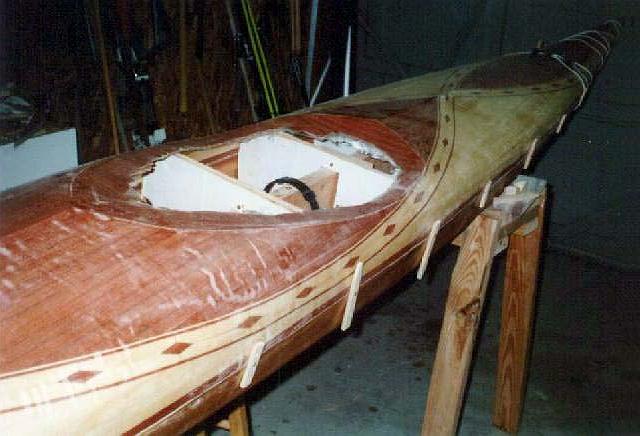
6mm Okoume cheekplates and bulkheads. I extended the cheekplate down to the hull so I'd have better support. |
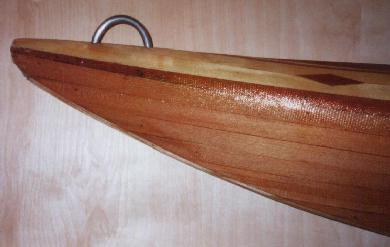 |
 5/16"
Stainless steel U-bolts for grab loop and deck hardware attachment, as
well as locking to an immovable object when I'm not in it! 5/16"
Stainless steel U-bolts for grab loop and deck hardware attachment, as
well as locking to an immovable object when I'm not in it! |
 |
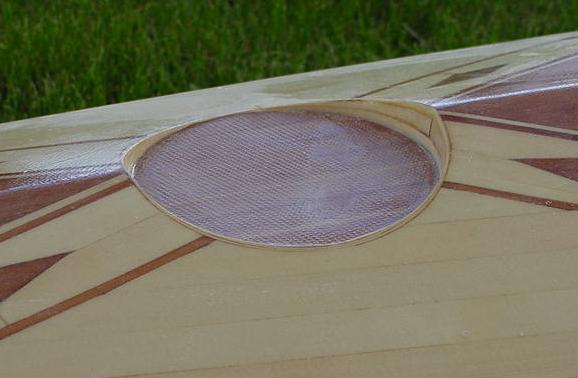
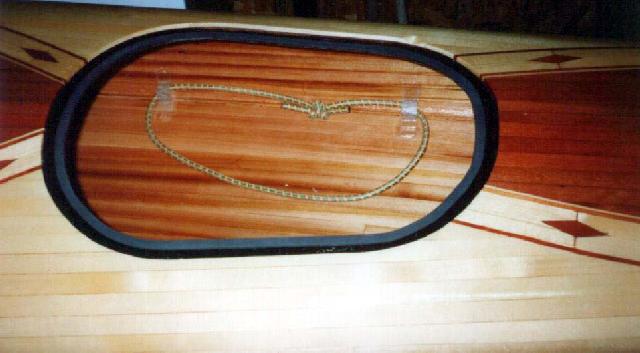 The
completed glass hatch lips after trimming, with closed cell foam gaskets
and internal bungies. The
completed glass hatch lips after trimming, with closed cell foam gaskets
and internal bungies. |
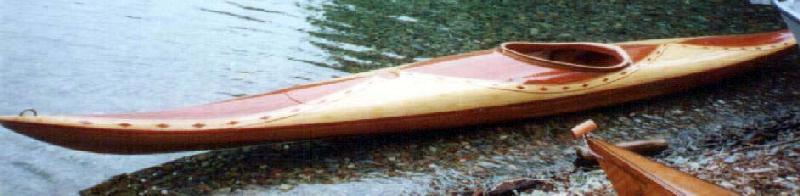 |
The Guillemot 18's first time in the water. |
 |
Blessing the kayak with a fine bottle of Full Sail Amber
ale. "Bless this boat and all who paddle it". My family said,"You're going
to pour that whole bottle on the boat?!?"
They just didn't understand that I've poured my heart and all my efforts into this boat, all winter long, and I'm not going to do the blessing halfway and be greedy enough to drink the boat's beer. Sheesh! |
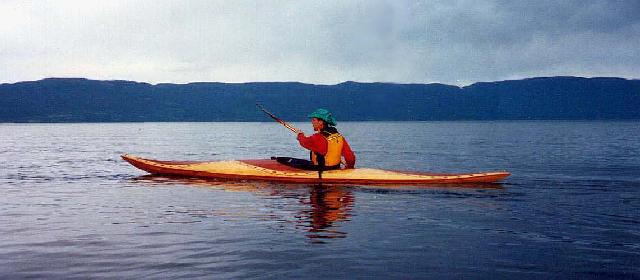 |
We got a few 2' waves that day, so I did a little mild surfing. It is very quick in the acceleration department. |
| Well, its July 21st and I've had the boat in the water 4 times. Its a super performer and I'm looking forward to logging some miles in it. I finally weighed it and to my astonishment, it only weighs 46 lbs. with bulkheads, hatches, and knee braces. This from a guy who built a 57 lb. Chesapeake 17! If I can build a lightweight boat, anybody can!! | |
 |
I took the boat out to the salty seas of the Puget Sound in August and hit the West Coast Wood Kayak Rendezvous, did a 2-day trip in the San Juans, and took this boat into Deception Pass--what a rush! I love this boat design more than ever. |
Chapter 8: Fitting Out and Customizing:
 |
My kayak has ultra-aggressive carved redwood knee
hooks. I also added some internal tiedown bungies to hold a bilge pump
and thermos or Nalgene bottle. These tiedowns won't work in boats
without hard chines, or with low decks, as there wouldn't be enough room
under your knees. These could present a potential foot entrapment
hazard, so evaluate your boat, your installation, and your own skills before
installing them on your own kayak AT YOUR OWN RISK!!
The front bulkhead is located at a distance from the seat that allows me to use it as a footbrace. It is also comfortably sloped forward to give me more foot room. |
 |
I fitted this kayak with a custom fiberglass seat and minicel hip pads covered with white neoprene. |
 |
I chopped the deck of this kayak to put in a deeper coaming recess and lower the overall height of the coaming. |
| Except for the wood for the hull which I purchased at the
local lumberyard, I sourced the rest of my materials from companies who
advertised on the Internet. I must say that, without fail, the service,
prices, and quality products offered by the following companies was unmatched,
and I would recommend all of them again. By choosing multiple suppliers,
you can select good quality products at the lowest prices.
I did ask several of them to contact me via email before the order went out, to advise me of availability or the final price, and Edensaw, Certainly Wood, and John R. Sweet all failed to return my request, but the rest of their services and products were too good to complain about a single unsent message. This is the second time I have used Raka products. I whole- heartedly recommend their epoxies--a great value! Hamilton Marine and Klingspor were "first-time" suppliers, but they had great service and promptly and enthusiastically answered all of my questions.
|
| Supplier and materials ordered | Cost for portion of order used in boat |
| Hull wood purchased locally in Montana.
Cedar, redwood, pine |
$50 |
| Epoxy and accessories were from Raka
in Florida.
3 gallons, squeegees, fillers - nearly enough for 2 boats |
$100 |
| 5.5oz x 50" cloth from Hamilton
Marine in Maine
40 yards - enough for 2 boats |
$65 |
| 2" Fiberglass tape from John R.
Sweet, in Virginia
50-yard roll - enough for 2 boats |
$10 |
| Ash for inner and outer stems from Edensaw
in Washington.
8 BDFT - enough for plenty of projects |
$10 |
| Veneer for coaming from Certainly Wood in New York. |
$15 |
| ROS Discs from Klingspor in North Carolina |
$30 |
| I also bought a strobe and compass from Cyber-Marine.com, in Connecticut |
$45 |
| I will later have a friend do a 2-part sprayed Urethane finish on my boat. The urethane is $100 per gallon, but I will split that cost with my brother. |
$50 |
| Total Cost |
$370 |
|
I love ordering stuff off of the Internet! (My wife, on the other hand, is threatening to cut up my credit card!) |
|
| | Home | Sea Kayaking | Homebrewing | Inverted | Granite Peak | Log Furniture | |
Copyright © 2002 Shawn W. Baker