I then cleaned the floorpans with TSP solution and applied red Rust Enscapsulator.


| Rust Prevention & Bodywork | ||||||||||||||||||||||||||||
| Interior Rust Prevention | ||||||||||||||||||||||||||||
|
||||||||||||||||||||||||||||
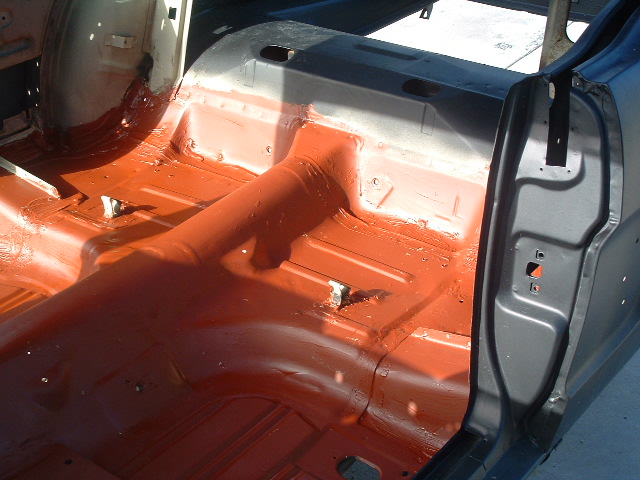
| I spent most of an afternoon using the vacuum cleaner to pick up sand from sandblasting. It was ALL OVER!! I then cleaned the floorpans with TSP solution and applied red Rust Enscapsulator. |
||||||||||||||||||||||||||||
|
||||||||||||||||||||||||||||
| Here's a view of the front floorpans. I painted Rust Encapsulator all the way up the firewall and underneath the dash, since I cut out the cowl vents. You can definitely tell I cut out metal and replaced it with something else - the lap joints were haphazard. | ||||||||||||||||||||||||||||
| Bodywork on the Unibody | ||||||||||||||||||||||||||||
|
||||||||||||||||||||||||||||
| My first attempt at replacing the roof/body seam sealer. I had to re-apply Rust Encapsulator and re-fill any remaining seam sealer voids the following week. | ||||||||||||||||||||||||||||
|
||||||||||||||||||||||||||||
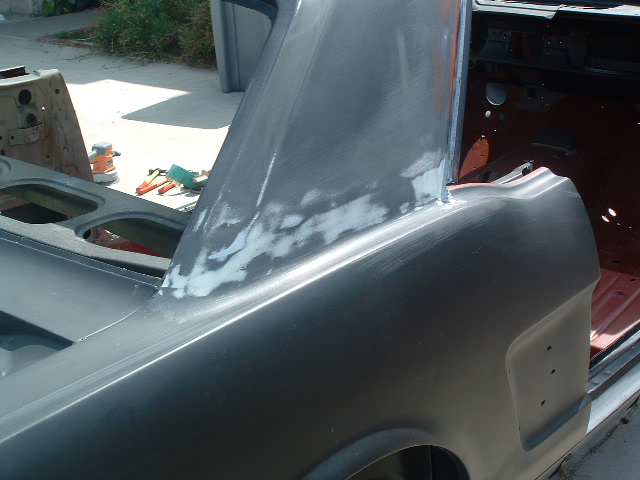
| Left "C" pillar bodywork. Most of the work in the corner is the result of me re-welding the pillar together again. There was a crack at that joint. | ||||||||||||||||||||||||||||
|
||||||||||||||||||||||||||||
| Right "C" pillar bodywork. Really not to much to do! | ||||||||||||||||||||||||||||
|
||||||||||||||||||||||||||||
| This illustrates nearly ALL the bodywork needed on the Left Rear Quarter panel. I didn't notice one more small dent near the door until after I applied primer. | ||||||||||||||||||||||||||||
|
||||||||||||||||||||||||||||
| At one time, the left rear quarter was smashed up in an accident, and this panel was not replace. I simply cannot get it fully straight, but most of the "waviness" will be covered by the fuel filler cap. It'll look just fine. | ||||||||||||||||||||||||||||
| In "Primering & More Bodywork", I'll show you the next steps in getting Woosie ready for paint | ||||||||||||||||||||||||||||
| Back to Homepage | ||||||||||||||||||||||||||||