|
|
|
|
|
|
|
|
|
|
|
|
|
|
|
|
|
|
|
|
|
|
|
|
|
|
|
|
|
|
|
|
|
|
|
|
|
|
|
|
|
|
|
|
|
|
|
|
|
|
|
|
|
|
|
|
|
|
|
|
|
|
|
|
|
|
|
|
|
|
|
|
|
|
|
|
|
|
|
|
|
|
|
|
|
|
|
|
|
|
|
|
|
|
|
|
|
|
|
|
|
|
|
|
|
|
|
|
|
|
|
|
|
|
|
|
|
|
|
|
|
|
|
|
|
|
|
|
|
|
|
|
|
|
|
|
|
|
|
|
|
|
|
|
|
|
|
|
|
|
|
|
 |
|
|
|
Exterior Projects and Systems |
|
|
 |
|
|
|
|
|
|
|
|
|
|
Engine Replacement Page - Apr, 00 |
|
|
|
 |
|
|
|
 |
|
|
|
- Click this LINK for all the gory details! |
|
|
|
|
|
|
|
On how we got from....
<= Point A to Point B =>
(no engine) (engine) |
|
|
|
|
|
|
|
|
|
|
|
|
|
Battery Compartment Upgrade - Feb, 03 |
|
|
 |
|
|
|
|
|
|
|
|
|
|
 |
|
|
|
 |
|
|
|
|
All cruisers strive to be energy efficient and depend on the house batteries to power all the 12vt goodies. Therefore, the battery system is generally on the list of systems to upgrade. We did quite a bit more than just change out the batteries, and have a page to prove it!
Click on this link to check it out. |
|
|
|
|
|
|
|
|
After |
|
|
Before |
|
|
|
|
|
|
|
|
|
|
Replacement Portlights/Paint/Transom Makeover - Nov, 03 |
|
|
|
|
|
|
|
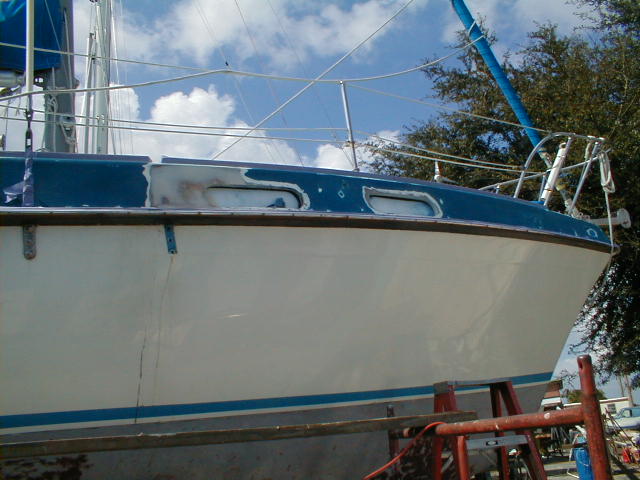
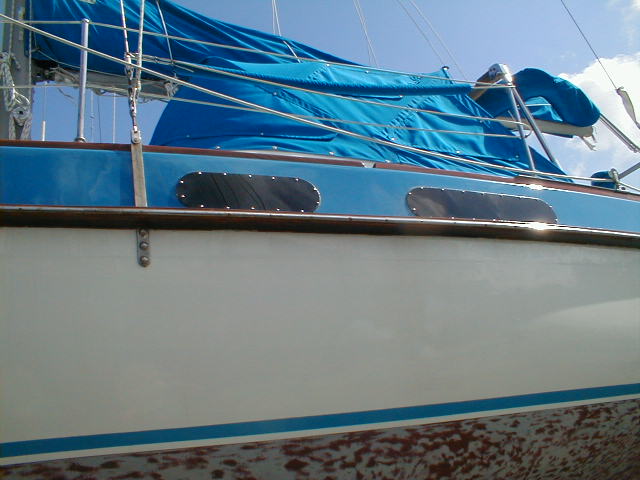
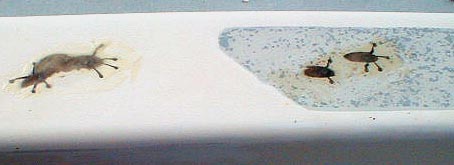
One of the things we wanted to work on after the spring shakedown cruise was the replacement of the plexiglas portlights. They had suffered from a lot of UV damage and were difficult to see through.
While we were at it we decided to repaint the blue between the toe and rub rails. Had to do a fiberglass repair where the old owner had made a bondo-type patch to fair out a mishap!
Click each picture for a larger view |
|
|
|
 |
|
|
|
 |
|
|
|
|
|
Before |
|
|
|
After |
|
|
|
|
|
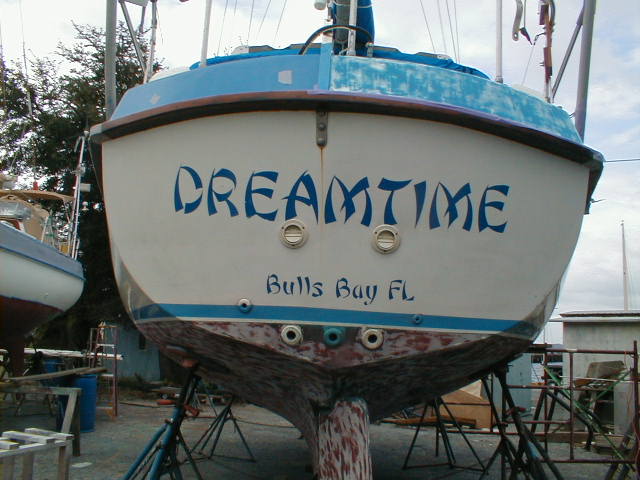
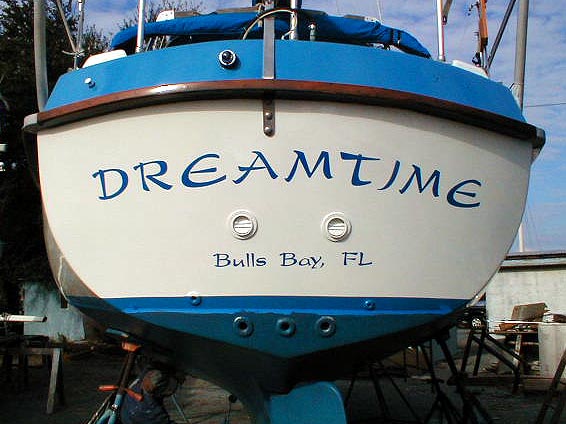
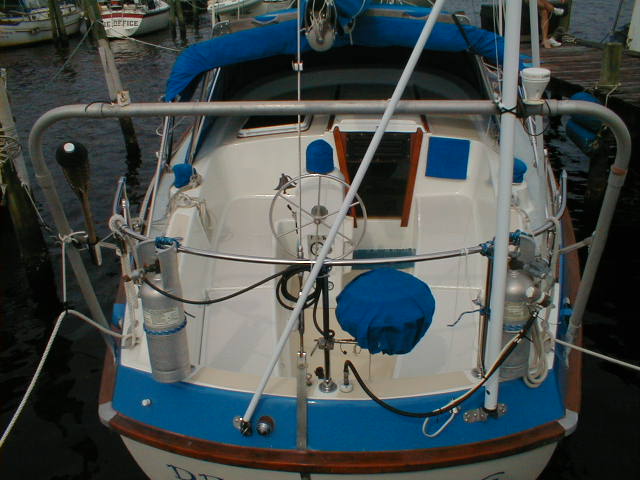
We also decided to perform a makeover on the transom, which was dated and tired. That included sanding, repainting and relettering while we had the boat in the yard. Rounded up a new font from the web (called Kudasai) and found a shop that would take the TTF file and cut the new vinyl lettering accordingly. Looks a dream now! |
|
|
|
 |
|
 |
|
|
|
|
|
After |
|
|
Before |
|
|
|
|
|
|
|
|
Cockpit Paint and Treadmaster - May, 04 |
|
|
|
|
|
|
|
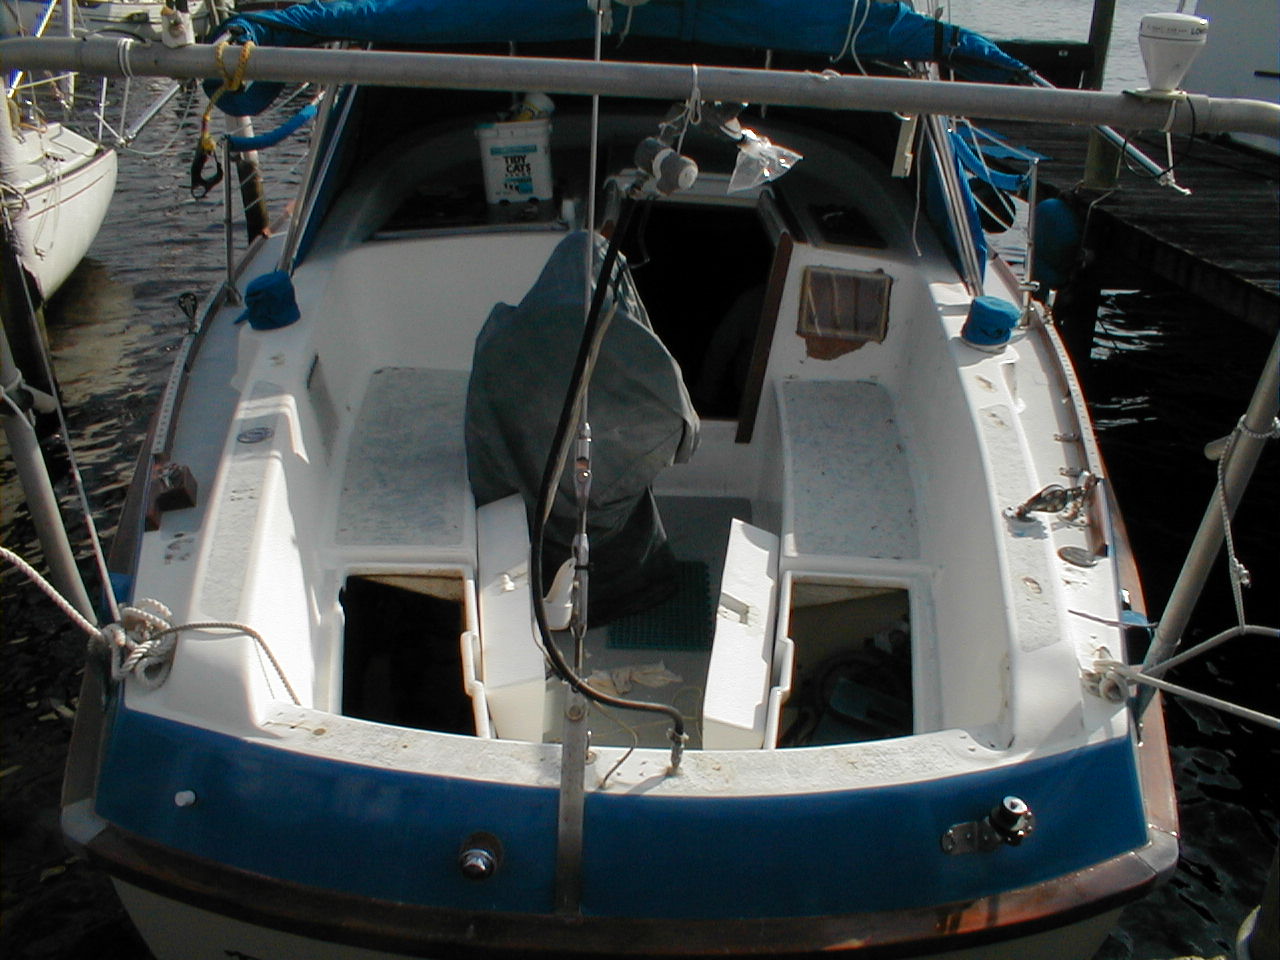
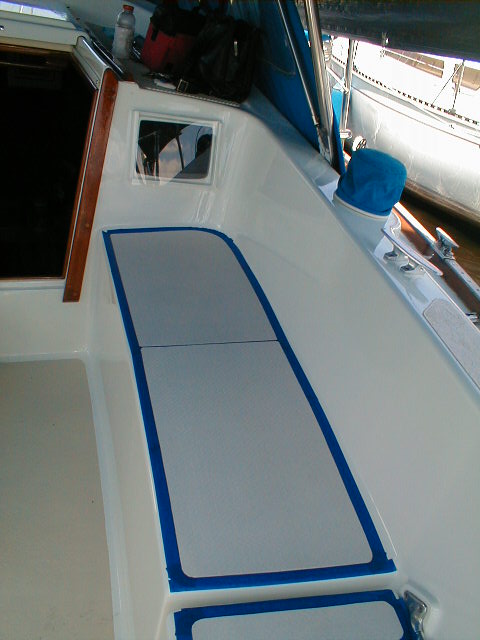
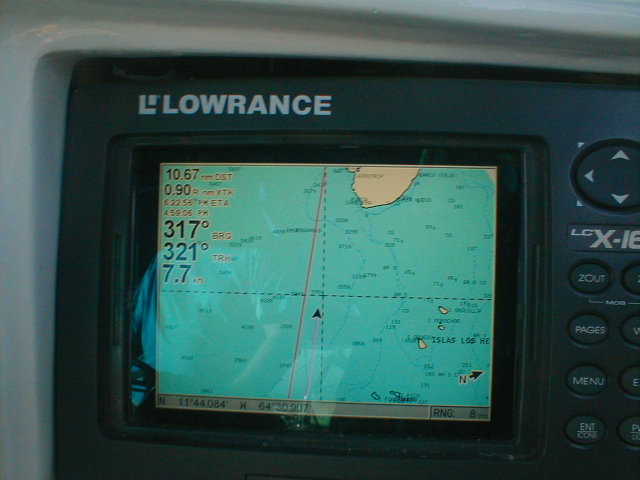
This project has been a loooong time in the process. With the addition of the new electronics, the Capt'n decided to glass in an opening for the Lowrance unit. This would effectively replace the old holes where the Datamarine gauges were removed. And what an excellent job he did!
We felt that the whole key to a successful outcome of this project was minutely detailed preparation work. That meant weeks of grinding down to gelcoat, fairing, and sanding to get a smooth surface with all stress cracks filled and faired. We removed all the hardware, including the stern rail, winch drums, cleats, and various other doodads.
After we were satisfied with the results, we applied 2 coats of primer, which we then sanded heavily. 2 more coats of primer with another sanding and we were ready for the Awlgrip application. For that, we got help from our Green Cove Springs painter, Reggie, who did a stellar roll & tip job on it.
Next it was mask off and repaint our non-skid areas on top of the transom and cockpit coaming. We are switching from gray to tan, and eventually the entire deck will reflect these color changes.
Then make patterns for the cockpit seat tops and cut and fit the treadmaster. Masking around the treadmaster's footprint, we sanded inside the taped area to ensure good adhesion for the thickened epoxy. Finally, installed the treadmaster and removed the tape. As the final step we painted non-skid on the floor.
Click each picture for a larger view |
|
|
|
 |
|
|
 |
|
|
|
|
|
|
Stress cracks were terminated with the drill and walled out with the Dremel prior to filling with epoxy. Then of course you must sand smooth. |
|
|
|
|
|
 |
|
|
Cockpit doors off and electronics bay roughed in |
|
|
|
|
|
 |
|
|
|
|
|
|
Treadmaster is installed, floor already painted |
|
|
|
|
|
 |
|
|
|
|
Cockpit is painted, now to the non-skid |
|
|
|
|
|
 |
|
|
|
|
|
|
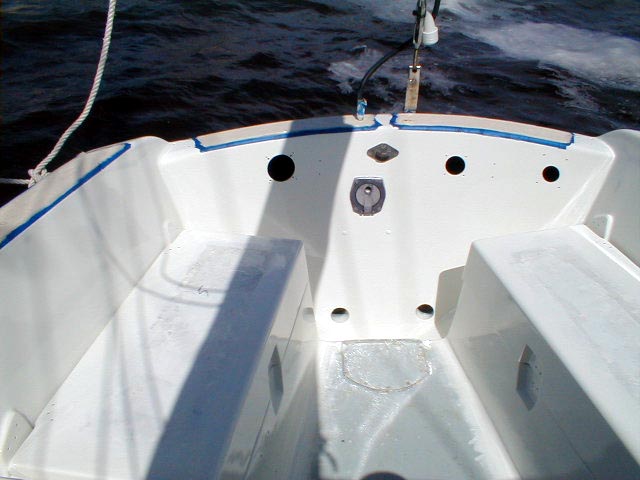
Good shot of starboard side including electronics bay but treadmaster is still taped off. |
|
|
|
|
The voila shot shows the completed project. Check out the sunbrella cover for the electronics bay to the right of the companionway. |
|
|
|
|
|
|
|
|
|
|
Companionway Coaming Area - Aug, 02 |
|
|
|
|
|
|
|
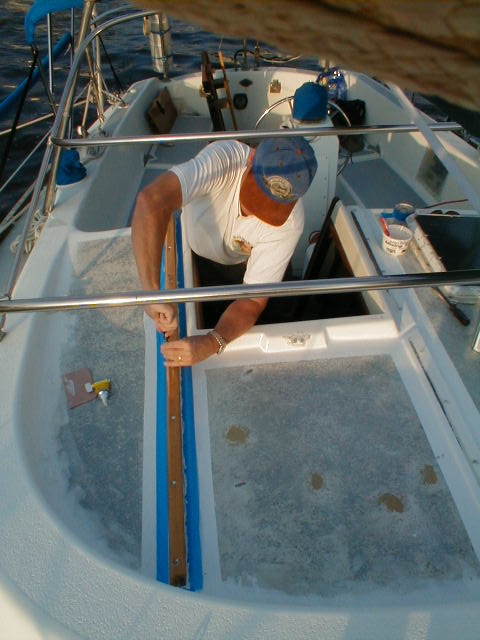
The deck paint is very tired about now. We are in the process of sanding, primering, painting and applying treadmaster to our deck surfaces starting first in the cockpit coaming area.
The previous owner must have used incompatible paint on top of the existing painted surfaces as small rust colored bubbles are apparent when sanding. We have decided to sand down to bare gelcoat. This is somewhat TEDIOUS to say the least, but perserverance pays, and we have one set of before and after shots to show for our troubles so far. Needless to say, we have a ways to go.
Additionally, the companionway slide had worn channels down into the fiberglass which caused misalignment when pulled forward onto the slat boards. We used epoxy (with filler) and aluminum strips to rebuild that area. The before shot shows the grooves in the fiberglass, plus the aluminum strips needed to repair it. The after shot was taken after the rebuild process is complete, along with the paint, the reinstallation of the companionway hatch, the teak rails and treadmaster.
We removed the teak rails that guide the companionway slide so that we could easily take out the hatch and repaint it with 2-part while we were at it. The after shot shows the area all put back together. |
|
|
|
 |
|
|
 |
|
|
|
 |
|
|
|
|
|
|
|
|
|
|
Before all the hard work |
|
Aluminum strips in and teak rails being reinstalled |
|
|
|
|
After all the hard work |
|
|
|
|
|
|
|
|
|
|
|
|
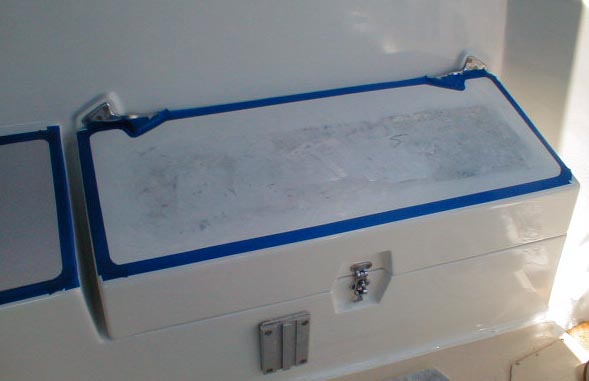
New Electronics Bay for Lowrance - May, 04 |
|
|
|
|
|
|
|
|
|
|
|
|
|
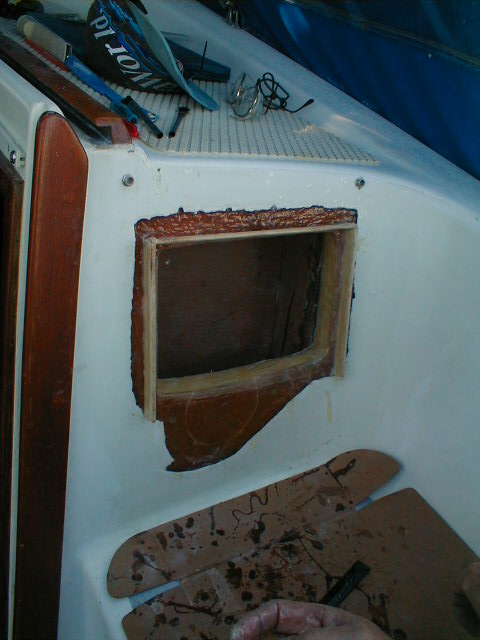
As a part of the cockpit makeover, Ed decided to glass in a new electronics bay for the Lowrance to get rid of the obsolete Datamarine electronics openings. He envisioned a glassed-in box opening with provisions for a plexiglas cover that would either slide longways covering the entire bay (for rain protection and while not in use), or slide in horizontally and thus stick out providing a platform for a shade cover. He started by cutting the new opening, then he cut and epoxied/glassed balsa wood strips which would act as guides for the plexiglas protective cover. Meanwhile, he cut the plexiglas cover and shaped it using a heatgun. After lots of fairing it was ready to be primered and painted. We also have a heavy-duty, gasketted plexiglas cover to use in port or in storm situations. |
|
|
|
 |
|
|
|
 |
|
|
|
|
|
|
|
|
|
|
 |
|
|
|
|
|
|
The voila shot |
|
|
|
|
|
|
|
|
|
New Electronics Project - Triducer - Jan, 03 |
|
|
|
|
|
|
|
The 2002 winter haul-out batch of projects included the installation of a new triducer which feeds sonar, speed through the water, and temperature data back to the Lowrance unit.
Here is a shot of the transducer plus the mahogany fairing block the Capt'n had to make to get a level installation through the hull. |
|
|
|
 |
|
|
|
|
|
|
|
Topside Deck Features |
|
|
|
|
|
|
One of the things that differentiates our Morgan Out Island 33' from others that we have seen is the addition of a couple of features topsides:
1) A teak deck box, real handy for quick storage.
2) The replacement of the standard molded forward hatch with a raised teak hatch box. A Bomar hatch is mounted on the top of the box . This raised approach provides extra protection from spray or waves taken over the bow. (That would never happen!) |
|
|
|
 |
|
|
|
|
|
|
|
Rub Rail with Stainless Strip - July, 01 |
|
|
|
|
|
|
|
The previous owner had the black rubber rub rail replaced in Venezuela with a mahogany rub rail. He soon tired of maintaining it, and covered it with epoxy and leftover bottom paint. We completely refurbished it some years back, however with our schedules we weren't doing the best job of maintenance ourselves.
This haulout we tackled the job. It started with it's complete stripping (using a heat gun and scraper) and sanding, then finished it with 3 coats of Cetol marine and 3 coats of Cetol clear. Wow! Looks fabulous and glossy. To protect it we installed a stainless steel strip.
See the few shots below for a taste of the manual labor involved.
I learned that a heat gun really lifts old finish pretty effortlessly, relatively speaking. I was able to scrape off all the old cetol down to bare wood after a 30 second blast of the heat gun. Pretty cool. |
|
|
|
 |
|
|
|
|
|
 |
|
|
|
 |
|
|
 |
|
|
|
|
|
|
|
|