
First, the hat needs to be painted to provide a good underpinning for cosmic ray deflection...Spray paint the hat in several general colors [See figure number 4, below]...
If you have a hat that is made of cloth, you need to pick a color that is opposite the color of the hat...If it is dark, use light colors. Likewise if it is a light one, use dark colors. Cloth hats sometimes need to have several light coats applied. Cloth hats also take more time to dry between coats or the colors will bleed together. Building a cosmic ray deflector takes time, but there are plenty of other things you can work on while the paint is drying. Clothlike materials should not be overpainted or they will become too stiff to work with easily. While not recommended for hats, items like vests, robes, shirts and pants can be machine-washed and lightly dried to soften without too much loss of color. I strongly suggest washing pants to prevent crotch chaffing...
On the other head, hard hats made of other materials usually look good in almost any combinations of colors, require less paint to cover and dry faster. I prefer soft cloth hats, even though they take more time...

Now that you've given your cosmic ray deflection headpiece a few basic colors it's time to make some stencils for it. Fold a piece of cardboard in half and cut out some wierd shapes [See figures a and b, above]...Make two or three and save the cutout pieces for later attachment to your hat...
By now your hat should be dry so use your stencils and apply some more paint...When the stencil is all wet with paint turn it over and apply the paint to the hat for more neat patterns... If you are working on several hats at a time with your friends at a covered dish meeting, it works out great to wipe the paint from the stencils on someones cloth hat as this type of painting makes for a cleaner impression. Once you have your cosmic ray hat covered pretty good let it dry out...
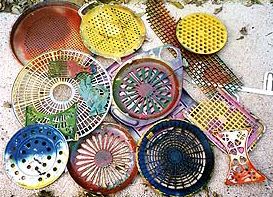
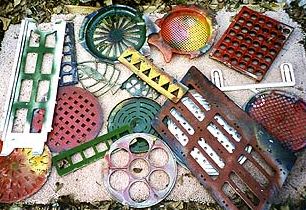
Here are a couple photos of stencils collected over the years. Most of them come from kitchen areas of thrift shops. They last longer than paper cutouts mentioned above, but they lack the personal feeling homemade cutouts will give your hat...
Next, get some acrylic or enamel paint and some small brushes...
Outline all your spraypainted designs... [See figure 6 above]. This will help define the stenciled designed. This is especially important on cloth items, which may have absorbed lots of paint in the first coats. Paint some names of your favorite places and people and maybe something like 'cosmic rays
go home'... If you go forward to the section on shields, you can see a couple good examples of this important deflection layer...Then go back over the whole thing again with crayons and magic markers...Here Zippie might ask, ''Are you finished yet?''
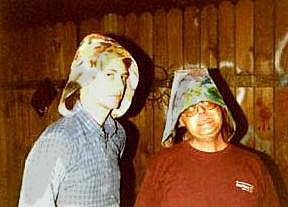 Curtis and Steve
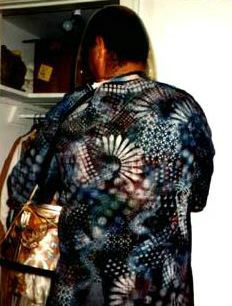 Curtis in Robe
Hopefully you now have a hat that is either asthetically pleasing or truly horrible to the eye...In either case it doesn't matter because you're about to cover it with lots of stuff and the appearance now will be somewhat obscured with another layer of cosmic ray deflection items...You have now compleated the first stage of your cosmic ray hat...
Make sure you like what you have, because it will be difficult to come back and fix any Paint problems later.
Go on to Part 3 -- PREPARE TO ATTACH
Here's the original leaflet of The Hat Comes First, in large gif format. You should be able to print these front and back and have a hard copy...If you have any problem, please let me know, I don't have a printer, so I haven't tried this yet... ''The Hat Comes First''... Front Here's the Back
Part 1 -- THE HAT COMES FIRST
Part 2 -- PAINT UNDER COAT ESSENTIAL
Part 3 -- PREPARE TO ATTACH
Part 4 -- THE FINISHED HEADPIECE
Part 5 -- THE COSMIC RAY SHIELD
Part 6 -- COSMIC RAY QUILTS AND BEYOND
 also supports free speech
hits since March 17th...
© 1996 -1997 a.aswell@gs.net