
WET #22A: Pencil and Watercolor Sketch
April 17, 1999
 |
|
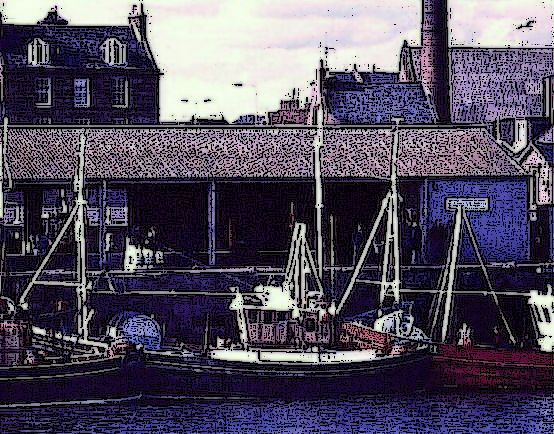
The WET image this week was a photograph of boats alongside a wharf.
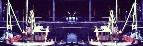
For this first image. I made 2 copies of the original. I used gaussian blur on the first and used it as the base.
On the second, I enhanced the edges "more," then used "find edges." I changed it to grayscale, then selected white at 50 (brightness), selecting similar. I then inverted this and copied it, pasting it onto the blurred image as a new layer. I then blended the two layers at 100% burn, merged the layers and saved.
|
WET #22B: The New Sailor
April 17, 1999
 |
|
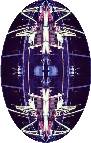
Since the image was of sailing vessels, I thought I'd see about creating a "modern" sailing vessel...in space!
I cut out a section of the image, then copied and mirrored it alongside the first cutout. Then I selected that combined image and copied and flipped it below the first. This gave my my "4-fold symmetry."
I then enlarged the canvas to a square and rotated the image 90 degrees. Next I applied the circle deformation once. Then I used the horizontal perspective deformation at 100%. I repeated the horizontal deformation at 50%. This gave me the basic "space capsule."
For the background, I made a new image a little larger than the space capsule. I used an off-center sunburst fill of med to dark blue. Then I added 3% uniform noise. Next I selected white and used my spray can at 1% density, about 50% opacity, and a size of about 17. I sprayed very sparingly to create the stars. (And used a 1-pixel brush to cover the extras with matching background colors.)
I now copied and pasted the space capsule as a new layer on the background. I added a 60% opaque white drop shadow at 0 vertical and -12 horizontal, with 12 blur, then another white drop shadow, this time at 0 and -13 with a 12.8 blur.
I created a world by selecting a circle on a medium blue background, adding dabs of deep green and white at various opacity. I softened it once. I then contracted the selection 2, then feathered it 1, then copied and pasted it into the main image, before merging everything and saving the image.
|
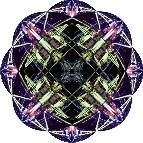
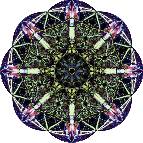
WET #22C: Kaleidoscope
April 17, 1999
 |
|
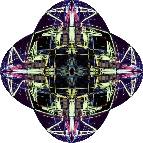
This image started out with the oval image I used in the "Sailing" graphic. I'll repeat the instructions here, with examples: |
|
I cut out a section of the image, |
 |
|
then copied and mirrored it alongside the first cutout on a doubled-width canvas. |
 |
|
Then I selected that combined image and copied and flipped it below the first on a doubled-height canvas. This gave my my "4-fold symmetry." |
 |
|
I then enlarged the canvas to a square so I could rotate the image 90 degrees without losing anything. |
 |
|
Next I applied the circle deformation. |
 |
|
(Here I've changed my direction from what I did with the space capsule.) I enlarged the background, copied this oval and pasted it on the original oval as a new layer, rotated 90 degrees. |
 |
|
Now I blended the two layers at 100% Burn, then merged visible layers. |
 |
|
Again, I copied this image, pasted it on its original as a new layer, and rotated 45 degrees. |
 |
|
Again, I blended the layers at 100% Burn, then merged all to complete the kaleidoscope design. |
 |
|
For the background, I created a new image a bit larger than the kaleidoscope image. I filled this image with a gold color, then added 3% random noise. I blurred with a Motion Blur at 84 degrees and intensity of 15.
I repeated the addition of 3% random noise, then blurred with Motion Blur at 84 degrees and intensity of 25.
I finally Color adjusted the Highlight Midtone Shadow to H=82, M=50, S=50 to get the cherrywood effect.
Now I copied the kaleidoscope as a new layer to this background. I added a dropshadow of 0, 0, 100% opacity and 10.6 blur in a pink picked up from the image, to outline the kaleidoscope slightly and make it stand out a bit from the wood.
I added the frame by using "Add Borders" 1 pixel symmetrically several times, from a deep gold up through white, then back down to deep gold. Then I merged everything and saved. |
Everything on this page was done in Paint Shop Pro 5, using only the original filters and functions supplied with the program.
|