Material
- Cardboard for pattern
- Wings
- Fabric (I found old white vertical blinds and decided
to keep them for crafting)
- Body
- Paper, Fabric, Fun Foam, Contact Paper, Tinfoil
- Clothes
- Paper, Fabaric, Contact Paper, Tinfoil
- Glue, glue gun, fusible web or stick and hold
- Fabric paint
- Fishing line
General Instructions
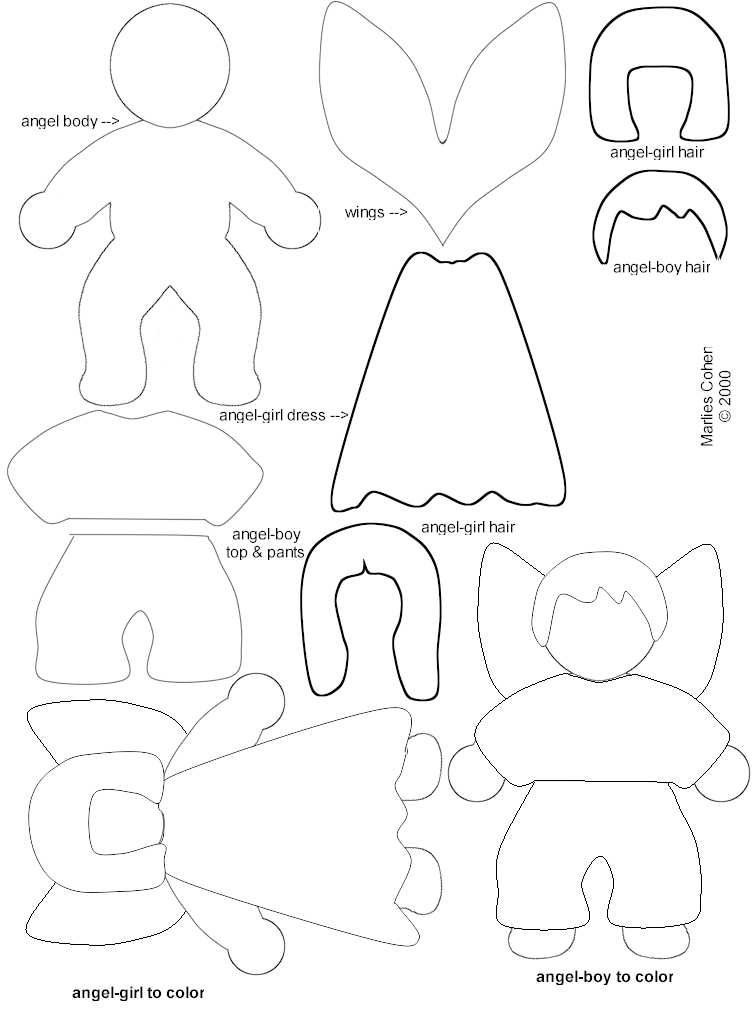
- Print the pattern
on heavy paper or card stock. I set my printer to print
the page at 100% size of the pattern. This will make the
angel about 4 1/4 inches tall. If you change the way you
print the pattern it will either be larger or smaller, but
the clothes will always fit the body.
- Cut out the pieces. There is the body part, the wings,
hair for a boy, hair for a girl (long and short), a dress
for the girl and pants and a top for the boy.
- There are also two finished angels on the pattern, a boy
and a girl angel that also be colored in.
Now you have to decide on the material you are going to use
to make your angel ornament.
Gathering the Pieces
- Trace the body twice (a front and back). You don't have
to reverse the pattern as it is symmetrical. I also found
that the gel pens work quite well for this purpose especially
on fabric. Cut out inside of traced lines.
- Trace the dress for the front of the angel. Now you have
to reverse/flip the pattern for the back of the dress so
that the two match when put together.
- Trace the hair twice. On the front piece mark the full
pattern so that there is an opening for the face. The back
is just the pattern without the face cut out.
- Trace the wings twice. I use two different colors. The
front is white and the back matches the color of the dress
for girl or top for boy.
Putting it Together
I used the glue gun and stick and hold to put the angel together.
I imagine that fusible web would also work.
- Glue or fuse the two body parts together.
- Run a bed of glue along the neckline of the dress and
press onto the body.
- Lift dress and run a bead of glue diagonally down to the
middle of each leg and press dress down.
- Turn angel over and repeat on back.
- Now lift the front of the dress/shirt/pants and run a
bead of glue along the edge of the bottom piece and the
press the two pieces together.
- If you are making a boy angel start with the top and then
the pants. Flip angel over and repeat on back.
- Now look at your angel and decide which side you want
to be the front as the next step is to glue on the hair.
- Place a dot of glue at the top of the head and center
the hair so that it extends slightly above and the sides
of the head. Run a bead of glue down the sides of the head
and press.
- Flip angel over and run a bead of glue along the edge
of the hair and place the back of the hair on top and press
the two edges together.
- Glue the two wing pieces together.
- Place angel onto wings and pick up gently and flip so
that the angel is on the bottom and the wings on top.
- Glue wings to angel.
- With fabric glue make two dots for eyes and a small line
for the mouth.
- Take about 4 inches of fishing line and tie a knot. Thread
loop part in a needle and stitch through top of head, remove
needle. Take the part with the knot and put through the
loop and pull. You now can hang up your angel on the Christmas
Tree.
|
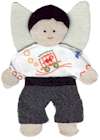
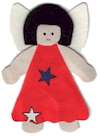
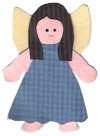
fabric angels

fabric angel with
fun foam body
paper angel
tinfoil angel
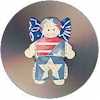
contact paper
angel
|
Paper Angel
For this angel is wanted to see if I could do it with only
craft paper. It worked just great. So this way it is a project
that mom's can do with their children. I have a paper crimper
and used it on the hair and dress to give it dimension. I
imagine that flower pictures from a catalog would also make
wonderful clothes.
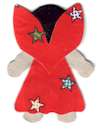
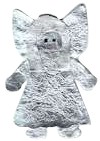
Tinfoil Angel
This one was very easy to make. I only cut one body piece
and no back piece for the hair. I used decoupage glue and
glued the cut out parts onto crumpled tinfoil. When it is
dry, cut out within about 1/8 of an inch of the shape. Gently
fold tinfoil to the back of the piece. Now put glue on the
seond side and put onto crumpled tinfoil. Assemble like the
other angels.
Contact Paper Angel
As I was continuing with my experiments I found some contact
paper that was mostly skin colored with a few pattern. Now
how to put it together was a different story. So I decided
they would look lovely on a CD.
|
