| The Grand. 1998 Grand Cherokee Laredo Limited Edition |
| Home | Front to rear coil swap by Krash80 | Links | ZJ Specs | Adventures | Geocache | Geo Tracker| MOAB 2006 | RE Long Arms! |
I figured it was time to start a second page of the ZJ stuff. To be honest, I have been neglecting not only the ZJ itself, but the supporitng web page. I will lay out a few changes I have worked on over the last 6 months or so.
You can call me an information freak. I like to know what is going on with the Jeep. In today's world of computer controled engines and accessories, there isn't a whole lot you have control over. All you can do is monitor what is going on. To be truthful, the ZJs come with a decent instrument cluster. Right in front of you are the Speedo, Tach, Oil Pressure, Water Temp, Fuel Level and Voltage. I was missing some things and after having to remove the tranny for an unplanned rebuild, I installed a transmission temp gage. I installed the sending unit on the rear of the oil pan. I thought about inline... but I finally felt that the temp of the tranny fluid in the pan was more accurate as what was going INTO the tranny pump.
I got a single gage a-pillar pod from AutoZone and hung up a iEquuis oil temp gage. Beautiful. That worked for a while... until I wanted to add something else. I added an O2 sensor gage which shows a real-time fuel mixture. The 4.0 (like most other modern engines) runs a bit lean. This is no exception... even with my 180* thermostat.... another iEquuis gage found its way to the pillar, and it was mounted in a dual pod along with the tranny temp. So. I had an on-board air unit and then reinstalled the single pod above it. That lasted a while... but then I wanted to add a fuel pressure gage. I got the gage... and it laid in the back of the ZJ for over a year.
So.... after a year.... I started to try and figure out the reason I had been putting it off. The fuel system is a pretty tight unit. After looking long and hard at how I was going to get a sending unit with a 1/4" pipe fitting into a system that uses a 1/4" flare... I found what I needed in a local hardware store. They had a prefabbed double female 1/4" flare set on a very short tube. I used a combination of angle fitting and viola!!!! success. I have some pics of the end result.


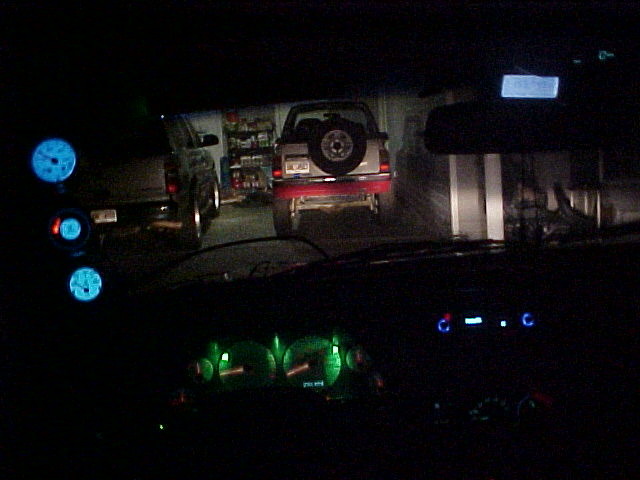
If you look at the layout above, this is the current arrangement and I am satisfied with it. A keen eye will note that the backlighting has bright spots around the rim. I actually slid the trim rings off of the gages and applied 35% window tint to knock down some of the brightness. These are good gages and are IN-YO-FACE BRIGHT!!!. I need to go back and add a tiny pair or tinted dots at each end of the fuel mix gage because this one uses two LEDs at each end of the arc. That makes them a tad brighter. For the time being, my air pressure gage and switch are laying on the dash. A lack of time has left me with too few hours to devote to cleaning that up.:-(

Here is a daytime shot. Note the hole where the power switch "was" for the air compressor. I had intended to put a little switch in there so if I wanted to - I could kill the backlighting all together on the pillar gages. As usual. Time got away from me.
This pic is actually and older one. I was experimenting with some LEDs in the top of the main cluster. I had gotten a set of LEDs and drilled the holes for them. The problem I found is that these LEDs were more directional than I had thought. I later went and got a LED light strip. It is now WELL lit. I have to keep the dimmer down all the way to keep from being blinded. I mounted the light strip at the top of the instrument cluster. I removed the cluster from the Jeep and popped the cover off of it. Came together real nice....
If you look above, you will see the green LEDs that I installed initially. I installed the LED strip. I comes with and adhesive backing and is REALLY sticky. I had cleaned the plastic with alcohol, so it was perfectly clean. I then used the little "try me" battery and momentary switch to confirm that my lights worked great.


Here is the final shot and is what I have now. Don't mind the shop. :-D
Note that the backlighting on the HVAC controls is pretty dim. The dimmer is actually all the way down.

Please sign the guest book below to leave comments or just to say you dropped in.
Sign Guestbook View Guestbook
HOME --------------------------------------------------------------------------------