TR7 Cooling System
With particular attention to the water pump...
All aluminum engines of any type require considerable care and attention to the cooling system. Any hint of overheating must be fixed before the heads warp resulting in major repairs.
The TR7 is especially tricky!
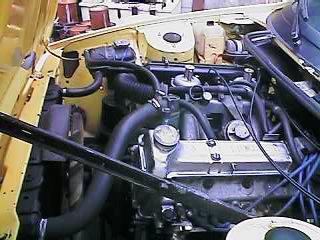
The first thing your have to get used to is the fact that the water pump is driven off a jackshaft and is not at the front of the block as in a conventional engine. This I have been told is because the engine is half of a V8, and they needed something to do with the jackshaft that also runs the distributor.... And therein lies the biggest problem with the beast.
I don't want to scare you, as the repair of the pump is well within the ability of a decently equipped repair shop. But, if the fact that you have to remove the intake manifold to get to the pump scares you you had better steer clear of the next section.
 As well, there is another weird fact, and that is the location of the header/expansion tank for the radiator. It it below the level of the thermostat. That means if you are topping up the radiator you must exercise extreme care to be sure that the thermostat housing is full. I found the easiest way to get this really topped up is to unhook the header tank clamp and raise the tank as high as possible when filling the system. From then on in, don't let the tank go totally dry. It is possible to also get a special funnel (or a tight fitting plastic one) and actually raise the filler water level.
If you have an early version there is actually a removable cap on the top of the thermostat housing you can undo and top up the system. Otherwise, be careful!
 The signs of a leaking water pump are quite easy to recognize. When the pump goes it starts to drip water from a slot in the block below the cooling hose, at the front of the block. Any dripping water from here means the imminent failure of the pump. But, don't panic, it is not that tough a job.
Start off by labeling and removing all the hoses from the intake manifold. There are two water hoses on the manifold that are tough to get at. The one at the back, and one under it. Not to worry, they can be taken off once the manifold is loose. Oh yes, drain the system by taking off the lower rad hose!
Take off the fuel line at the manifold fuel rail. Remove the vacuum advance line at the small trap connected to the back of the fuel rail.
I have a manual choke, so follow the two choke cables and disconnect them. The throttle cable is between the two carbs, and can be removed by taking out the hair clip. Remove the pin, but try not to drop the little washer on one end. Undo the top mounting nut at the cable sheath end and slide the cable off the mount.
Take off the top of the thermostat and remove the thermostat. Make a mental note of which way up it goes at this point. It will prevent you from questioning which way up it goes when you put it back...
Remove the 6 cabs mounting bolts and remove the intake mainifold with the carbs intact. There is a small pipe that joins the mainfold with an "O" ring at both ends. Don't loose it or pinch it. As well, now may be the time to undo the two heater hoses I mentioned earlier. I also learned to curse the front mounting bolt. Without a universal coupling it is a pure bugger to get off!
 You should now be faced with the water pump impeller staring you smack in the face. It is held in place with a left hand bolt, so the first thing you should do is undo the bolt by turning in a "clockwise" direction. One of two things will happen now. First and easiest the whole pump assembly will pop up without coming loose. The other is that the bolt will unscrew. If the latter, take a vice grip plier (mole grip in the UK) and clamp the impeller. Turn the entire impeller counter clockwise and the water pump assembly should back out on the jack shaft. If neither work you will have to prise the assembly out. Put the screw back in without the washer and take a couple of screwdrivers and lever the pump out by raising the bolt. But, be sure to protect the surface of the block to prevent nicks.
 This photo shows the entire pump assembly, complete with the brass housing around it (impeller removed) It may not come out with the housing. If it stays in the block, you might just as well leave it there as removing it without due caution can damage it. And the "O" rings on it are probably ok if not disturbed. You may also just be able to gently prise it up and out with a screwdriver. I personally would say leave it...
If you have access to a press at this point you can proceed happily. If not, you might try and track down someone who has. Do not try and drive the impeller off the shaft. It is guaranteed to break it. Put it in a press, or rig it in a vise, with a small old socket on top of the shaft. The idea is to apply pressure to the shaft to drive it out of the impeller. You will have to heat the impeller to get it to release, The combination of pressure and heat are all you should use. Do not back the screw out and use it to apply pressure. It is a fine thread and you will totally bugger it. A small socket will do the job. As well, the cage can be pressed off easily after the impeller is off. Now it is just a case of taking the thing apart. If you busted the impeller, get to a wrecker, or order a complete rebuilt pump assembly (about $280). You cannot replace the impeller by itself from a parts jobber.
By this point you will probably realize you need to order parts. Resist the urge to keep anything. Parts to rebuild the entire assembly are less than $40 bucks. I got mine from Victoria British, but Moss and others all have parts. I have a link to both of them on the main Triumph page. Get the "O" rings to do the job too (there are 3 of em). Re gaskets get the "O" rings for the connecting tube, and the one that goes between the head and the manifold. You have a top water seal, an oil seal and a bearing to replace on the pump shaft. Check the quality of the shaft. I got one from a wrecker that had a pitted shaft, but good water seal seat. Between the two of em I have been fortunate so far with parts interchange. A pitted shaft or a bad seat can be trouble if not replaced, and to do that you need to visit a wrecker. They are not shelf items! Re assembly is straight forward, and if you have the catalogs or a manual it is easy to see which way up things go. But, hopefully you made notes when you took it all apart!
If you left the impeller housing in the block you will have to assemble it in the block. The impeller cannot be totally pre-assembled then dropped in. Assembly however is straight forward either way. First place the oil thrower. It is concave and goes curve toward the gear. The bearing is then pressed in place, and the clip is replace. Watch that the clip seats in the groove. Insert the impeller into the housing and seat the oil seal, flat face against the bearing. Make sure the bearing is fully seated or you will have big problems later. A large socket will do the job to tap the bearing home. Do not beat on the inner race or the shaft! And make sure that the oil seal is fully against the bearing or you will have water in the oil at a later date! The water thrower is installed (the little metal cone thingee). Then the graphite seal. Flat face against the thrower. Put the little "O" ring on the impeller shaft, re-install the impeller. Tighten up the left hand holding bolt and you should be done.
When re-installing the water pump coat the inside of the block with a light grease so that the "O" rings will seat not jam. On the other hand, the "O" rings on the little connecting pipe may be covered with a non hardening water resistant gasket compound.
Now, on the subject of gaskets! Once again Triumph has a quirky assembly. You have to dry assemble the water pump cover without gaskets. By finger tightening and evening out the pressures you will then have to measure the gap. This is because the impeller hits on the pump cover at this point. You measure the gap then add .010 to .025 to this and order the needed gaskets. They are sold in different thicknesses and are used to assure the correct "Head Space" for the impeller. Talk about Chicken Shit!
Well, at this point you can re-assemble the intake. You might also want to replace the little heater hose under the manifold at this point too. Bloody miserable if the little sucker lets go later. And you need the factory replacement unit, a straight piece of hose will drive you nuts and probably kink anyway! When re-assembling anything be sure to use a little grease on the "O" rings to allow them to slide together. As well, good clean surfaces here allow for trouble free assembly.
Beyond this there is not much more to say about the water pump. Now it is up to you to make sure that the cooling system is filled with no air locks. Refill the system with the heater on hot to let the core fill as well. And, as I mentioned earlier be sure to make sure that the coolant gets up to the top of the thermostat housing by the use of a funnel or raising the header tank.
OK, we are done. Here are some choices: