 Teacher
Tip:
Teacher
Tip:
The speed calculations can be done
in more than one way, depending on the time, class level, and the resources
of your class.
The Speed Testing Lab:
Should be set up and ready to use at all times, so that students can be
actively testing and redesigning their robots at all times. Set it
up somewhere where it will be out of the way (hall, extra room).
Several speed test labs floors should be make so that more than one group
can be testing at a time (Make sure that all the testing areas are the
same).
-
We suggest that you use black electrical
tape on a hard floor to create the test track.
-
The start should be TWO METRES from
the finish.
|
1. SPEED CALCULATION WITH A STOPWATCH
-
Student measure the speed by using
a stopwatch to record the time (in seconds), it takes their vehicle to
drive between the start and stop lines.
-
Students enter their data into their
charts and into EXCEL.
-
Have the materials (stopwatches) ready
at the station, and make sure the children are familiar with how to use
them.
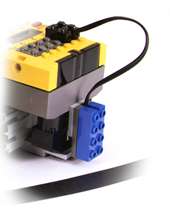
2. SPEED CALCULATION WITH ROBOLAB
Students can also calculate the
speed of their vehicles using a light sensor and Robolab's INVESTIGATORTM
programming.
-
Students
connect the light sensor to their vehicle so that it is pointing towards
the ground.
-
Students
program it to sense the black lines and collect time data.
-
Students
can manipulate their data in INVESTIGATOR or export it to EXCEL.
-
This
method is optimal for a class with good access to computers and sensors,
a lot of time, and previous Robolab experience.
|
 |
DISCUSSION:
-
Discuss
with students the importance of doing several trials and taking an average
when testing a speed.
-
Why
would you not simply use your first result?
-
What
can account for the differences in results?
-
What
kinds of strategies can you use to minimize error?
-
Brainstorm
ideas of how errors in measurement can have adverse effects.
-
Discuss
the most appropriate standard units to measure the length of the track
and the time.
|
 Back
to Unit Plan or to Teacher
Tips
Back
to Unit Plan or to Teacher
Tips