
An Introduction to the Restoration of Old Vinyl Records at Home
Sound Editing with the best software - Cool Edit Pro
Background Noise eliminating
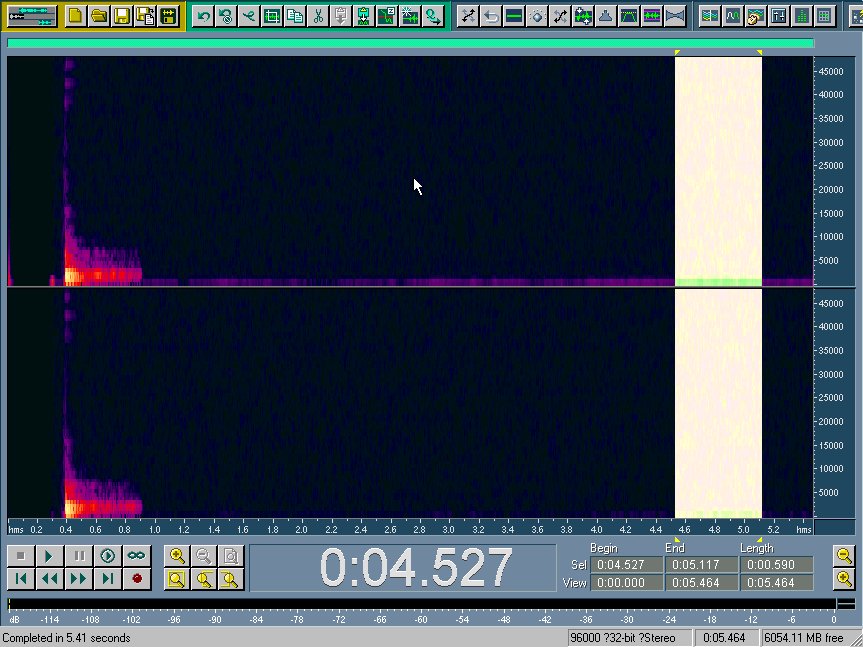
We are going to eliminate the background noise with Cool Edit Pro for the previously saved "Untitled.wav".
First you have to highlight a small part of the background area. Now select "Transform/Noise Reduction/Noise Reduction..."
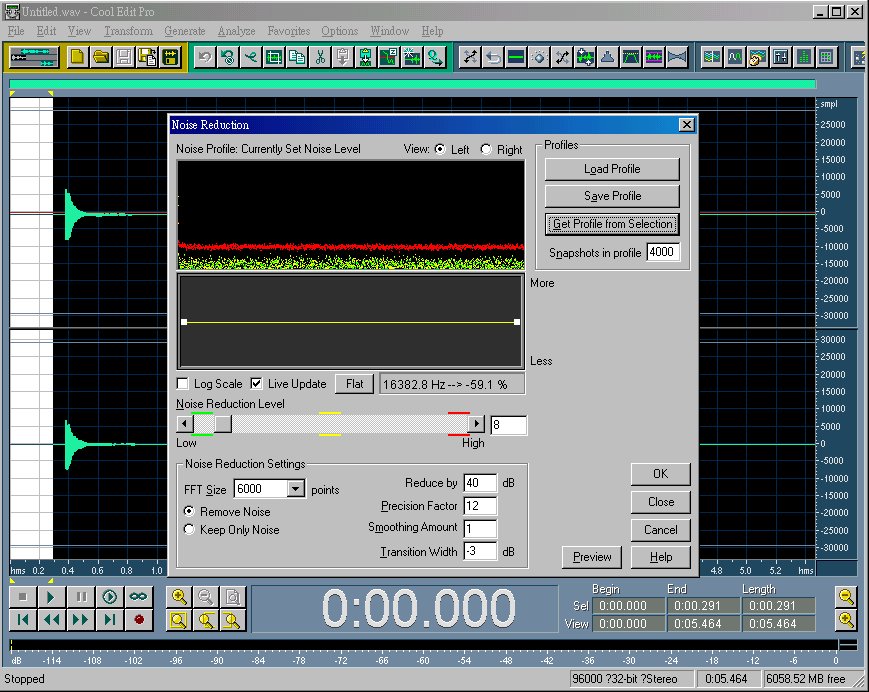
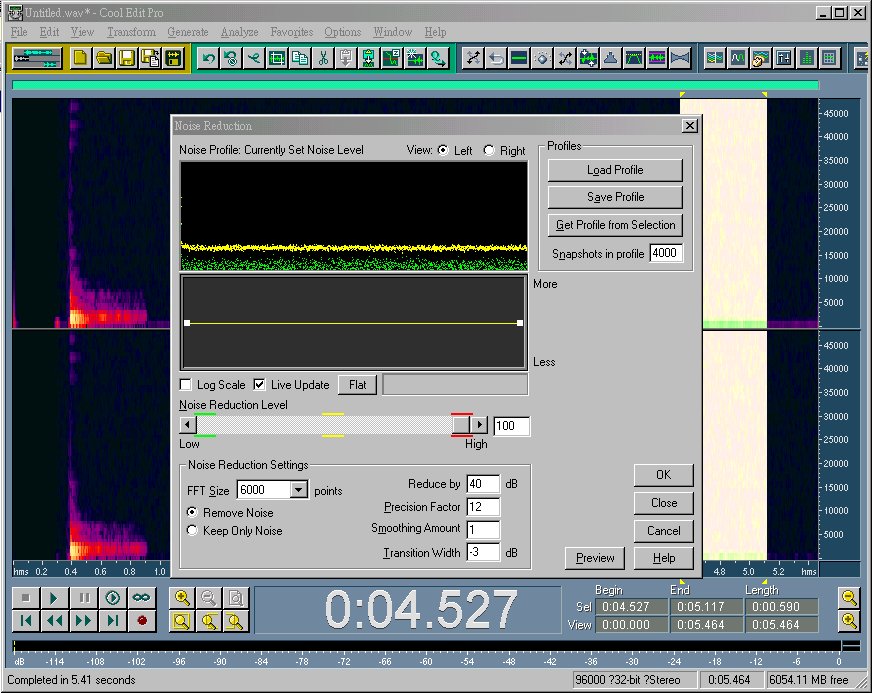
Click on "Get Profile from Selection" so that the background noise is sampled according to the particular settings as shown (You can click on "Help" button to see what do these settings mean). After a while, the background noise is sampled and shown as red-yellow-green signals.

Click on the slide-bar of the "Noise Reduction Level" to drag along horizontally. You'll see the yellow lines going up and down between the red and green lines. If you slide up to the right, the sampled background noise will be removed completely (You can also choose to "Keep Only Noise"). If you click on the "OK" button, the highlighted area will be wiped out of the background noise.
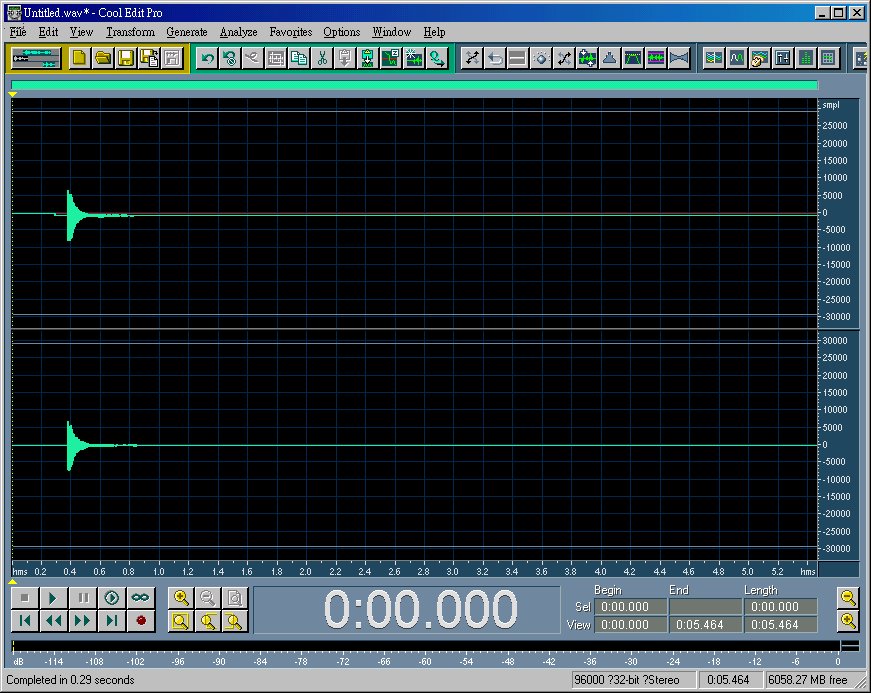
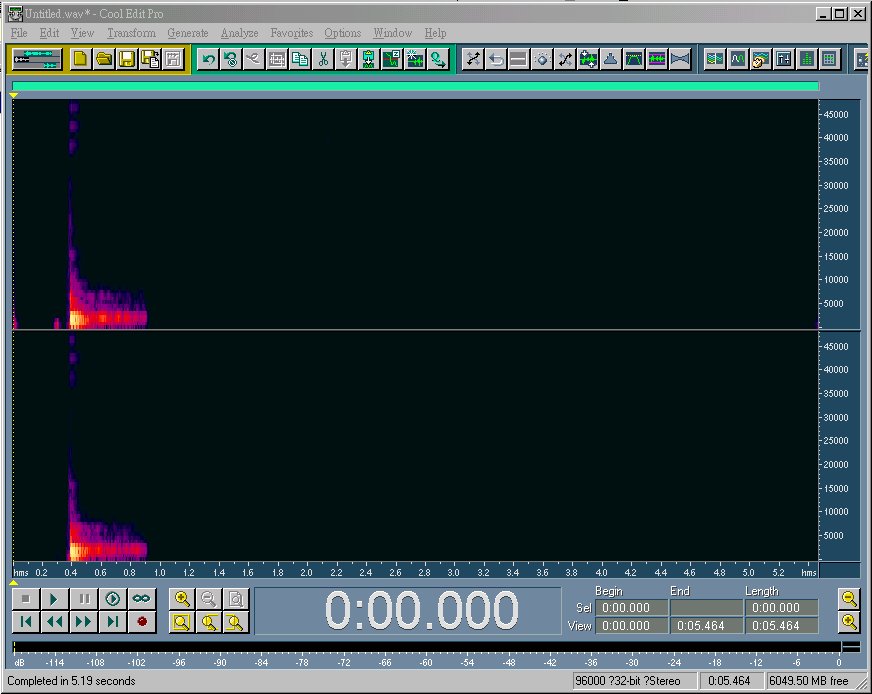
See. The background noise is eliminated over the previously highlighted area, suggested by the removal of the DC bias.
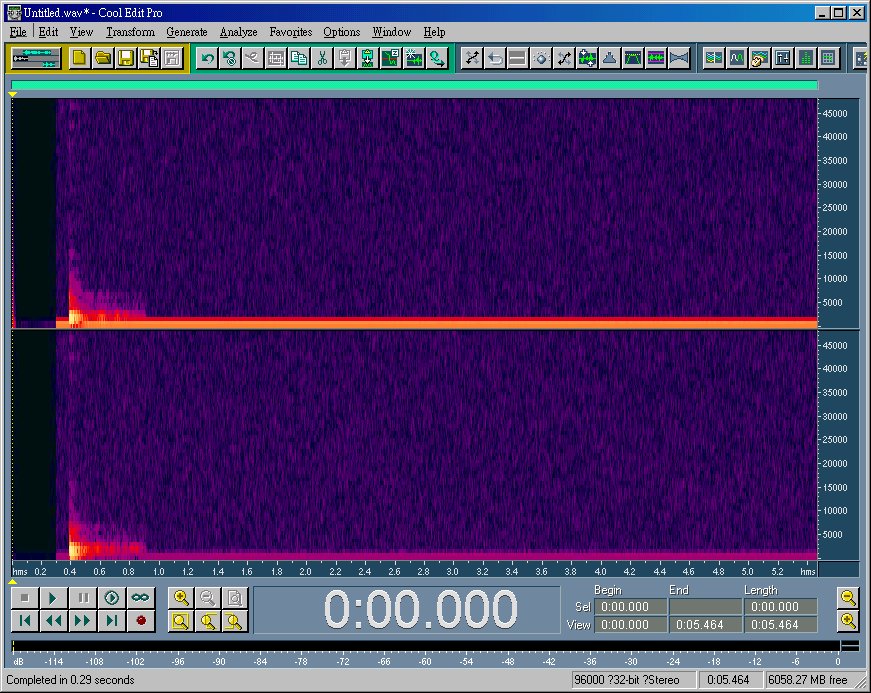
To view it clearly, you may choose "View/Spectal view".
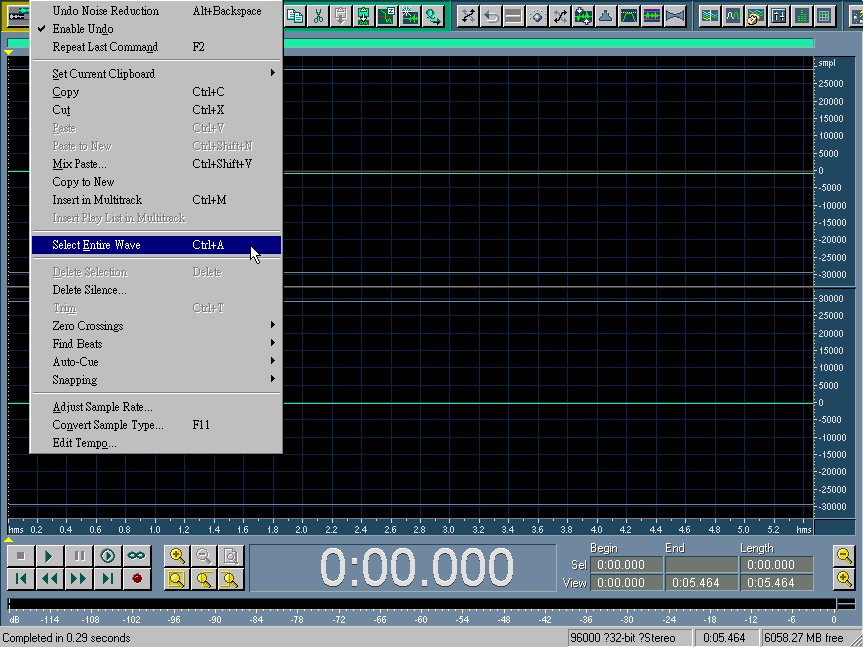
To eliminate the entire file from the background noise, now select the entire file and repeat the noise reduction again.
Sometimes, the background noise you sampled is not exactly what it seems. You may need to re-sample on the right again.
This background noise sampled on the right is somewhat different from the previous one. In order to do the job completely for the entire file, click on "Close" instead of "OK" to quit the Noise Reduction Menu temporarily and then select the entire file. Now select the "Transform/Noise Reduction/Noise Reduction..." again and click "OK" to complete the job. This time I chose 100% Noise Reduction Level to simplify the job.
It's magic! But wait! You should listen to the sound before saving. When you choose to slide up the yellow line of the Noise Reduction Level, high level of background noise is eliminated. However, at the same time you take risk of adding artifact to the sound. What I do usually is to choose a value of 10% or below for the Noise Reduction Level and repeat the procedure anew by choosing carefully the background area again. A good noise reduction with no harm to the recorded signal may need more than ten times of careful Noise Reduction Procedure with each time renewing the sampling area. Tedious, right? But rewarding!
NEXT PAGE: How to do the sound editing (5. Editing - Prelude to Clicks & Pops)