Preparation: I initially broke down the rear axle into the main components. First I unbolted the swing arms from the main yoke which goes over the diff. This then released the half shaft, hub, brake assembly and swing arm as one lump. Next I removed the hub and half shaft from this assembly. The four bolts holding the hub assembly to the swing arm took some persuading but it gave in, in the end. I started unbolting the diff from the yoke but decided it just wasn't worth the effort as it could be cleaned up and painted as it was. If I were doing the job again I would have been more careful taking the old brake lines out - these can be used as patterns to make new ones up…. You live and learn!
(Yes… but, unfortunately I'm still married to him)Having broken the rear end down, I set about it with the wire brush, cleaned it up then hammerited the lot. At this point I then overhauled the brakes (see
brakes page)I examined the hubs, they seemed to be running smoothly with no play so "if it ain't broke don't fix it". The bushes all seemed to be in good condition in fact some looked pretty new so, again, why replace them?
The next job was to cut down the flange on the ends of the yoke so it would fit up against the Tiger chassis and cut the top off the big doughnut bush.
All the lot was bolted back together again ready for fitting.
Fitting: This was a simple task, with the chassis on the floor I positioned the rear suspension assembly so that the big
(jammy) doughnut bushes lined up with the bottom chassis mounting holes and dropped the bolts in. With that end located I jacked the diff up to meet the chassis, and marked the mounting holes. Once these were drilled everything was bolted up tight and the job half done. Next job was the shocks and springs. Don't make the mistake I did and get to the end of this bit and realise that you've used the front springs!First was bolting in the spring locator in the bottom of the swing arm - the new springs are a smaller diameter than the standard Sierra item. Then I bolted in the top of the shock absorbers to the chassis with a suitable amount of washers to space the eye of the shock centrally. Then stand the spring in the swing arm and lift the arm up to bolt in the bottom end on the shock absorbers - again a few washers to space thing nicely…job done!
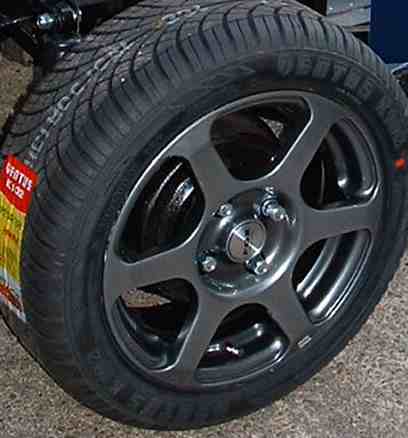
Wheels: Do wheels fit in this section?…they do now. I was originally intending to find a set of second hand alloys to start with and upgrade later, but every breaker had a large stock of the Pepper Pot style Sierra wheels but nothing else. Where as every Sierra I parked next to at the Supermarket had some type of 5 spoke jobs. In the end I went for some brand new ones, some very tasty 6 spoke Fox EVO 2, 15inch rims in a dark titanium finish… they look mean.