New battery switches in place
|
Upgrade (Page 3) |
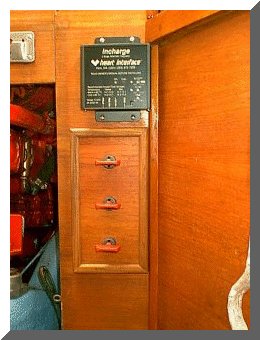
3. I decided to work on the battery switch panel while all this penetrant hopefully does it's thing. I mounted the last of the battery switches and installed the panel in the same area where the original "1-2-Both-Off" switch was.
New battery switches in place
Saturday February 23, 2002
1. Another night of soaking with penetrating
oil has passed so I tried once more to drive the frozen bolt out with a
drift punch and hammer. At this point a friend came by to offer a hand, but no amount of tapping with a hammer or drift punch appeared like it would budge the stubborn bolt. All this effort appeared to prove fruitless. My next move was to get a HEAVY
duty C-clamp and try to press the bolt out from the rear to the front
of the engine. Still no luck. I have left the C-clamp on the
bolt overnight under as much pressure as I dared to put on it and also
soaked the entire area with LOTS of penetrating oil. Tomorrow is
another day, but if I still have no luck, I am thinking of using a saws-all
and sacrificing the old alternator. I had high hopes of keeping it
as a spare, but not at the expense of DAYS of work. That is truly
false economy. Stay tuned, more to follow in this ongoing saga.
Sunday February 24, 2002
1. After one more night of soaking in penetrating oil with loads of pressure on the bolt, I returned to the boat to try one last time. I spent about 1 hour with a drift punch, and hammer. The bolt is not showing any signs of movement whatsoever. I made up my mind to cut the two feet from the cast aluminum alternator housing. I have reached the point where investing any more time in saving the alternator is just not worth it. It took me approximately an hour to cut the two feet and remove the alternator. I now wish I had sacrificed the alternator earlier. :-( Oh well, live and learn.

Alternator after cutting feet off. The
bolt is still
frozen in the rear mounting foot and I could
not
get it out using an arbor press. The
little square
in the lower left of the photo is the head
of the
bolt after I drilled it off. This is
the stuff that
will give you gray hairs.
2. Tomorrow morning I will call Jack
Rabbit Marine and order my new alternator, adapter spacers and a new metric
mounting bolt.
Monday February 25, 2002
1. This morning I ordered the new Balmar model 70-80 alternator from Jack Rabbit Marine as well as ordering a replacement alternator bolt from the local Westerbeke dealer. This is the bolt in the photo of the old alternator above that I removed the head from with a drill while trying to get the old alternator out.
2. With my ordering done for today, I made a trip to the boat to clean and wire brush the area under the alternator. I plan on priming it with Rustoleum and then giving it a couple coats of Westerbeke red paint tomorrow.
3. I began the fabrication of cables
and rewiring of the DC system. I hope to get all the battery cables
as well as the Echo-Charger wiring finished tomorrow. I will leave
the wiring of the In-Charge 3 stage regulator and the Link 10 battery monitor
system until I receive the new Balmar alternator next week.
Tuesday February 26, 2002
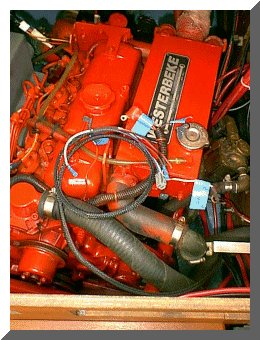
1. My day began with spraying 2 coats of Rustoleum primer followed by several coats of Westerbeke red paint in the area where the alternator lives after masking off cables, wire and hoses.

Alternator area of engine after cleaning and
painting
Wiring from In-Charge Smart regulator
awaiting connection to new alternator
2. I finished up all the heavy cabling (battery cables and other large gauge wiring) as well as the wiring of the Echo-Charger. I added two (one for positive connections and one for negative connections) insulated Blue Sea Power Posts to dress up the wiring and make for easier troubleshooting in the future.
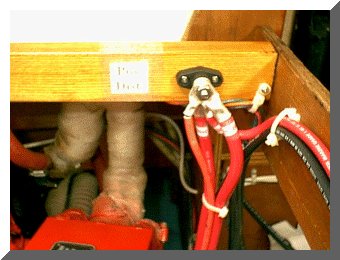
Positive distribution power post

Negative distribution power post
3. The wiring to the new battery switch panel was completed and the new labels arrived and were added. I still need to find some "function" labels such as "House Bank", "Starter Bank" and "Emerg. Parallel". I may have to find a shop to engrave them for me. That can wait for a day when the weather is not cooperative.

New battery switch panel after wiring
was completed and labels applied.
4. All that remains of the DC upgrade is the installation of the new Balmar alternator (when it arrives), the wiring of the In-Charge 3 step regulator to the alternator and the connections from the Link 10 to the house battery.
Click HERE for page 4 of DC Upgrade
Copyright 2001-2009 No duplication of any portion of this website without express permission.
Permission may be obtained by e-mailing the webmaster at
earlylight160@yahoo.com.