Introduction:
The Fox 3 Mustang, like a lot of Ford cars built in the mid to late 1980's, had a problem with its paint process. I've never gotten a straight answer as to the real problem, but the result is that with enough exposure to the sun, the paint will start to peel all by itself. This is a problem that Ford tried to shirk its responsibilities of. See one of the many web sites that discuss this problem: Article at autosafety.org
My car was not immune to this problem, and the peeling started a few years after I owned the car. It lasted that long because I had always kept the car in the garage or under a cover, and I washed and waxed it pretty regularly. When I contacted Ford about it, they told me that I had "just missed" the deadline for the secret warranty. So I ignored the peeling paint until it got so bad that bare metal became exposed to the elements and rust started to form.
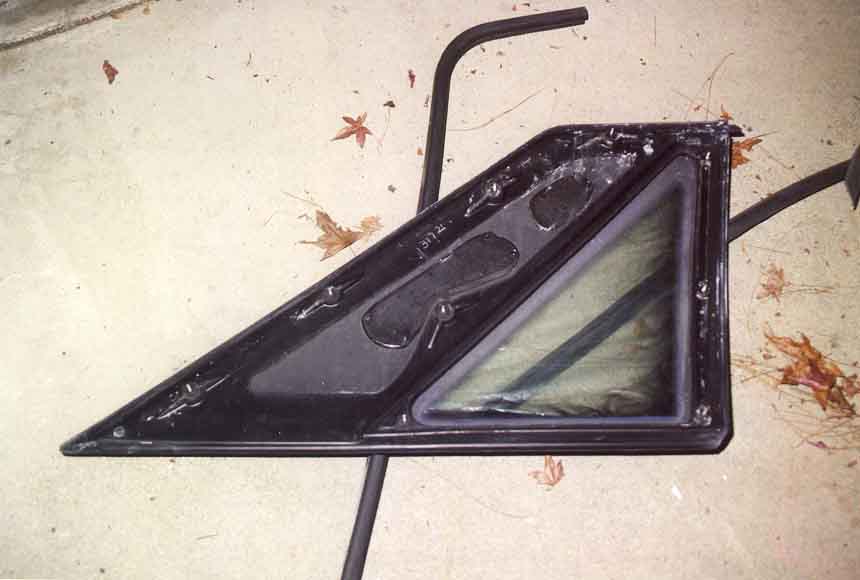
I wanted to make sure that once I had the car painted that it would last longer than the original. I started by removing every trim part that I could from the body. This included the nose piece that's part of the front bumper cover and "air scoop", the tail piece that's the rear bumper cover and "aero" skirt, the side skirts, the tail wing, and all the little mouldings around the windows and doors. The rear side glass are actually molded with the mouldings that go around the glass. These had threaded studs molded into their structure, and fastened to the body with nuts. The interior panels had to be removed to access them. The rubber moulding around the glass had deteriorated a lot from being exposed to the sun.
After all the parts were removed, I used a 180 grit sanding disk on a Sears buffer/polisher to remove all the paint down to bare metal. This revealed a lot of areas where rust had started to form under the paint. I was amazed to find that a lot of the original primer would actually rub off by the pressure of just my fingers once the color coat had peeled off. So I guess the paint had started to let moisture get to the metal long before it started to peel.
After the car was sanded down to bare metal, I applied some phosphoric acid based chemical to wash the metal. This is supposed to eat up all the oxidation and prevent it from further rusting. Of course, as soon as I rinsed the chemical off with water, the rust started almost instantly. So I had to re-treat the surface with the chemical and quickly dry it off.
Then I applied a polyester primer over the bare metal. It is like a very liquid form of body filler; it sticks to bare metal very well, fills in most of the sanding scratches, and uses a hardner to cure. After the primer cured, I sanded it first with 240 grit paper to knock down the rough spots, and then followed with 400 grit to make the surface smooth enough for the color coat. Here's what the car looked like after the primer was completed.
I attempted to apply the color coat myself, but I really messed it up. I just did not have the skills or know-how to do this well. So I took my disaster to a local paint shop in the hopes that they can resurect it.
I also had to prepare all the parts that I removed from the car. I sanded most of the parts to at least remove the oxidized layers of paint. The paint on most of these urethane parts were not even as durable as the paint on the metal parts, and most of it had faded, while some were completely gone. The exposed urethane parts were badly weathered by the sun, and also got oxydized. Most of those parts developed a lot of pits on their surface. The nose piece also had a couple of damaged areas; one from an off-road excursion from a road covered with black ice, and another that I made while trying to make some headlight modifications. I filled these in with 3M's Flexible Parts Repair Material and some fiberglass mesh. I spread the FPRM over the pitted areas and smoothed them out as much as I could. The FPRM is also a two-part resin, and it sets up in about 5 minutes after mixing, so I had to work fast with it. After the sanding and filling, I applied primer to these parts as well. I added a flexitive to the primer, since these urethane parts will flex more than the steel parts.
One stock part I replaced was the rear bumper cover. It had sustained some damage in the past from where I parked at work, and was in pretty bad shape after a couple of my attempts to fix the damage. I ordered a 93 Cobra conversion kit from ABC Exclusive. The kit included two front side spats, two side skirts and spats, and a one piece rear bumper cover, all made of fiberglass. I had intended to use these to replace all the original parts on my car. I started with the rear bumper cover, and the fit was so poor that I ended up cutting and filling a lot of it to make it fit on the car. I also made up some brackets to hold it to the bumper because the few places their instructions directed to use for fastening just did not seem sufficient. When I got to the side spats, they were so far off that I did not want to even try to modify them to fit. Later on I found out that the bumper cover was very poorly laid up, and there was a huge void between one part of the surface and the fiberglass underneath, which yielded easily to hand pressure, and cracked. ABC has been far from helpful in addressing these issues, and I would not recommend them to anybody.
The results of the work done by the "professional" painters left something to be desired; there were a lot of places where the paint had sagged from orange peels, and trapped dirt. Most of these were dealt with by polishing the car after the paint had dried. If I had the choice, I would have waited a few weeks for the paint to thoroughly dry before having it polished. There were other signs of carelessness as well, where the paint was scratched, and where the polisher pushed on the paint a little too hard. But overall, it looked a lot better than before. Unfortunately, I do not have a "before" picture.
After I got it back, I carefully installed all the parts I removed and the paint shop painted. While trying to put these parts back onto the car, I noticed that the fit were so poor that I wondered whether they actually came off the same car. Unfortunately, the answer could not be anything but "yes"; the factory fit and finish was poor, and I simply did not notice it when removing these parts before.
I also painted some of the trim pieces that went around the windows. (It's hard to screw up flat black.) These included the rubber trim around the rear side glasses. I first tried to fill in their porous surfaces with FPRM as well, but it was too difficult to get a smooth and straight surface with the quick setting nature of the material. So I ended up sanding down most of the rubber, and built it back up with layers of flexible bumper paint. I also took the opportunity to install new tracks in the side door windows, and I replaced the driver's side door seal and trunk seal as they were all getting a little worn out.
So now the car looks pretty good from a distance. This front-left shot shows how even mediocre paint jobs can be made to look dazzling with a bit of polishing. Also note the wheels from the 1996 Cobra that I installed when I converted the brakes to the 13" five-lug set from a Fox-4 Cobra. It was an interesting coincidence that the painted insert parts between the spokes had the same color and type (Ford's Dark Grey Metalic) as the body. The new rear bumper can be seen in this rear-left shot. Also in this shot are the new tail lights that I got from a 1990 Mustang LX. I liked these better than the stock GT tail lights.
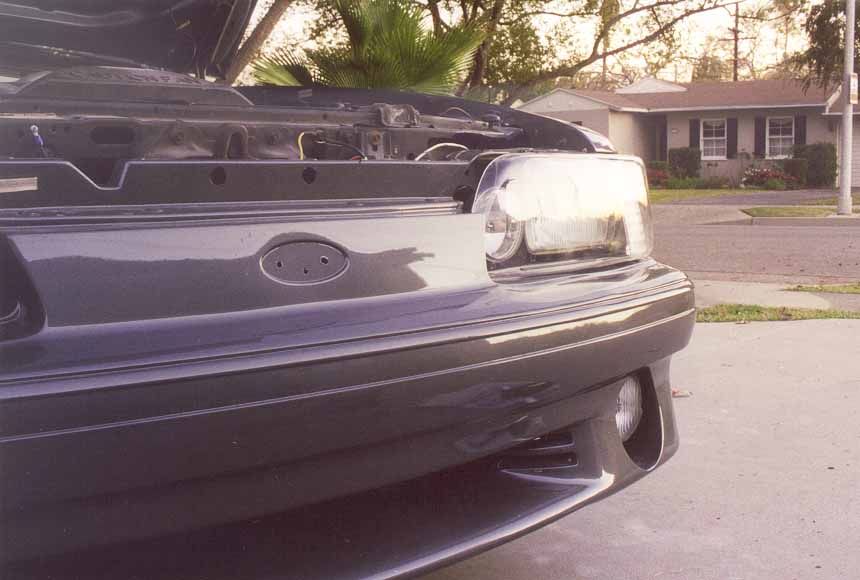
I made one further cosmetic modification, which was to install some covers in front of the headlights that I had installed a couple of years ago. I had some plastic covers that mounted directly on the rectangular lenses of the H4 lights. But that area had always looked somewhat awkward, so I got a set of clear plastic covers from GT Styling. (Yes, the same company makes those really stupid smoked or "carbon fiber look" covers for headlights and tail lights.) I needed something to protect both the low beam and high beam lights, and hopefully reduce air turbulence in that area by smoothing the structure a little. This is a test fit of the cover. (You might see a slight wave in the bumper cover just below the light. That is where the hole used to be.) I made a set of brackets to hold the cover to the front structure of the nose. The bracket was aided by a strip of Velcro on the side. Here's the final result of the front with the light covers installed .
The car looks so nice now that I'm almost afraid to take it out of the garage. And it seems to collect dirt so easily.