 |
| Coloring With MS Paint -- Part 2 |
| [Last Page] [Main MSP Page] [Main Page] |
| Now use the fill/paint bucket tool to color in the main space. If your coloring goes crazy, make sure the outline solid all the way to the very last pixel; it's very picky. Also, save often. You're allowed up to three UNDOS but I still say be safe in case you mess up. Going a little over the outline is not messing up badly. In fact, avoid fixing those little flaws if you can help it--just wait until you're done with the rest. In my particular image, I just had a few others spaces on the face to color. You may have arms, visible ears, etc.,etc. It is not time to focus on lighting & shading just yet. However, that doesn't mean you should no keep 'preplanning' as you go along and continue accordingly. To keep things simple we'll apply the base colors for the whole picture first. Follow the basic steps for the skin and color (for example) the clothes, hair, accessories, etc. I tend to frequently give hair special attention although not always. ----If you have a tablet, fill the hair solid first. Then, use the freehand select tool or pencil to create white highlights. ----With a mouse, it is easier to use that good 'ol preplanning! Take the color you intend for the hair (or outfit for that matter) and do like you did for the skin leaving the future highlight (or shadow if you'd like) blank. Consider using a smaller brush/pencil. ----If you plan on three plus values in the hair, do the main color, the dark, and then the highlight. That is likely the order in most cases. |
|
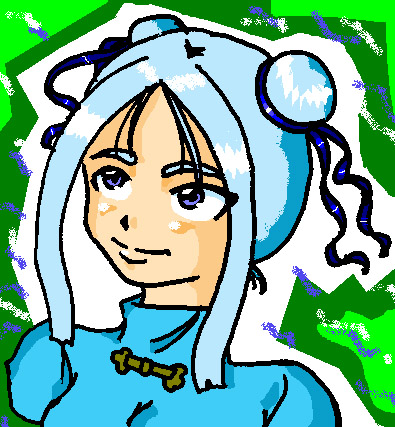
| This picture shows something similar to how your picture will look at this point. The lines are sloppy right now so that you can see it's normal to have messiness. However, there is a over-looked Zoom Tool that is useful for this purpose. If you don't want to worry about those overlapping lines later, zoom in and edit with the lines that way. That'll make it easier to avoid the overlapping. Not always convient, though. I used it when filling in the tiny spaces in the ribbons. Keep in mind that this whole thing is not the best example of me following my own advice. ^__________^ |
| *See if you can spot the diversity of techniques used. For example, one bun was shaded before adding white while the other was vice versa. Also, you may be able to see the use of the spray can throughout it.* Now I'm ready to finish my picture! Without time, my coloring is limited without use of a tablet to speed things up alittle (although my pace with a mouse is still very steady). There will be better tutorials with more details in certain areas such as backgrounds and eyes. This was a basic overview. =) |
 |