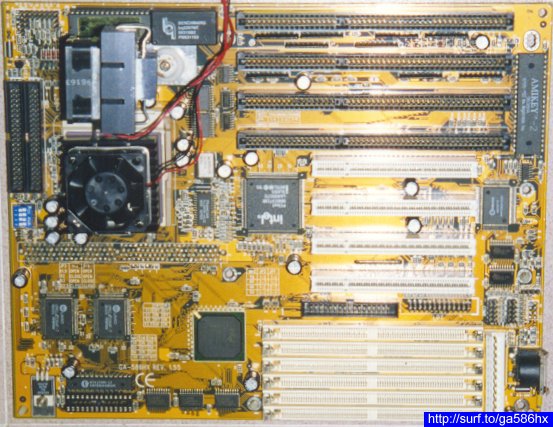
(Click to enlarge - 76.7KB)
| QuickLinks | Home | GA-586HX | Hot-Swap | AP5T-3 | Q3Test/TNT2 | PA-2012 | H/W-Hack | JiuZhaiGou | Wallpaper |
I took these photos of the reworks so that it would be clear what I had done to hack my GA-586HX. I wasted 2 rolls of Kodak film before I was satisfied with the shots. The close-ups were especially hard to capture clearly.
Please feel free to download and use these images, on one condition. Please do not modify them in any way, and ensure my website address is clearly shown in the lower-right corner.
Auto-Voltage Detection Removed
| 1. AVD chips removed
and JP4 jumpered (hard-wired).  (Click to enlarge - 34.9KB) |
2. Another view. |
| 1. Two 100W resistors
soldered in parallel with R1 and jumpered. 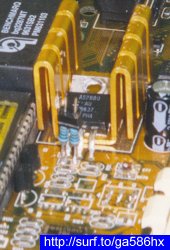 |
2. Another view. |
1. Front view. (Click to enlarge - 70.4KB) |
2. Front-corner view. (Click to enlarge - 71.0KB) |
3. Side view. (Click to enlarge - 52.7KB) |
4. Back-corner view. (Click to enlarge - 27.3KB) |
5. Back view. (Click to enlarge - 36.1KB) |
6. VR screwed onto
the heatsink. |
1. Heatsinks
compared. (Click to enlarge - 25.8KB) |
2. The leftovers;
mangled AVD chips & the heatsink that couldn't.  |
| QuickLinks | Home | GA-586HX | Hot-Swap | AP5T-3 | Q3Test/TNT2 | PA-2012 | H/W-Hack | JiuZhaiGou | Wallpaper |