
To My Mother
with Love
Tutorial |
 |
Here is a simple Mother's Day Heart to design and give to the
best Mother in the world.
|
|
Level of difficulty: Intermediate. |
 |
|
You will need the graphics on the right for this lesson. Right click on each one and
save to your hardrive. |
 |
 |
This tutorial was designed in PSP 6.02 and can be completed in other versions
with some adjustment. Use your creativity and have fun.
Copyright © by Harold E. Jones .. 2001 - 2002. |
1. Open new image, width="350" height="350", 16.7 million colors, Transparent.
2. Click on the "Color Options pallet."  Make your foreground color White ["#FFFFFF"] and your background
color Beige. ["#FFE4B5"]. Make your foreground color White ["#FFFFFF"] and your background
color Beige. ["#FFE4B5"].
3. Go to "View/Rulers" and click Ok. [If you do not already have "Rulers" on your PSP
Desktop] Go to "View/Grid" and click Ok. I find it is easier to be more precise when using the
"Drawing Tool" if you have both the "Rulers" and "Grid" activated.
4. Click on the "Layers Option Pallet."  and add a new layer and name it "Color." and add a new layer and name it "Color."
5. Click on the "Flood Fill Tool"  and in the "Tool Options Pallet," and in the "Tool Options Pallet,"  select "solid color." Right click on the "Color layer"
and flood fill with the "Beige background color." This will give us an easy color to view
our work as we progress. select "solid color." Right click on the "Color layer"
and flood fill with the "Beige background color." This will give us an easy color to view
our work as we progress.
|
10. Click on the "Magic Wand Tool,"  open your "Tool Options Pallet" and choose "Match Mode=RGB Value; Tolerance=0;
feather=0; Sample Merged=unchecked." open your "Tool Options Pallet" and choose "Match Mode=RGB Value; Tolerance=0;
feather=0; Sample Merged=unchecked."
11. Left click anywhere on the background out side the "circle." Go to "Settings/invert."
The "Marching Ants" will now surround the circle.
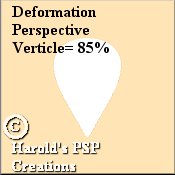
12. Go to "Image/deformations/Perspective-Verticle" and when the "Options box" pops up,
choose "% Difference=85." Deselect. [Press the keys "control+D." or go to
"Selections/select none.] The "Marching Ants" will disappear. |
 |
|
Go to "File/save" and click Ok and it will be saved in a .psp extension. |
|
13. While still on the "Heart 1 layer," go to "Image/rotate/rotate left=20 degrees."
14. Click on the "Mover Tool"  and position the bottom of this "deformed circle" at co-ordinates W=175 x H=270.
15. Click on the "Layers Option Pallet." and you should have 3 layers. "Layer 1 [the background layer];
"color layer" and the "Heart 1 layer." |
 |
|
16. Right click on the "heart 1 layer" heading and in the "Options box" that pops up,
choose "duplicate." You wont see any difference because this copy layer will overlap the
"Heart 1 layer."
17. Go to "Image/mirror" and the "copy layer" will appear to the right of the deform
circle. |
|
Go to "File/save" and click Ok and it will be saved in a .psp extension. |
|
18. Click on the "Layers Option Pallet." and you should have 4 layers. "Layer 1 [the background layer];
"color layer"; the "Heart 1 layer" and "copy of Heart 1 layer."
19. Turn off the 2 bottom layers by clicking on the "small glasses" alongside the headings,
"Layer 1" and "Color layers." Go to "Layers/merge/merge visible." Turn on the bottom 2 layers
again by clicking on the "small glasses." |
 |
|
20. Right click on the "merged layer" heading and in the "Options box" that pops up,
choose "properties" and rename it "Heart layer."
21. Click on the "Magic Wand Tool," open your "Tool Options Pallet" and choose "Match Mode=RGB Value; Tolerance=0;
feather=0; Sample Merged=unchecked."
22. Left click anywhere on the background outside the "heart." Go to "Settings/invert."
The "Marching Ants" will now surround the "heart." To overcome the slight "overlap" that
is seen we need to "flood fill" with "White."
23. Click on the "Flood Fill Tool" and in the "Tool Options Pallet," select "solid color." Left click on the "Heart"
and flood fill with the "White color." Do not Deselect." |
|
Go to "File/save" and click Ok and it will be saved in a .psp extension. |
|
27. Open the "redroses.jpg" image. Click on the "Magic Wand Tool," open your "Tool Options Pallet"
and choose
"Match Mode=RGB Value; Tolerance=0; feather=0; Sample Merged=unchecked."
28. Left click anywhere on the background outside the "redroses." Go to "Settings/invert."
The "Marching Ants" will now surround the "heart." |
|
|
29. Go to "Edit/copy." Then go to "Edit/paste/paste as new image." The "redroses" will now
appear on a transparent background. I made a tube out of the "redroses" so that I can alter
the size if needed. Go to "File/export" and export as a "Tube."
30. While this new "redroses" image on the transparent background is still active, go to
"File/save as" and save as redroses1.psp." |
|
Go to "File/save" and click Ok and it will be saved in a .psp extension. |
|
31. While this "redroses.psp" image is still active, go to "Edit/copy."
32. Activate the "Heart layer" and go to "Edit/paste/paste as a new layer." Click on the
"Mover Tool" and position the
"redroses" overlapping the top left of the "white satin heart." Make sure that the left side
of the rose is at co-ordinate W=175. |
 |
|
Go to "File/save" and click Ok and it will be saved in a .psp extension. |

|

