(Created with Paint Shop Pro v6.02)
Level of Experience: Beginner
~*~ This is my first tutorial, so please bare with me... ~*~
Level of Experience: Beginner
~*~ This is my first tutorial, so please bare with me... ~*~
This tutorial came about because of several requests that I received asking me how I created the watermarks on my images. Well, that and the fact that I didn't want to forget how I did it, either! *S* I tried for months - experimenting with different types of watermarks to find one that I liked. Finally, I sat down and came up with 2 different methods of my own. This is the first of my 2 methods. I hope that you find it to be useful... Thanks for looking!
Ready? Okay, let's begin. Create a new image about 150 X 150 with a transparent background, a resolution of 72 pixels/inch, and 16.7 million colors. It's going to be re-sized later, but you need to give yourself some room to work.
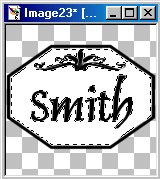
Now you need to decide upon a shape for your watermarked image. For this tutorial, I'm going to use an octagon. Choose the 'Preset Shapes' tool  and select the octagon with the following settings: stroked, a line width of 3; and the anti-alias box should be checked. If black (#000000) isn't already set as the foreground color, you should do that now.

Go ahead and draw your octagon shape to nearly fill the image window. I've made mine mostly horizontal, but if you choose to make yours more vertical, that's fine too. Making sure that you keep your foreground color set to black (#000000), go ahead and add your desired text to the octagon and center it up the way you want it. If you'd like to add any other images to your octagon (like ding fonts or whatever), this is the time to do it...

Alright, now you need to change the foreground color to white (#FFFFFF). Pick on the 'Magic Wand'  and then use it to click one time in the open area of your image. If you have any closed in spaces (e.g. ~ the inside of an 'O' or 'A'...), click on the shift key while using the magic wand in order to select multiple areas. Next select the 'Flood Fill' tool
  and flood each of these selected areas with white.
NOTE: You need to fill the majority of the area, but it is NOT necessary to fill in each and every pixel with color! In the long run, you probably won't even notice it.
Now you need to de-select everything, and then export it as a tube. Never done that before? Just click on 'File', then on 'Export', and then on 'Picture Tube'. When the next window opens up, you just need to give it a 'Tube Name' (Copyright or something similar works for me...) and click 'OK'. Simple enough, right? By the way, if you want to create additional tubes from other images or fonts, you would do them the exact same way. =)
Ready to put that tube to good use now? Great! Just click here when you're ready to continue.
This tutorial was created on 9/8/00.
Disclaimer(s):
This tutorial was written ENTIRELY by me. Should it happen to resemble any other written tutorial, it is purely a coincidence. (I'm sure that there are only so many ways to create a watermark...) Any comments, suggestions, etc. should be directed to me at gigipo@hotmail.com. Thank-you.
The antique photo used in this tutorial is a royalty free image obtained from http://www.freeimages.com. I am not in any way associated with them; I just chose this as a random image to work with.