This page has moved to http://www.dustyant.com/win32. Please update your bookmarks.
Click here to download the source files to this tutorial.
In this tutorial you will be introduced to the event-driven programming model. You will learn how Windows uses messages to communicate with applications, how event based programming works, what callback functions are, and while doing this create a basic windows application
If you do not have the platform SDK help files (WinAPI docs) - no, they do not come with Dev-C++ - then I suggest you do one of the following:
Create a blank windows project in Dev-C++ (In case you've forgotten how this is done, take a look at the previous tutorial). Name it lesson2. Open a new file(Press Ctrl+N) and save it(Ctrl+S) as main.c. Enter the following code,
1  #include <windows.h>
2
3  HWND hwndMain;	//Main window handle
4
5  // Callback function
6  LRESULT CALLBACK MainWndProc(HWND hwnd,UINT msg,WPARAM wParam,LPARAM lParam);
7  // Windows entry point
8  int WINAPI
9  WinMain(HINSTANCE hInstance, HINSTANCE hPrevInstance, LPSTR lpCmdLine, INT nCmdShow)
10 {
11	MSG msg; // MSG structure to store messages
12	WNDCLASSEX wcx; // WINDOW class information
13
14	// Initialize the struct to zero
15	ZeroMemory(&wcx,sizeof(WNDCLASSEX));
16	wcx.cbSize = sizeof(WNDCLASSEX); // Window size. Must always be sizeof(WNDCLASSEX)
17	wcx.style = CS_HREDRAW|CS_VREDRAW |CS_DBLCLKS ; // Class styles
18	wcx.lpfnWndProc = (WNDPROC)MainWndProc; // Pointer to the callback procedure
19	wcx.cbClsExtra = 0; // Extra byte to allocate following the wndclassex structure
20	wcx.cbWndExtra = 0; // Extra byte to allocate following an instance of the structure
21	wcx.hInstance = hInstance; // Instance of the application
22	wcx.hIcon = NULL; // Class Icon
23	wcx.hCursor = LoadCursor(NULL, IDC_ARROW); // Class Cursor
24	wcx.hbrBackground = (HBRUSH)(COLOR_WINDOW); // Background brush
25	wcx.lpszMenuName = NULL; // Menu resource
26	wcx.lpszClassName = "Lesson2"; // Name of this class
27	wcx.hIconSm = NULL; // Small icon for this class
28
29	// Register this window class with MS-Windows
30	if (!RegisterClassEx(&wcx))
31		return 0;
32
33	// Create the window
34	hwndMain = CreateWindowEx(0, //Extended window style
35				"Lesson2", // Window class name
36				"Lesson 2 - A simple win32 application", // Window title
37				WS_OVERLAPPEDWINDOW, // Window style
38				CW_USEDEFAULT,CW_USEDEFAULT, // (x,y) pos of the window
39				CW_USEDEFAULT,CW_USEDEFAULT, // Width and height of the window
40				HWND_DESKTOP, // HWND of the parent window (can be null also)
41				NULL, // Handle to menu
42				hInstance, // Handle to application instance
43				NULL); // Pointer to window creation data
44
45	// Check if window creation was successful
46	if (!hwndMain)
47		return 0;
48
49	// Make the window visible
50	ShowWindow(hwndMain,SW_SHOW);
51
52	// Process messages coming to this window
53	while (GetMessage(&msg,NULL,0,0))
54	{
55		TranslateMessage(&msg);
56		DispatchMessage(&msg);
57	}
58
59	// return value to the system
60	return msg.wParam;
61 }
62
63 LRESULT CALLBACK MainWndProc(HWND hwnd,UINT msg,WPARAM wParam,LPARAM lParam)
64 {
65	switch (msg)
66	{
67		case WM_DESTROY:
68			// User closed the window
69			PostQuitMessage(0);
70			break;
71		default:
72			// Call the default window handler
73			return DefWindowProc(hwnd,msg,wParam,lParam);
74	}
75	return 0;
76 }
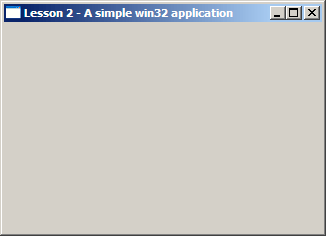
Whew. That was long! Press F9 to compile and run. You have a basic window on your screen!
The MSG structure is what stores the messages received by your application. Before going any further, lets take a look at the event-driven programming model.
To understand event driven programming, we draw analogies from the real world.
Every time windows has to communicate with your application, it sends messages to your application. Once all initializations have been done and the window shown on screen, all your application has to do is poll for windows messages.
The lines upto 51 create and show the window and the lines 52-57 poll for messages.
The GetMessage() function gets the next message to be processed from the message queue. GetMessage() returns a non-zero value for every message other than WM_QUIT. This means that the while loop continues until it is time to quit.
TranslateMessage() translates virtual key messages to character messages.
DispatchMessage() dispatches the message to a window procedure. This means that for messages coming to our window, the MainWndProc() is called by Windows(tm) through DispatchMessage().
How does Windows(tm) know which function to call? Well, we tell Windows(tm) during WNDCLASSEX initialization [line 18].
Every window that you create has an associated WNDCLASSEX structure. The WNDCLASSEX structure provides all the information necessary for Windows(tm) to do perform window related functions like drawing its icon, cursor, menu, calling the callback function which will receive messages and so on.
The WNDCLASSEX structure is defined as,
typedef struct _WNDCLASSEX {
    UINT    cbSize;
    UINT    style;
    WNDPROC lpfnWndProc;
    int     cbClsExtra;
    int     cbWndExtra;
    HANDLE  hInstance;
    HICON   hIcon;
    HCURSOR hCursor;
    HBRUSH  hbrBackground;
    LPCTSTR lpszMenuName;
    LPCTSTR lpszClassName;
    HICON   hIconSm;
} WNDCLASSEX;
After you've created your window class, you need to tell Windows(tm) about it. This is done
by registering the class with windows. The function call is RegisterClassEx(..).
Once this is done, you can create instances of this window by calling CreateWindowEx(..) with the proper arguments.
A window is created by calling the CreateWindowEx(..) defined as,
HWND CreateWindowEx(
    DWORD dwExStyle,		// extended window style
    LPCTSTR lpClassName,	// pointer to registered class name
    LPCTSTR lpWindowName,	// pointer to window name
    DWORD dwStyle,		// window style
    int x,			// horizontal position of window
    int y,			// vertical position of window
    int nWidth,			// window width
    int nHeight,		// window height
    HWND hWndParent,		// handle to parent or owner window
    HMENU hMenu,		// handle to menu, or child-window identifier
    HINSTANCE hInstance,	// handle to application instance
    LPVOID lpParam 		// pointer to window-creation data
   );
Lines 34-43 create the window. If the creation was successful a non-zero handle is returned by CreateWindowEx after which ShowWindow() shows the window on the screen.
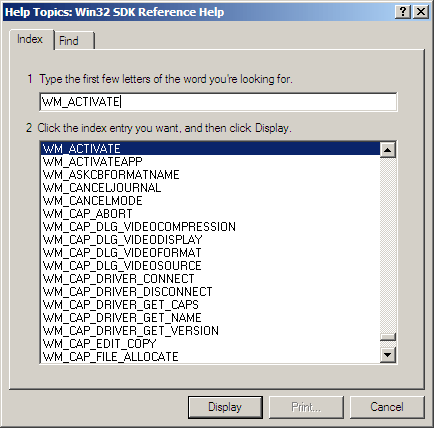
TIP: It is a good idea to keep refering to these functions in your sdk docs while reading this tutorial.

A callback function is the one that receives the messages sent to your application. This is where you do something about the message. We provide a pointer to this function while defining the window class [line 18].
Callback functions have to be defined as,
LRESULT CALLBACK
function-name(
		HWND hwnd,	// Handle of window which received this message
		UINT msg, 	// The message
		WPARAM wParam,	// Extra information
		LPARAM lParam	// Extra information
		);
63 LRESULT CALLBACK MainWndProc(HWND hwnd,UINT msg,WPARAM wParam,LPARAM lParam)
64 {
65	switch (msg)
66	{
	...
The switch statement lets us select which message was sent. There are over 200 messages that windows can send your application. To read about them, just search for WM_ in your sdk docs.
		...
67		case WM_DESTROY:
68			// User closed the window
69			PostQuitMessage(0);
70			break;
		...
The WM_DESTROY message is sent to your application when the user teminates the application either by clicking the X at the upper right corner, pressing Alt+F4, or quits the application by other means.
PostQuitMessage() causes GetMessage(..) [line 53] to return false and thus breaking out of the while loop and exiting the application. The argument to PostQuitMessage is the return value to the system.
What about the other 200 or so messages? Surely you, the programmer, aren't going to write code for all the 200 messages. Fortunately, Windows(tm) provides the DefWindowProc(..) function which handles all the messages. For the purposes of displaying a simple window, your MainWndProc could very well have consisted of
LRESULT CALLBACK MainWndProc(HWND hwnd,UINT msg,WPARAM wParam,LPARAM lParam)
{
	return DefWindowProc(hwnd,msg,wParam,lParam);
}
What this means is that every time you want to do something about a message, add the case switch for the message and write the code which does something about it. All messages that you don't want to handle should be passed to the DefWindowProc(). This is what we have done in our code.
	...
71		default:
72			// Call the default window handler
73			return DefWindowProc(hwnd,msg,wParam,lParam);
	...
Lets pop up a MessageBox which will display the co-ordinates of the point where the left mouse button was pressed. To do this you will have to handle the WM_LBUTTONDOWN message.
Add this code at line 70
... 68 PostQuitMessage(0); 69 break;70 case WM_LBUTTONDOWN: 71 pt.x = LOWORD(lParam); 72 pt.y = HIWORD(lParam); 73 wsprintf(str,"Co-ordinates are\nX=%i and Y=%i",pt.x,pt.y); 74 MessageBox(hwnd, str, "Left Button Clicked", MB_OK); 75 break;76 default: ...
Press F9. This is what you should see when you click anywhere inside the window.

If you can manage that, give yourself a pat on the back. You now understand the basics of event-driven programming - the mechanism which Windows(tm) uses to communicate with your application. You have crossed one of the more difficult hurdles in learning windows programming.
Don't worry if you could not do the exercise or if things are still a bit hazy. These concepts will be used in every single lesson after this and it will soon become second nature to you.