 60's Party
Invitation:
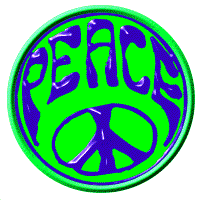
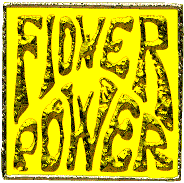
Front: Peace Symbol, Flower Power
Your invited to a Groovy Birthday Party
Inside:
Day:
Time:
Location:
RSVP:
Dress to go back in time to the 60's
Decorations:
Hang beads in all the doorways the party guests will pass through.
Check out novelty shops. Place colored light bulbs in all lamps and sockets. Using
large poster board or banner paper and neon tempra paint, make signs declaring,
"Flower Power," "Love not War," " Peace."
Make lots of giant daisy like flowers and Smiley faces, Ying and Yang symbols, peace sign
symbols etc. Hang lots of honey-combed paper balls from the ceiling.
Cake and Food:
Large round cake decorated as a Smiley or Peace symbol.
Goodie Bags:
Loot bags can be made out of one piece of brown or tan construction
paper. place the paper vertically and fold slightly above the center of the paper. glue
sides together making a pouch. Fringe the top of the paper and fold it down slightly over
the center of the paper to make a little pouch. Using a hole punch, punch a hole in
the top corner on each side of the pouch. cut a long piece of ribbon or yarn and pull one
end through each hole. Make the ends even and tie a knot. Fill the pouch with plastic
beads, stickers candy, etc. Seal the pouch with a smiley sticker or a sticker of some
sort.
Games and Activities:
A simple craft idea would the to get a badgemaker and let the kids design
pins with 60's symbols. Most teacher stores carry the badge making kits. Just make sure
you have enough materials for each kid to make 2 or 3 badges. Keep a sample of the paper
circle supplied in your kit so you can cut additional circles from ditto paper and they
will fit the badge press. Supply neon makers and glitter pens for decorating paper
circles.
Make head bands using paper, fun foam or felt. Have 3 or 4 inch wide strips cut in advance in the material of choice. Use markers and other things to decorate. When child is finished decorating cut the band to fit his head, punch a hole at each end and pull a piece of leather, ribbon, string etc. to secure it. Leave ends long and let child add beads to the 2 ribbon pieces. Tie knots in ends so beads don't come off.
Fringed Hippie Vest:
MATERIALS- You will need a paper lawn bag for each child. Construction paper, glue sticks
and other decorating materials and enough scissors for your group's size.
Prior to the party draw a line around the middle of each bag about the spot where your
child's hips would be when holding the bag at his shoulder height. Hold the bag upside
down, front of bag facing your tummy. Starting at the open end, cut straight up center of
bag until you reach the bag's true bottom. Make a T-shape cutting along the bottom on both
sides of the middle cut. Leave about 3 to 4 inches about where the shoulders will be.
Measure your child from shoulder to the bottom of arm pit. Make a slit or cut a circle in
the side of the bag. This is the main pattern for the vest and variations could be things
like cutting a v-neck. Have some examples of 60's symbols available for the kids to get
decorating ideas. have them color, cut and paste etc. Then have them cut from the
open end of the bag to the line in the middle of the bag all the way around the bag. This
becomes fringe.Have helpers do a few alterations if needed and then let the fun begin!
This looks and sounds much more complicated then it is. Brown grocery bags can be used
too.
Rose Colored Glasses:
Materials- a sheet of white poster board and some colored art cellophane, not Saran wrap
but the kind you get at a craft store and several glue sticks. Prior to the party, make
the frames for the glasses by tracing the bottom of a 15 ounce soup can. You will need 2
circles side by side with about one and a half inch space between them. Connect them by
drawing the "bridge" of the glasses. Inside the circles, trace a circle the size
of a 6 ounce tomato paste can. These are the lenses. On the top side of the glasses draw
the bows straight out making the two lines about an inch thick and about 4 inches long.
Curve the lines to make the ear pieces. You may want to measure the distance from your
child's eye to ear to get a more accurate length. Cut out enough frames for the number of
guests at the party plus a few more for mistakes. Leave them flat so the children can
decorate the frames with markers, stick on jewel earrings, etc. Trace the 15 ounce can
bottom onto a piece on scrap paper. cut a length of cellophane and fold it into a square
that will fit the can bottom. Place the drawn circle on top of the cellophane square and
cut the circle. This is a quick way to cut out the colored lenses. Remember, each child
will need two and have extras available. Have the children decorate the front of the
glasses, turn the frames over and use a glue stick to spread glue around the circles.
Place a circle of cellophane on top of the glue and press to secure it in place. Bend the
bows of glasses, place on face and enjoy the world through rose-colored glasses.
Dress in their new dud's, put on some groovy music and dance.
These party ideas suggested by Julie Siniard
Please e-mail me with additional ideas
![]() boardlr@coupeville.net
boardlr@coupeville.net
Return to my Home
Page
This page hosted by ![]()