Choose a link to get started:ALL NEW!!!Scrolling MarqueesThe BasicsThe BasicsManipulating Text Images Backgrounds Links More Advanced TopicsThe <HEAD> TagTables Forms Frames Lists Advanced TopicsImage MapsCSS - Part 1 CSS - Part 2 CSS - Part 3 CSS - Part 4 Additional TopicsXML Tag FormattingXHTML - Part 1 XHTML - Part 2 |
Client-Side Image MapsThere are two types of image maps : Server-Side and Client-Side. This tutorial discusses how to make a Client-Side image map. Image maps, Client-Side that is, require 3 things, the image to be the map, the script in the HTML document that defines the map, and the pages the map points to. Here is an example of a very basic image map.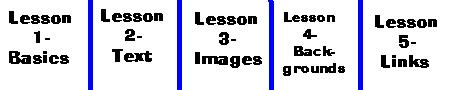 Notice how every time the mouse moves over a different part of the image map, the target location changes. That is all one image. You can even look at the source for the page. The script for the map is shown below.
That is, of course, a very basic image map, but it works for our purposes. I will try to explain the script as detailed as I can below, so be patient.
That was just the basic meaning of the map. If it wasn't clear, then a full explanation is provided below for you. I hope you enjoy it. Our first topic will be short. It is the use of <IMG> tag. It is placed either above or below the <MAP> and </MAP> tags. You can use any attribute with it when it is an image map, but one, actually two are mandatory, the SRC attribute and the USEMAP attribute. The USEMAP attribute designates that the image will be a Client-Side image map. The value of this attribute is a number sign, #, followed by the value of <MAP NAME>. So, if <MAP NAME="squash">, then <IMG USEMAP="#squash">. Get it? <IMG SRC="basiclessons.jpg" USEMAP="#tutor"> Our next topic is also brief. It is the <MAP> tag. There is only one attribute that must be included, the NAME attribute. Without the NAME attribute, the image would have nowhere to get the information about being an image map. Make sure you can remember the name, and it is not something like, 199375371475852, that you have a very good chance of miscopying. <MAP NAME="tutormap"> The next section deals with the <AREA> tag. It is the longest section in the tutorial. Anyway, the <AREA> tag describes a section of the image map. There are 5 attributes, two of which will be described together. One's value changes when the other changes, and the pattern of the first changes too. Don't understand?? You will. Here is the list of attributes.
First, we will discuss the hard part, the pair of attributes known as SHAPE and COORDS. Depending on what SHAPE is set to be, then COORDS must be adjusted in value and value style to accomodate that. Let me clarify. Above, the SHAPE of the area was "rect", a rectangle. The COORDS pattern was like this :
It is really helpful if you have a graphics program like Paint that shows the coordinates of where the mouse is, so those can be used to determine the coordinates. The coordinates are backwards then what you might think. The top left corner of the image is the point "0,0". As you go right, the first, X, increases. As you go down, the Y increases, second part. The next value of SHAPE we will talk about is "circle". This designates a circle. Using a circle is a little more complicated. You must find the center point of the circle. You must then determine what the length of the radius is. Here is the script rule :
Again, having Paint or a similar program is helpful in determining this. The last value of SHAPE we will talk about is "polygon". It designates any shape of figure which is not a circle or rectangle. The pattern for this type of image map area is as follows :
Place the X and Y coordinates of points on the polygon in the order that you want them connected so that you make a polygon. This is the most difficult and most complicated shape to make. <AREA SHAPE="rect" COORDS="0, 0, 16, 20"> <AREA SHAPE="circle" COORDS="50, 50, 45"> <AREA SHAPE="polygon" COORDS="0, 0, 50, 0, 0, 50"> The next two attributes we will discuss are HREF and NOHREF. Place NOHREF in the tag when the area does not link to somewhere. The HREF does the same thing it does in links. It points to the page that will be loaded when the area is clicked. <AREA NOHREF> <AREA HREF="maps.html"> The next attribute has the same values as that for links. The TARGET attribute describes where the page will be loaded. It can be _top, _self, name of frame, _new, _blank. All you have to do is make an <AREA> tag for every different area that is linked or unlinked. It really isn't all that hard to do, but getting it right is tough. Have fun with image maps, and do not forget the </MAP>. |