Putting togeather the Back Pocket, and putting it on
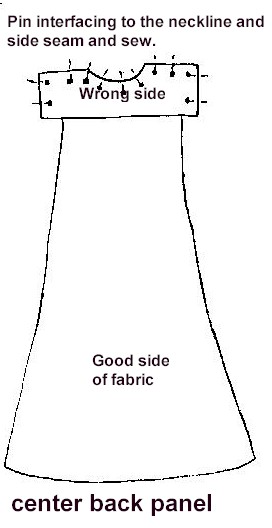
Sew the facing to the neck portion of the back panel. At this point you assemble and sew on the back pocket which is optional. The back pocket has many pluses. You can make it either letters sized, or legal sized, so you can keep flyers, instruction booklets, or anything else that you may want to bring with you to an event. It should also be able to accommodate a clipboard which you have attached a pen or pencil with a cord, for signing a new members, etc. this pocket has to be reinforced because of the load it ends up carrying.

If you are making the back pocket that has to carry stuff for real, this is the way to put it onto the vest. Pin the pocket edges onto the back vest triple sew the top edges because they are going to have the most stress on them. Double sew the rest to the pocket. A piece of wood or metal can be inserted to the bottom of the pocket.
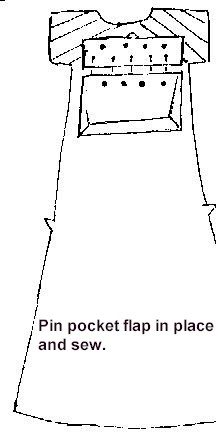
The flap is separate from the pocket. You sew it into place lining it up with the bottom edge of the upper section. Pin it down, and sew into place. Double sew the two edges of the flap for a stronger construction.
Vest/Cloak construction index page.
Main Index page.