Creating the back Pocket
At this point you assemble and sew on the back pocket which is optional. The back pocket has many pluses. You can make it either letters sized, or legal sized, so you can keep flyers, instruction booklets, or anything else that you may want to bring with you to an event. It should also be able to accommodate a clipboard which you have attached a pen or pencil with a cord, for signing a new members, etc. this pocket has to be reinforced because of the load it ends up carrying.
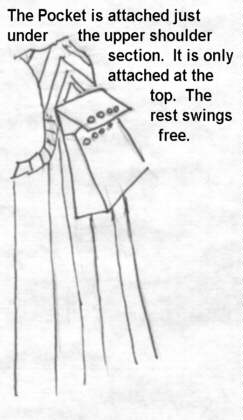
The pocket on the standard vest is only attached across the top section, and fly out if the actor turns suddenly like in the scene in the high council where Worf accepts discommendation, or in The House of Quark , where D'Ghor is found guilty of financial manipulation to aquire an other klingon house.
This pocket is an example of the construction technique. It is made of thick green felt and silver grey lining to go onto a cloak which is based upon Link from the Zelda game, played by a klingon character.
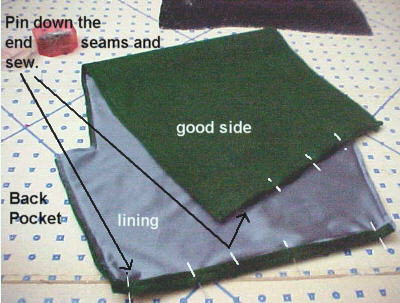
Cut out your pocket using the above pattern. Zig zag around the pattern piece to prevent fraying. You may want to use iron on interfacing to stiffen the pocket. You then pin and sew the end seams as shown above.

Pin down the corners and sew into place.


You should double sew all of this seam because it will have the greatest stress and carry most of the wieght. I reversed an extra time at the top of the seam.
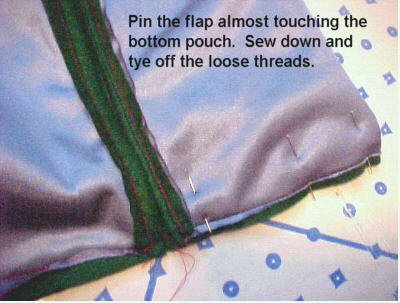
Sew the seams that create the flap. This can be done with only one sewing since the seams bare no wieght or stress. You do not overlap the edges. The gully is where you will attach the pocket to the vest.

Before turning the pocket, clip out notches at all the corners, being careful not to cut through the sewing. Then you turn the pocket and flap right side out.
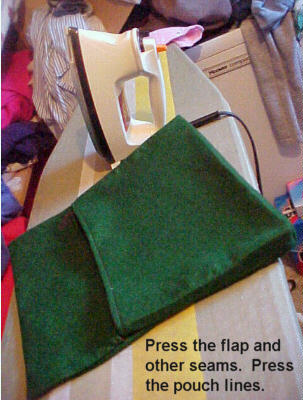
Press down all the seams. Then press the fold lines from the pattern.


This is the pattern to use if you plan on carrying anything heavey in your pocket. You can also use the standard swing out pocket pattern, and sew it on going across the flap as shown above, and the continue down and around the seam lines of the pocket back up to the flap. I would double sew it for durabilitiy. I would also use a heavier thread(button and carpet thread) to secure the pocket to the vest.
Back Pocket Pattern for heavey stuff.
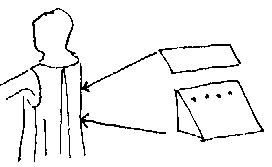
Attaching the pocket to the back of the vest.
Vest/Cloak construction index page.
Gallery of vest styles from Next Gen. and Ds9