
"Head on"
| 3.1 Stroker | Differential Ratios | Parts and Accessories | Tips and Information | Price List | Pictures | Valve Seal Replacement |

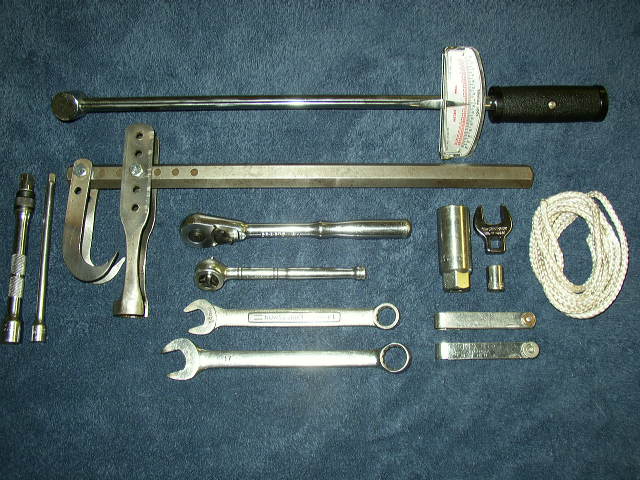 |
Tools Required
Valve spring compressor. 17mm and 14mm combination wrenches. 13/16" and 10mm sockets. 3/8" and 1/4" drive ratchets and extensions. 2 feeler gauge sets. 5 feet of 1/4" nylon rope. Torque wrench. 17mm crows foot. |
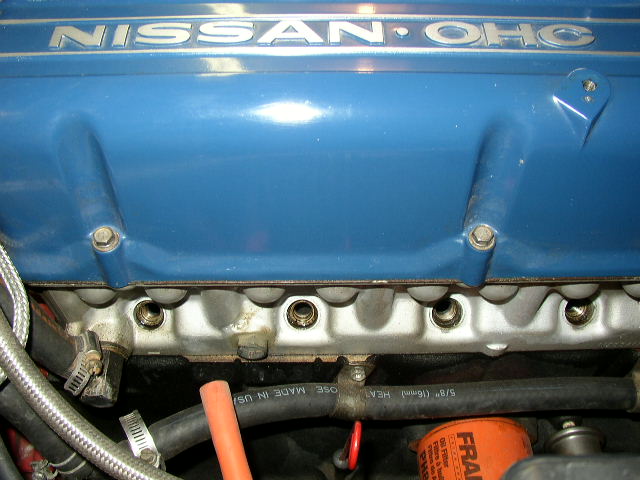 |
1)
Disconnect battery.
2) Remove valve cover. 3) Number each spark plug wire and remove. 4) Remove all plugs. |
 |
5)
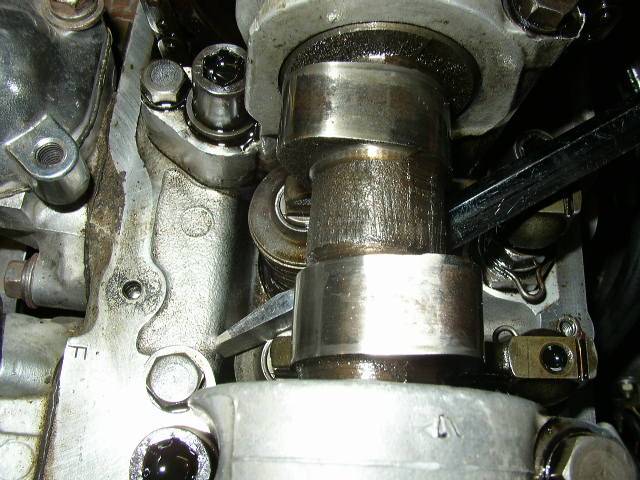
Chock the wheels and place the car in neutral.
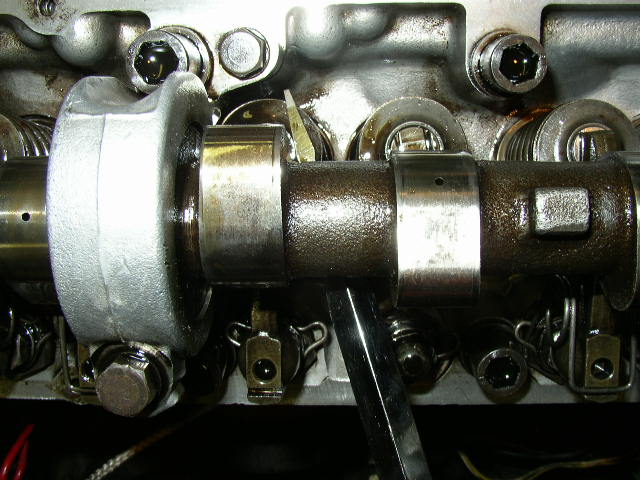
6) Rotate the engine until the #1 piston is at TDC. With all the plugs removed, this can be achieved by using a wrench on the top timing chain sprocket bolt. At TDC, the piston will be at its highest point and both valves will be closed. Note the position of the cam lobes in the picture. They should be pointing at the 10:00 and 2:00 positions. |
 |
7)
Place the car in either 4th or 5th gear. This will lock the motor.
8) Use a small screwdriver to insert the 1/4" rope into the #1 spark plug hole. You should be able to stuff about 4 feet onto the top of the piston. It's very important to have as much of the rope as possible in the cylinder. This is what will be holding the valves up once the keepers are removed. |
 |
9)
Remove the springs from the intake and exhaust valves. This is done by lifting the top of the spring and rotating it down to release the tension. You can then unhook the bottom.
|
 |
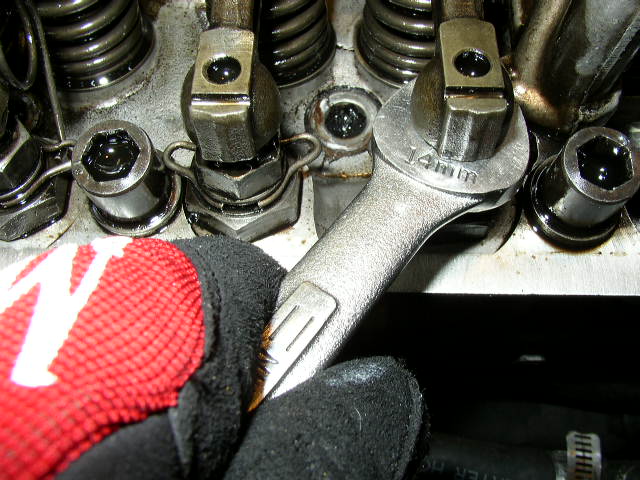
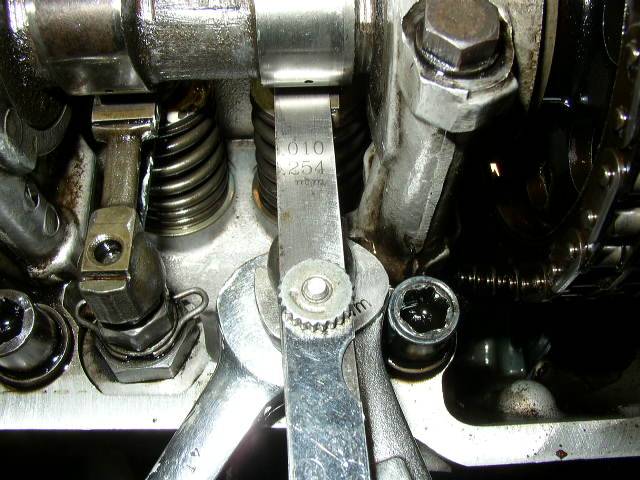
10)
Loosen the lock nuts, using the 17mm wrench.
|
 |
11) Use the 14mm wrench to screw the lifter down. You will probaly have to back off the locking nut, several times, as the lifter jams agaist it. Be sure to screw the lifter all the way down.
|
 |
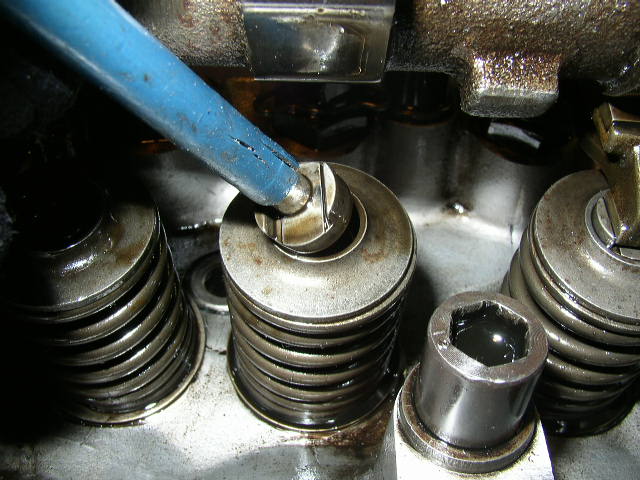
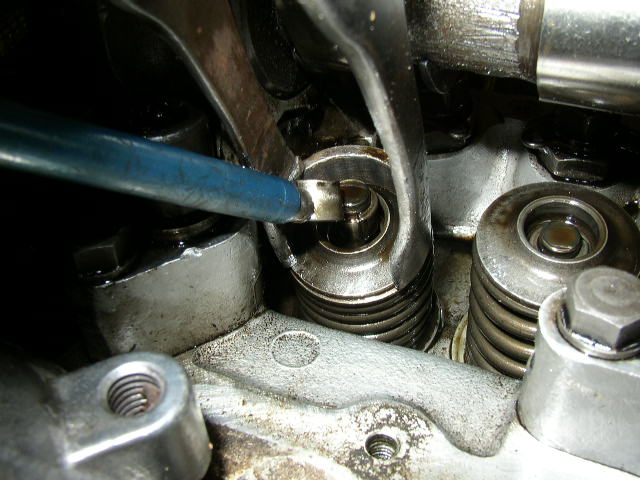
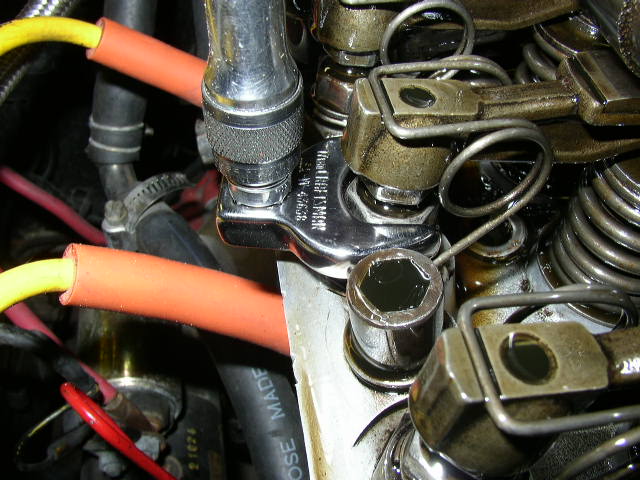
12)
Place a large screwdriver under the camshaft as shown. Lift up on the handle to depress the valve spring. This will free the rocker arm for removal.
NOTE: Be very careful not to allow the screwdriver to contact the cam lobes. Keep the rocker arms in the order in which they were removed. Do not mix them up. |
 |
13)
Remove the lash pads and place with their corresponding rocker arms.
|
 |
14)
If you are using a universal compressor, make the nessasary adjustments for that paticular head.
|
 |
15)
Compress the valve spring and remove the keepers. A small magnet is very useful for this.
The springs must not only be kept in order, but have to be kept with the "top" oriented as well. |
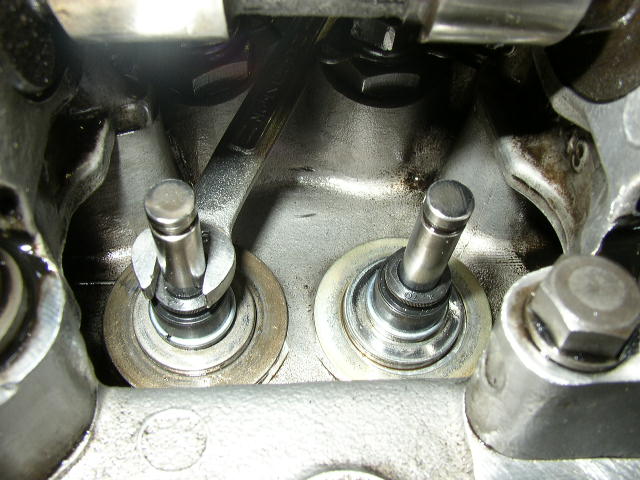 |
16)
The old seals can be popped off with a screwdriver. To install the new ones, use a 9mm wrench to press the seal in place. This works well and will not damage the top of the seal. A distinct "click" will be heard and felt as it pops into place.
|
 |
17)
Here's a tip for re-installing the springs.
Position the inner and outer spring over the valve. Install the keepers in the collet "before" placing on the top of the springs. Place your finger on top of the keepers as you compress the spring. Once the keepers are in position, bounce the compressor a few times to insure that the keepers are properly seated. |
 |
18)
Install the lash pads and rocker arms.
19) Set the valve clearance to the cold settings. .08 Intake 20) Re-install rocker arm springs. |
 |
21)
Torque the lock nuts to factory spec.
22) Remove the rope from the cylinder. 23) Place the car back in neutral. 24) Repeat the procedure for the remaining cylinders. |
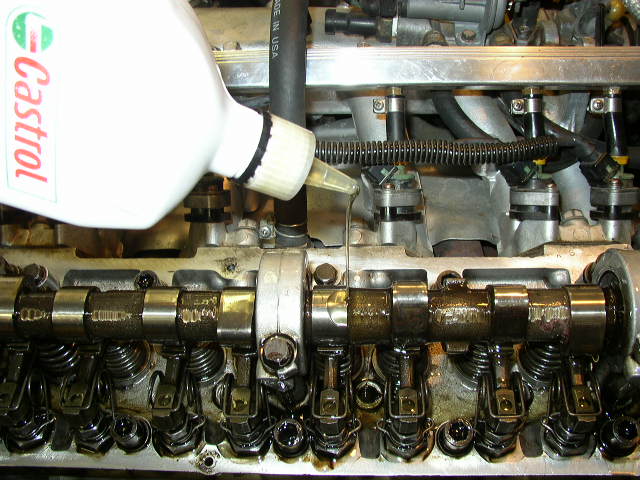 |
25)
Pour about half of a quart of clean oil over the cam, valve springs, and rocker arms.
26) Reconnect the battery and install the plugs and valve cover. 27) Start the car and allow it reach normal operating temperature. 28) Turn off the engine, remove the valve cover and ajdust the valves to the factory hot specs. .10 Intake |
| 3.1 Stroker | Differential Ratios | Parts and Accessories | Tips and Information | Price List | Pictures | Valve Seal Replacement |