| Home │ Recovery Console Part I │ RC Part II │ RC Part III │ | ||
Repair installation of Windows XPTopics on this page: [1] Introduction [2] Method
1. IntroductionThere are several ways to repair Windows XP if there is system instability or system crash leading to an unbootable state. If your system cannot boot always exclude hardware fault first. Then think if you've done something before the fault: like installing new software, drivers, update patches, or have virus or Trojan infection. If you can boot the system the repair options include: system restore,
Or when the above methods all fail, in-place upgrade (Microsoft's terminology) when you insert the Windows XP CD in Windows and choose upgrade (this is similar to a repair installation when chosen in text mode). If you cannot boot into normal mode, then try: If you cannot even boot into Safe Mode, then most likely you will have to do a repair installation or failing that, reformat and re-installation, assuming there is no hardware fault which you should always exclude. The different R (repair) options in Windows XP Setup cause much confusion to many users and this article aims to clarify this, by focussing on using the Windows XP CD to boot, bypassing the RC and do a repair installation. You would need a full Windows XP CD, not a factory recovery CD. (For factory computers with recovery CDs, the CD will restore the computer to the factory condition without going through the normal installation steps.) There is a lot more information in the: You are well advised to consult these and familiarise yourself with the options before you need to use them. This knowledge is also needed for MCP/MCSE.
2. MethodYou should do the repair installation while disconnected from the internet until it has finished and rebooted and you have enabled a firewall. Do not allow Setup to connect to the internet to find any updates. This is very important to avoid being infected with viruses and worms such as Sasser worm before you have enabled a firewall. You should be warned that doing a repair installation will reset the registry to default values in many places and restore system files from the CD. Some programmes would no longer work and need to be reinstalled. All the post-installation Windows hotfixes and service pack will be wiped off and need to be reinstalled, unless you use a service pack integrated/slipstreamed and hotfix combined Windows XP CD. Or, have Windows XP SP2 update network installation file on a CD or another partition on the HD so you can update SP2 immediately afterwards without going online. Set BIOS to boot from CDROM if previously disabled. If your system is still bootable, set to boot from CDROM before the system disc (usually IDE0 or 1 if you use IDE drives). Consult your BIOS manual if needed. The initial steps are the same for a fresh installation, Recovery Console or repair installation (fig. 1).
Fig. 1. Press any key to boot from CD.
Wait for set up to finish detecting and loading files (the procedure would be the same as installing Windows the first time, when you're prompted to press F6, then F2 for ASR in Windows XP Professional, then the files are loaded into memory); the Setup blue text screen then appears (fig. 2).
Fig. 2. Welcome to Setup screen.
Do not Press R to go to the Recovery Console (this is the first R option; refer to my articles on the RC); instead press ENTER to go to Windows XP Setup; the procedure is the same for Home and Professional editions. To quit, press F3: the text mode set up will prompt you to confirm (fig. 3).
Fig. 3. Quit Setup.
If you really wish to quit, confirm by pressing F3 again and the computer will countdown and reboot in 15 seconds unless you press ENTER (fig. 4).
Fig. 4. Your computer will reboot in 6 seconds.
To carry on with repair installation, and if there is more than one Windows installation the screen will list them all. Highlight the installation to repair with the ↑ or ↓ keys and press R (fig. 5). This is the second R option; remember the first R was to go to the Recovery Console, which is not what you want here.
Fig. 5. Windows XP Setup.
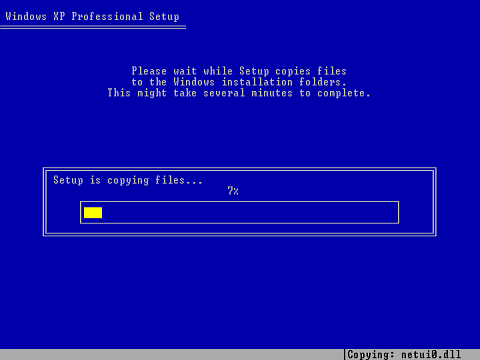
When you press R, there is no going back. Immediately Setup will start to copy files from the CD (fig. 6). You cannot abort it apart from switching off the computer. So be careful. The rest will be similar to a fresh installation except that some files will be deleted first, you won't need to repartition or reformat the hard drive and you'll need to enter the product key when prompted. The process will take roughly as long as a fresh installation.
Fig. 6. Setup is copying files.
Go to TOP
ReferenceKB 315341 How to Perform an In-Place Upgrade (Reinstallation) of Windows XP Windows XP Professional Resource Kit: Troubleshooting Startup
Copyright © 2003 by Kilian. All my articles including graphics are provided "as is" without warranties of any kind. I hereby disclaim all warranties with regard to the information provided. In no event shall I be liable for any damage of any kind whatsoever resulting from the information. The articles are provided in good faith and after some degree of verification but they may contain technical or typographical errors. Links to other web resources may be changed at any time and are beyond the control of the author. Articles may be added, removed, edited or improved at any time. No support is provided by the author. This is not an official support page for any products mentioned. All the products mentioned are trademarks of their companies. Created 2 Mar 2004; last updated 12 Sept 2004 |
||