Using
the Colour Palette
By
now you should have an idea of the size of
PSP and all of the things that are
available to you. If you aren't sure
of anything in PSP, and you haven't
already, take a look at this
tutorial for an overview of everything
that is available in the programme.
This
tutorial is going to show you how to use
the Colour Palette to help you to learn
various ways of using the variety of tools
to make or change colours on your image.

You
will need:
A
copy of PaintShop Pro - you can download
a 30 day trial version from here
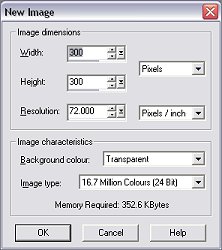
Fire
up PSP then start a new image (File, New)
- it can be any size you like... I like to
use 300x300 on a transparent background
but that's just personal preference
:o)
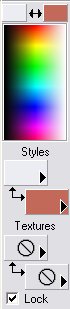
In
the Colour Palette on the right hand side,
you will have a variety of colours
available. Yours will look similar
to this but the colours in the 4 small
boxes may be different depending on the
colours you last used.
There
are several basic things you need to know
about the Colour Palette that you will use
in the majority of your work in PSP from
now on.
First
you will notice that there are 5 different
sections. Lets take them each in
order from the bottom to the top.
At
the very bottom of the Colour Palette, you
will notice a small check-box... it may be
ticked or unticked for you - I've got mine
ticked.

If
you haven't got a tick in there, single
click in the box now to put a tick in
there. This means that you have
locked your Colour Palette which is more
useful than it sounds! :o)
By
locking your palette, the colour, gradient
or texture that you last chose will stay
where there until you choose something
different. If you have it unlocked,
PSP will automatically change the colours
for each tool you select - most of the
time in PSP we want to use the same
colours with different tools, so it is
always useful to have this box
ticked. Check the screenshots on any
tutorials to make sure that the tutorial
writer hasn't unticked the box... most
leave it locked though :o)
The
next section up is where most of the
activity goes on in the Colour
Palette.
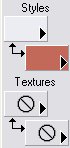
From
here you can select colours from your
image, you can choose your own colour, you
can add gradients and textures and give
each of those their own colours.
This is the nerve center of the Colour
Palette.
Next,
we've got the part of the Colour Palette
that shows you how many colours you have
got available to you. This can be
anything from 1 colour to 16 million
colours - the screenshot below shows us
that all 16 million colours are available
for us to use in our image.

This
is a useful part of the Colour Palette to
use if you are restricted to only using a
certain amount of colours. You can
set the number of colours you can use in
the Colours menu in the toolbar and then
pick your colour from here.
Right
at the top we have our final part of the
Colour Palette. You will notice that
the colours in here are the same as the
colours in the main part of the Colour
Palette (the bit where all the activity
goes on).
Now
that we've got an idea of what all the
bits do, lets get our hand dirty and start
*doing* something with our new-found
knowledge!! :o)


