Using
the Browser
By
now you should have an idea of the size of
PSP and all of the things that are
available to you. If you aren't sure
of anything in PSP and you haven't
already, take a look at this
tutorial for an overview of everything
that is available in the programme.
This
tutorial is going to look at something
that I have found to be incredibly useful
in PSP. It's the PSP Browser.
It shows you small pictures (thumbnails)
of all the graphics you have in various
folders so you can decide more easily
which image you want to use.

You
will need:
A
copy of PaintShop Pro - you can download
a 30 day trial version from here

Fire
up PSP and wait for it to chug and whir
into action
Now
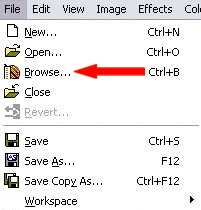
go to the "File" menu and click
on "Browse" (it may take a while
to come up depending on the speed and
memory of your computer)
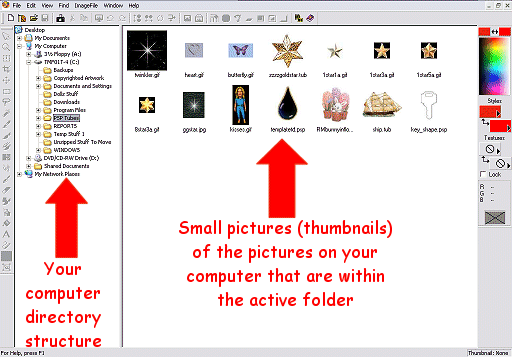
You'll have a screen that
looks similar to Windows Explorer come up,
with the directory structure of your
computer on the left and thumbnails of all
the graphics within that folder on the
right (I've reduced this screenshot a lot
to save space and download time, but
hopefully you get the idea?)
I don't usually go any
further into the Browser options 'cos this
tells me everything I need to know most of
the time, but there are a lot of other
functions that are available to you and I
think it's good to know about them even if
you don't use them! :o)
The main browser window is
a brilliant tool to use if you have either
a large hard drive or a lot of
graphics. I've got both so I've got
into the habit of always opening this up
before I do anything else in PSP... it's
such an incredible time-saver! :o)
So, what can you do with
it now that you've got this window open?
You can find out the date
the image was last saved, how big it is
and the type of file (.gif, .jpg, .psp
etc) which can really help if you have
lots of different versions of similar
images. To find out this
information, take your cursor over to an
image and just let it hover over it.
A small box will come up with the image
details.
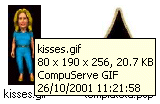
The first line tells you
the name of your image - this one is
called "kisses.gif"
The second line tells you
the height, width, colour depth and file
size of the image, so this one is 80
pixels wide by 190 pixels high and the
colour depth is 256 colours. The
size of the file is 20.7kb
The third line tells you
the type of file it is - this one is a
CompuServe GIF (more commonly known as
just "gif")
The last line tells you
the date and time the file was last saved
This will probably be the
only information you need about your
image, but if not, there is another way to
find out a bit more about it.
If you right click on your
image, a pop-out box will come up
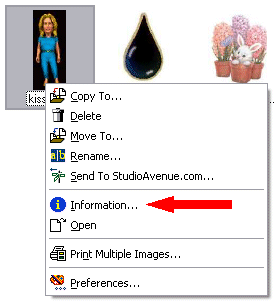
Choose the
"Information" option and a
dialogue box will come up with more
technical information about the image.
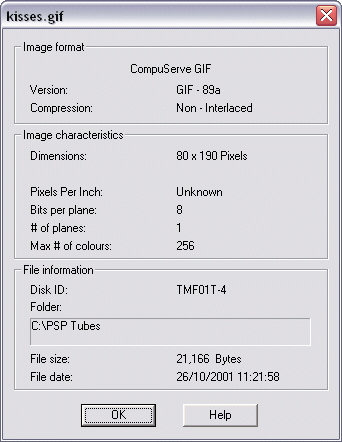
Right at the very top it
tells you the name of your image "kisses.gif"
Then we go to the
"Image format" section.
This tells you that it's a gif file and
the version of gif that it's saved as
(there are 2 versions of .gif files -
older programmes will only read version
GIF87 but newer programmes will read
GIF89a) and it tells you the way that it
is set to load up on a webpage - this
image is set to load up all at once when
the whole file has been downloaded from
the server, but you can set it so that it
appears on the screen a bit at a time as
it is downloaded.