Tour
of PaintShop Pro
It
would be a good idea to take a break from
the screen now - grab yourself a drink or
something to eat and then come back... to
avoid eye strain, it's best to take a 5
minute break away from the computer screen
for every hour that you use it -
especially when you are concentrating on
something! :o)
Next,
we are going to be looking at the toolbar
on the right hand side of the
screen. This is the Colour Palette
and it's where you get to choose the look
and feel of your image.

Right
at the top you have your last used
foreground and background colour.

The
one on the left (red in the screenshot
above) is the foreground colour and the
one on the right (yellow in the screenshot
above) is the background colour.
If
you click on the arrows in the middle, it
switches the colours (so red would be the
background and yellow would be the
foreground).
If
you right-click on one of the boxes, you
get a pop-out box of your 10 most recently
used colours - this can be *really*
handy! :o)
Immediately
underneath the last used colours you have
the colour picker (or colour chooser - I
can't decide which name I prefer for it
lol)
This
is one of the places you can choose which
colour you want to use in your
image. Move your mouse cursor over
this area - you'll notice that it changes
from an arrow to a dropper. Use the
dropper to pick the colour you want to use
- left click for foreground and right
click for background. Your last used
colours have now changed to the colours
you've just chosen.
The
next block ("Styles" and
"Textures") is another way to
choose your colours/textures.

If
yours look like this, don't worry, it just
means that nothing has been selected for
them yet.
To
choose the colour (or gradient or
pattern), you need to click and hold the
left mouse button on one of the
"Styles" buttons until a pop-out
box appears

The
paintbrush (the first icon on the pop-out
box) gives you a solid colour, the
lines give you a gradient and the squares
give you a texture/ pattern.
To
make a solid colour, click on the
paintbrush. Your last used colour
will appear in the box. If you want
to change the colour, single left click on
the box with the colour in and the Colour
dialogue box will appear:

In
the screenshot above I have already chosen
my custom colours - you don't need to
worry about these atm... I'll go through
it in more detail in another
tutorial. You can choose the colour
you would like in one of 4 ways in
here.
1) You can choose one of the "Basic
Colours"
2) You can type in the values of the
colours (if you know them) either as the
RGB (Red, Green, Blue) values, the HSL
(Hue, Saturation, Light) values
3) You can type in the HTML code
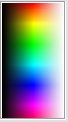
4) You can use the colour circle to choose
your basic colour and then use the square
in the middle to adjust the shade to your
liking
In
the tutorials I write, I give the HTML
code of the colours I use.
When
you have chosen a colour you like, click
on the "OK" button. Do
this for both the foreground and
background colours.
To
choose a gradient, you need to select the
lines (the one after the
paintbrush). A gradient will appear
in the box. Single left click on the
box and the Gradient dialogue box will
appear.

On
the left hand side there is a preview
window with an arrow at the side (where
the Yellow Neon gradient is in the
screenshot above). Click on the
arrow next to the gradient and you will
get a drop down list of all the gradients
that are available to you. Click on
one of the gradients and it will appear in
place of the previous gradient. You
can either click on the "OK"
button now if you like the way the
gradient looks or you can play around with
the settings on the right hand side to get
it to look like you want it to, then click
"OK"
Do
this for both the background and
foreground.
To
choose a pattern, choose the square in the
pop-out box (the 3rd one from the left,
after the gradient lines). A pattern
will appear in the box. Single left
click in the box to get the Pattern
dialogue box

On
the left hand side there is a preview
window with an arrow at the side (where
the Wrapped pattern is in the screenshot
above). Click on the arrow next to
the pattern and you will get a drop down
list of all the patterns that are
available to you. Click on one of
the patterns and it will appear in place
of the previous pattern. You can
either click on the "OK" button
now if you like the way the pattern looks
or you can play around with the scale and
angle at the bottom of the box to get it
to look like you want it to, then click
"OK"
The
"Textures" section is a little
more complicated so I'll talk more about
it in another tutorial.
Have
a play around with them all and get used
to how it works - you'll be using them a
lot! :o)


