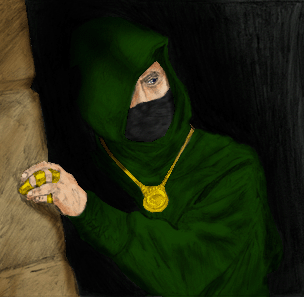
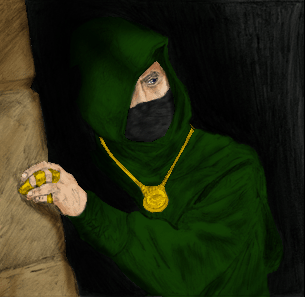
Ok in this last part of the 3 part tutorial I will walk you through how to add more shadow and highlights using the Dodge and Burn Tools. Here is the picture I left you with.. if our just joining us feel free to use this picture to continue on with the Dodge and Burn section of this tutorial

Allrighty then lets get started. First I want to show you how to smooth out some of the bumpy parts in the picture. These are from the Pixels being too sharp and not faded enough. you could fix this multiple ways but the easiest is to just use the Smudge Tool. As you can see I have quite a few on my work aswell.. Grab the Smudge Tool turn the Strength waaaay down to a mere 15% and turn the Brush size down to a 6. run along the edges that need fixing.. making sure to select the layer you think they are on. sometimes if they arent on that layer they are on the layer that touches the layer you selected. Once all have been eleminated we can move on to the next step.
Now that its smooth enough we can go onto the next step and apply the shades and highlights... |
|
|---|---|
For the shades and highlights you really need an artists eye also it would help to know your basic light effects. This really is all one step but even so i will break it down and show pictures of the different stages... i use both my Burn and Dodge tools set to an exposure of 16% and the range set to midtones.. you can switch between shadows midtones and highlights. i prefere to just keep it the same. the brush size is dependent on what you want to turn darker or lighter.. the smaller it is.. the smaller you need your brush size and vise versa. Other than that there isnt much i can explain other then in the pictures i show.. i will explain what i did. |
|
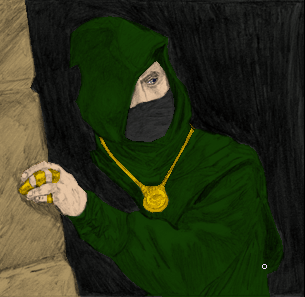
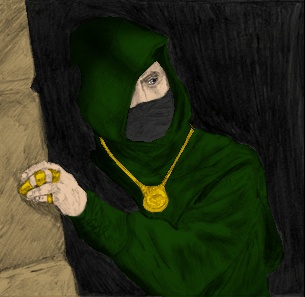
I start by shading the cloak.. the object is to make the cloak seem as if its just appearing out of the darkness no real lines between the darkness and the cloak in the back. Also i shade under the arm were the light is reduced and i run the Burn tool through some of the lines all over the cloak just to give them a darker more pronounced look.
I then proceed to darken the dark area to further blend the back part of the cloak into the darkness. As I move towards the light i decrease the effect to give off a sense of getting brighter this is why i represented this by a bunch of slashing lines when drawing. That way it had something to add to the mix if you will.
I then begin applying the Burn Tool to the wall making sure to include the shadow from the hand and also the shadow casted by the arm along with some darkening to increase the intensity of the scene. Remember however were the light is coming from.
I now have shadowed most of the face, the hand, the mask and have highlighted the fingernails slightly all to give off a more realistic look. the mask now has the impression of the nose and the mouth. The jewelry will come last and will need another layer to give off a shadow for the back half of the gold pendant.
Highlight the jewelry even shade it slightly if desired. Note: using the burn tool on the jewelry will result in a deeper and a deeper orange.. my suggestion is to use a new layer select the parts of the jewelry you wish to make darker and fill the new selection.. on the new layer.. with black.. then reduce the opacity and smudging until desired.. that in fact is what i did aswell.. After everything is completed i went over it for one last check and added a little here and there just to bring out stuff i felt i wanted to represent... Good luck with your results.
END. |
|
And here you are left with the final result

| 1 2 3 | Previous Page


