 |
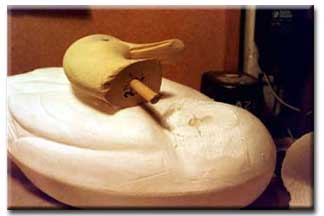
Doweling is
added to the head for extra strength and to aid in the attachment
to the body. |
| Poly gluing the head
to the body. A good trick to hold the head tight while gluing
is a large, wide rubber band. |
 |
 |
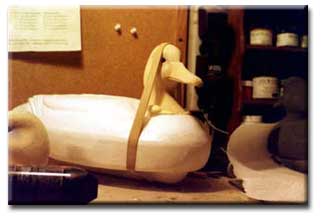
Head installed and
the glue is cured. Time to to trim excess glue from the joint. |
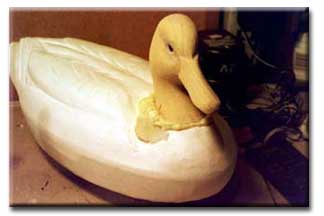
| Preparing to burlap.
I have developed patterns to make this step easier. Pictured
is the burlap pattern for the body, to get you close to the size
you need. I also have a separate pattern for burlapping the bottom,
I found it easier for me to get complete coverage with a 2 step
burlap procedure. I also didn't apply the burlap on a bias. Forgot
that part, but didn't give me any trouble. |
 |
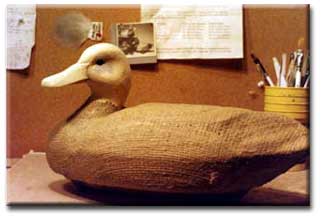 |
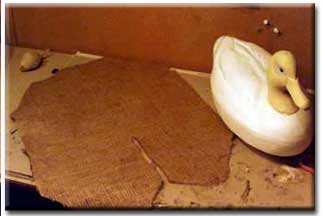
Burlapping complete
I believe Ian burlaps his without the head & that works too,
but I found the head sure makes a good handle when burlapping!
I also while the carpet glue was still wet, sprinkled dust from
my 80 grit sander over the glue & found that it makes a much
better base for painting. (Fills in the holes in the burlap)
I used Henry’s Outdoor Carpet Glue 663 (thin type, more
like a paste, works well!) & Henry’s Outdoor Carpet
Glue 263 (Thicker type glue, more like caramel, I had to thin
with mineral spirits & then it worked Ok) I got the glue
at Home Depot. Glue seems to take forever to dry even to a tacky
stage, couple days min. |
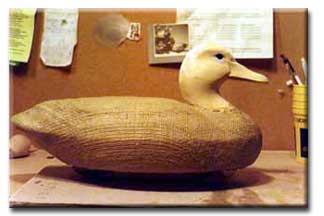
| Burlap trimmed
around the neck to make a nice transistion that will later be
smoothed out with the addition of bondo |
 |