|
Rhythm of the Rain
Needed: Jasc/Corel Paint Shop Pro. Tube of Choice - Tube image with a rain theme. For this tutorial, I used a delightful pay to use image created by Suzanne Woolcott. You can now purchase Suzanne Woolcott's Gorjuss graphics at her online store, located here. Supplies: Included in the zip are: Template made by me, Cloud (different than shown on tag for those who do not have the Gorjuss tube graphic) made by me, pink pattern and blue pattern psp files, polka dot seamless tile. The Tag Design was not my creation. I saw a tag very similar and fell in love with it. I could not find a tutorial for it, so I analyzed the design and come up with a similar type tag which I will share with you. Optional - Any additional elements, scraps or papers you wish to include. I add this because you may want to substitute and use your own elements. Remember, tuts are just guides - the finished product with your creativity, is yours. This is a long tutorial. Get yourself a cup of coffee, take a deep breath, and let's begin!
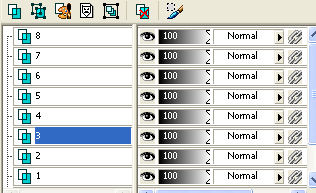
SETTINGS USED IN THIS TUTORIAL Magic Wand: Mode: Add/Shift, Match Mode: RGB Value, Tolerance 0, Contiguous checked, Feather: 0, Anti-Alias checked and outside selected Drop Shadow: 1. Vertical Offset 0, Horizontal Offset 0, Opacity 50, Blur 10, Color Black 2.Vertical Offset 2, Horizontal Offset 2, Opacity 80, Blur 5, Color Black Step 1 Open up rhythm of the rain template and the tube image you will be using. Left click the dropper tool, and left click it on a color from your tube image that will work well on your tag. At the Material Palette, left click the top color box that has the color you selected and write down the hue and saturation amounts. Step 2 Open up your layer palate and go to the layer that says block 1. Go to Adjust/Hue and Saturation/Colorize and type in the hue and saturation amount. Step 3 Left click the dropper on another color from your tube image. Open up the layer palette and go to the block 2 layer and colorize. Step 4 Left click the dropper on another color from your tube image. Open up the layer palette and go to the block 3 layer and colorize. Step 5 Open up the polka dot seamless tile. Colorize the tile to work with the colors of your tag. At the Material, left click the top color box. When the color selection window opens, select pattern, locate your polka dot tile and set the angle at 0 and scale to 100%. Step 6 Open up the Layer Palette and go to the hearts layer. Left click the magic wand using the settings from above, and left click the magic wand into each heart so all the hearts are selected. Left click the flood fill tool and left click it so that each heart is filled with the polka dot pattern. Go to Selections/Select None. Step 7 Go to Effects/3D Effects/Drop Shadow and use the #1 drop shadow settings. Step 8 Add your copyright information. Step 9 Open up your cloud tube and copy and paste the cloud on both sides of the tag (see above). Do not cover the middle large diamonds with the cloud tube. Go to Layers/Merge/Merge Visible. We have not yet added our main tube image to the tag - that will come later. Step 10 Go to Layers/Duplicate. Do this six more times so you now have a total of eight (8) layers. Open up the layer palette and rename each of your layers from the bottom up as Layer 1, 2, 3, 4, 5, 6, 7, 8.
Close off all your layers so that you have a red X on the eye of each layer. Step 11 Open up layer 1 (the bottom layer) and left click the magic wand inside the left large diamond. Make sure you are on Layer 1. It will be highlighted in blue. Step 12 Open up the blue1 psp file. Go to Frame 1. Go to Edit/Copy. Go to the tag template and go to Edit/Paste into selection. DO NOT DESELECT. Step 13 Go back to your tag template, and at the layer palette, close off layer 1 and open up layer 2. Make sure you are on layer 2. Go to your blue1 psp file. Go to Frame 2. Go to Edit/Copy. Go back to the tag template and go to Edit/Paste into selection. DO NOT DESELECT. Step 14 You will continue copying each frame of blue1 psp into the corresponding layer of the tag template. When you have all the layers completed, go to Selection/Select None. Again, close off all the layers. Step 15 Open up layer 1 of the tag template and left click the magic wand inside the right large diamond. Open up the pink1 psp file. And as you did with the blue1 psp file - you will copy and paste the pink1 psp frames into the corresponding layers. When you have finished copying all the pink1 psp frames into the template, go to Selections/Select None. At the layer palette, open up all the layers so that there are no red X's and save this file as a psp file. Step 16 Once your file is saved, go to Layers/New Raster Layer and copy and paste the tube image you will be using on your tag. Resize the image as needed and apply drop shadow #2 to the image to dramatize it. Step 17 Go to Edit/Copy. (you will be only copying the layer that has the image added). Open up animation shop and go to Edit/Paste as New Animation. You should only have your tube image copied here. Step 18 At Paint Shop Pro, close your tag template. DO NOT RESAVE IT. We will continue the next steps in animation shop. Click here to continue...
|