Italian Condotta vs. Sicilian NormanNick Grant vs. Mike Nash Please note...my interpretation of the recoil rules as described in this report is wrong. In DBA, if an element cannot complete a recoiling move due to an element being behind it at right angles to it's front (ie if it recoils into the flank of another element), only the recoiling element is destroyed, not both elements as described here. Sorry Mike, I was coming at it from a DBM perspective. The first battle in my afternoon's gaming with the Hawkes Bay Wargaming Club (I was up north on holiday visiting family) was my first knight vs. knight DBA encounter - and it proved harder than expected.
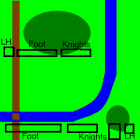
I thought I'd something clever. Most of my army - all the foot (2 4Cb, 2 4Sp, 1 2Ps), and half the knights (i.e. three of them) I deployed along the southern bank of the river, with the other knights and (one) light horse I placed in column along the eastern side of the field. I thought I'd do the clever thing by advancing the column northwards, deploying them in line and then send them east across the river, while advancing my other group of knights across the river from the south, thus catching Mike front and flank. Well, it seemed like a good idea at the time! As Mikes knights closed and started coming across the river to the north of the bend, I sprang my cunning plan - to see it go slowly awry! It was all the knights' fault! In DBA knights have to follow up each successful combat, whether they just push their opponent back or destroy them. The trouble with that is that if they just pushed the enemy back one base depth (a recoil result), the knights follow up for one base depth, thus staying in contact. And as you can't disengage from combat unless you've got a greater movement rate than your opponent (sorry Mike, I wasn't allowed to pull back my knight the way I did!), a knight vs. knight engagement means they push each other backwards and forwards until one of them is destroyed. As both have the same combat factors, it could take some time. Early in the piece this almost proved disastrous, as my own knights, advancing east across the river, got pushed back in front of one of their peers who was advancing north, trying to engage Mike's knights in their flank. Good idea in theory, but it had traveled a little too far north and ended up behind one of the knights who was facing east. Almost to their mutual destruction. No element can get pushed back into any other element that is not facing the same way. In this instance one was being pushed back into the flank of another, which would have destroyed them both. That was when I did the (as it turned out) illegal move of disengaging my knight in order to prevent it's destruction. After temporarily sorting out the mess in the middle, and a lot of pushing and shoving, my general (who was with the southern group of nights, facing northwards) saw the opportunity to get stuck into some crossbowmen on his left flank (i.e. at right angles and a little to the south of the knight action in the centre). With the company of a fellow knight element, he took off to get it. To his destruction. As they got into contact, both of my knights got pushed back, whilst and at the same time, a pair of opposing knights were hacking it out in the middle of field, behind and at right angles to my general. Slowly, my knight was being pushed back right into the recoil path of his leader. The inevitable happened. My general got pushed back once too often and goes slamming into the flank of one of his own knights. Bang! Both are lost, along with Mike's knight. Ordinarily, that would have been the game. If you loose your general, and more elements than your opponent, you loose. Fortunately for me, Mike had already lost one of his knights to mine, so it was two all - the battle continued... Meanwhile, on the other side of the field, I watched in disbelief as one of my other knights pushed back one of Mikes that had crossed the river - and pushed it back and back and back. Over the river, across the field and right up the hill in the centre of the field, where it's fortunes where reversed. My knight was then pushed back down the hill, across the field, over the river - and into the flank of one of my own knights (again!). He was locked in combat with Mikes general, who had managed to cross the river, but had got cut off between one of my knights (and then two), and a light horse element to his rear. Bang! My errant knight gets pushed back once again and takes out Mikes general and another of my knights in an effort to recoil. And that was it (the opposing foot elements never actually got into contact with each other - this was primarily a knight encounter). Lose four elements in DBA (out of your army of 12), and you lose the game. Still, it was a near thing (Mike had lost three by the time my knights topped each other). And a jolly good time was had by all! Back to The Battles Index |