Another trivial little modification.
Being annoyed that the across doesn't have a clock in its instrument
set,
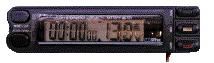
I purchased a combination clock/stop-watch/battery meter from Jaycar
electronics.
This unit has a time display with seconds and 12 or 24 mode.
It continually reads out the voltage of the battery.
It also has a five place stop watch.
A third power wire to the fuse box can give you 3 led indicators of
battery health
(I think totally unnecessary) and backlighting of the LCD.
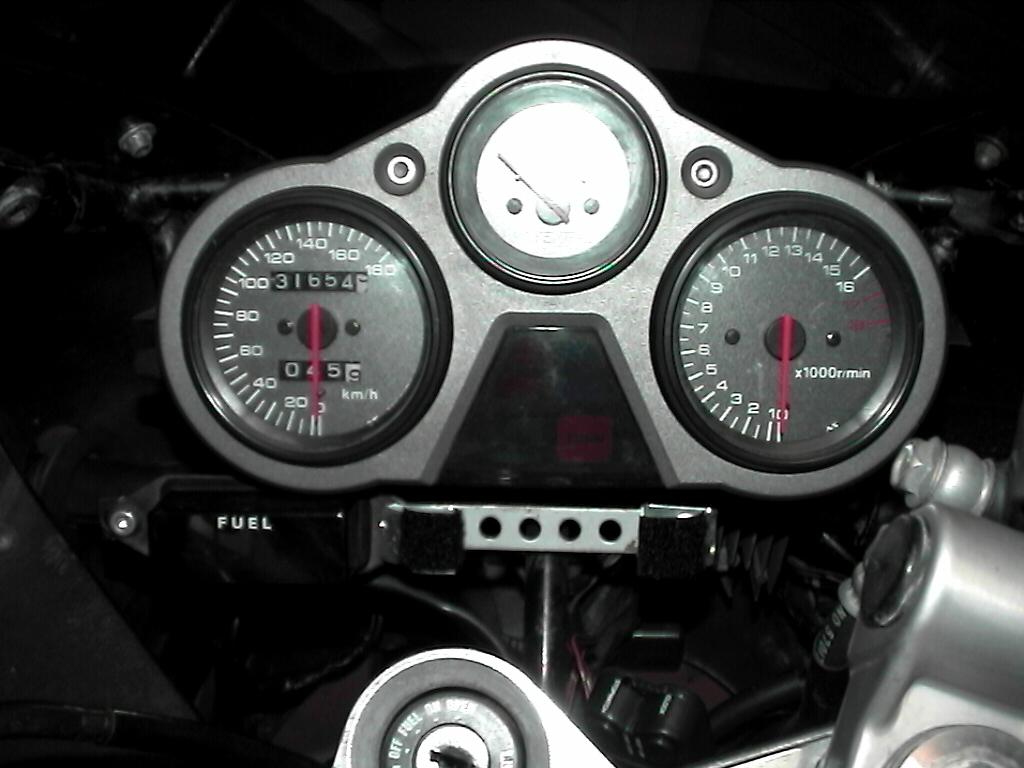
Initially, I couldn't find room to put it anywhere except on top of
the plate right under the ignition key.
Unfortunately this spot invites every loser to steal it, as it's too
obvious, so I made room for it elsewhere.
Room is made by just moving over the position of the fuel lights, to
either the left or right.
The lights come off easily as an assembly, once the 2 obvious allen
key bolts are undone.
Then find or make up a small plate of some sort. The one I used was
already drilled, so was less work.
This plate runs from the point that you see in the piccie all the way
over to the right hand side allen key bolt for the fuel lights.
(The picture 2 below will help envisage this.)
Rear of fuel lights moved over to the left of the original mounting
position and held in place by bracket.
Above: You can see that the rear of the fuel light assembly protrudes
by about 1.5 cms at the rear, meaning you have to allow for it in the re-mounting.
You either have to cut the custom plate you put in (if wide enough)
to allow the back of the fuel light assembly to protrude through,
or bend around it as I did, if it is soft enough. Ther would be many
ways to get a plate across the surface that we need to mount the instrument.
metal plate shown from the front, with smaller plates mounted over
bolt holes to hold the velcro (black here) mount for new instrument.
A couple of small metal C shaped clips (that were meant for venetian
blind mounting!) finished the job,
providing a spot on which to mount the actual instrument - in this
case the clock/meter was supplied with
velcro which is plenty strong enough to hold the unit (very light)
in place.
You can't see the original allen key bolts (that originally held the
fuel light assembly) in the picture above because the small metal C shaped
pieces
and the plate that runs from the right bolt hole all the way over to
the left of the fuel lights are all mounted on those 2 original bolt holes.
The black velcro also seen above is adhered to the small C shaped metal
bits.

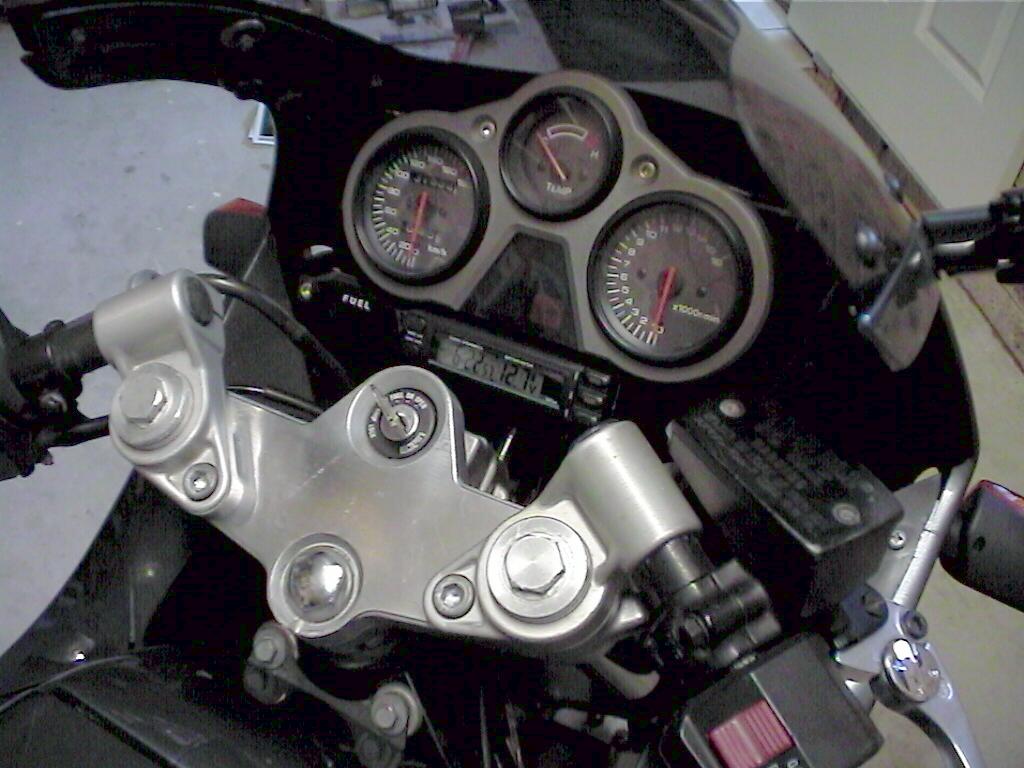
Two views of the unit in place. (1024x768 constrained, right click
view each image to make it bigger)
It modernises the across dash a little to have the LCD display in there,
and it fits so snug it almost looks like it's factory.
You could probably mess about a little more and get both instruments
side by side into the middle of the instrument cluster together, which
might look better.
But remember that your bracket & the lights & new instrument
have to clear all of the cables on the bars when they are turned.
I chose the lazy option (butcher's perogative) because it was much
easier this way using the original mounting positions of the fuel lights.
It still gives full clearance with handlebar rotations, but I had to
cable tie the choke cable away from the new display.
The clock unit is mounted exactly in the middle and it looks quite
good that way, I think.
Don't know how well this unit will stack up over time, regarding weatherproofing.
Some kind of clear plastic cover that fit neatly over the instrument
would do nicely, but I haven't found anything yet.
If anyone finds a nice slim unit like this that is well protected from
the elements,
or you work out a way to weatherproof the new mounting area, please
email
me.
(Phoenix sent through this tip; use the plastic cover that the instrument
was
wrapped in at purchase; cut it to size and place it over the instrument
with a bit of glue/tape. Ta, Phoenix!)
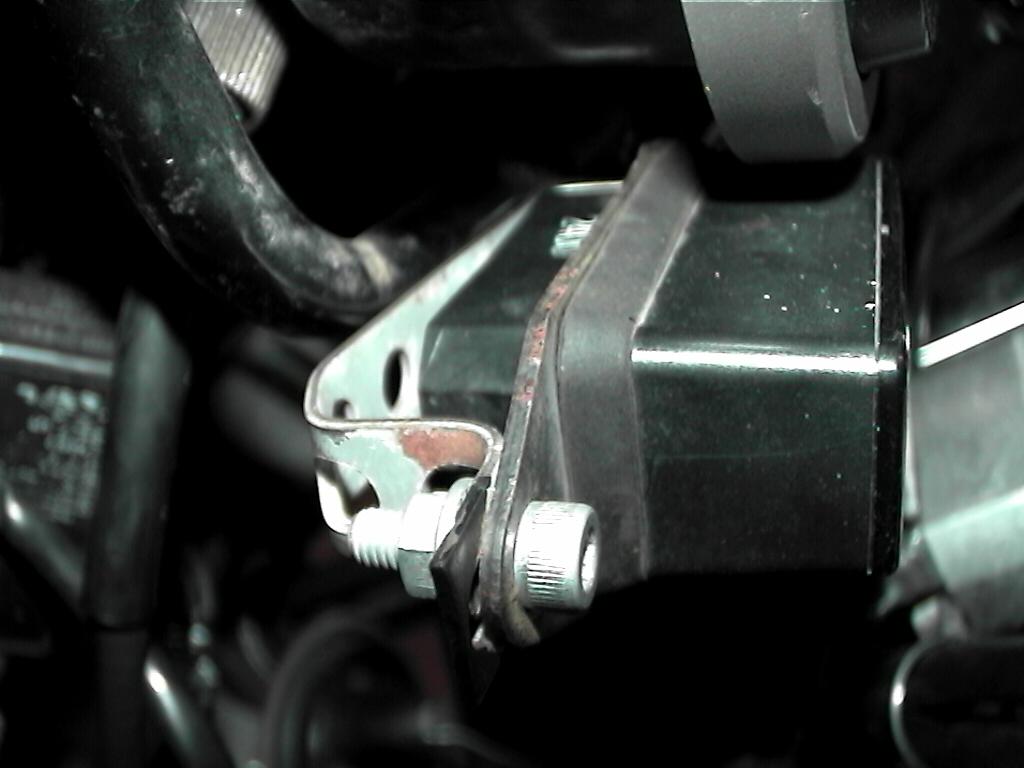
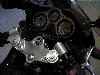
PS 12V Power...

I ran the black and red straight of the battery terminals,
and ran the brown-orangey coloured wire off of the 10 amp fuse as you
can see here.

 Made
in Sydney, Australia
Made
in Sydney, Australia
 Tip # 8