Open new image 125, 400. Transperant, 16 million colors
Go to SELECTIONS, LOAD from disk sher_wrought_decor ... it will be placed
in the middle of your new image.
Use what ever color you like as your foreground color, and then use
your FILLER TOOL (piant can) to fill the selection with. CRTL D to
deselect
Use your DRAW TOOL (pencil drawing) set it SINGLE LINE at a 6 line width.
Antialias Checked. Solid line
Draw a line down the right side of what you filled earlier .. use the
top graphic as a guide. You want the line a little above and a little
below the middle area.
Now draw another one on the left side. You want these lines BARELY
touching the middle area.
If you do not get the top and bottom lined up just right don't worry
.. after you draw both lines then use your selection tool set to rectangle
and delete a little off BOTH the left and the right side at the same time
.. do this to the top and the bottom if needed.
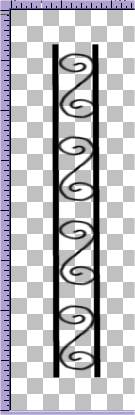
Now go to EFFECTS, 3D, INNER BEVEL (PSP6 users, go to image, effects,
inner bevel) apply the preset METALIC, use the settings that are default
or use your own to your liking. Click OK
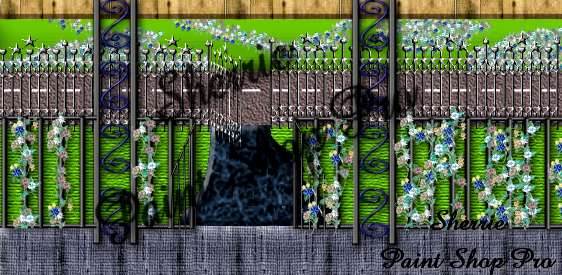
That's it .. it's done. Now save it how you want to, I made the
little picture below just so you could see it in use. Now you can
make front and back porches to go with your rooms;) The fence in
mine came from THIS TUTORIAL