
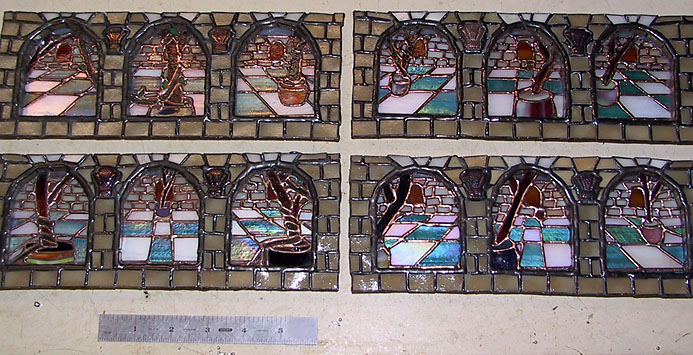
All four walls are finally complete, four fully soldered units, and fully patinaed. The bottoms were tinned, and leveled off (removed the solder lumps).
![]()

This is my bench with all the pieces laid out. One day this bench will be empty, but it won't be today.
![]()

The walls are up. I built it like would if I were building a normal house. I used brazing wire as temporary supports on the corners and uprights. The first wall was supported by the front with a wire, then the following walls were attached to the each proceeding wall, corner by corner. You can see the wires in the picture. The joints inside the shade were then soldered. I flat soldered the inside. If I bead the inside the lamp would simply be to heavy to lift. I couldn't believe I was able to fit the whole thing into the sink for cleaning, I won't be able to soon though.
![]()
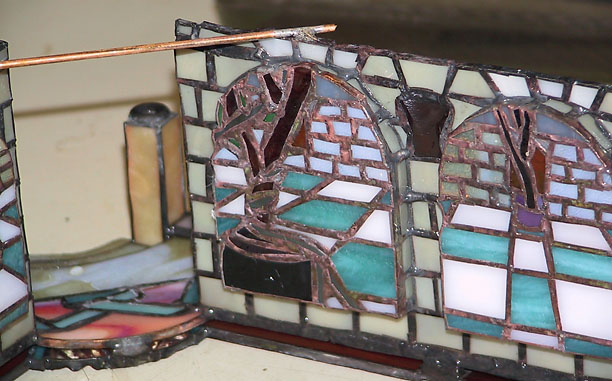
This is what the walls look like from the inside. The arches weren't very perfect. The front looks ok, and it's hard to tell there not perfect. The back however, is another story. It hangs over in some places as much as a 1/4", but since it's not seen, it should be ok. There may be a small shadow here and there though, but nothing serious.
![]()

Here's another side with messed up joints. The green lines are roughly were the windows should have been. It would have been too much of a pain to trim the windows.
![]()

This will give you an idea of what it will look like stacked up. However there will be a floor piece that the dome will sit on. The tree's are supposed to line up with each other; for the most part they do. Since there will be an interruption using the header and floor, some of the trunk width mis-alignments shouldn't,t be noticed.
![]()
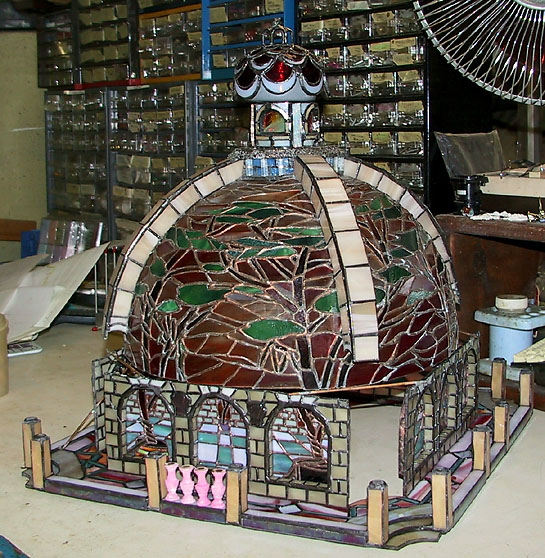
Here I stacked up everything, but in a very rough format. This will give you a basic idea of how it will look. The red cap, will be a bit lower though. I know it looks a little silly now, but believe me, when the rest of the stuff goes on, it'll look just fine.
![]()
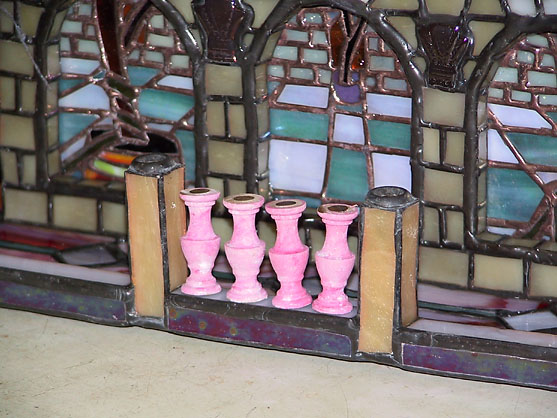
The balusters will go anywhere there is a white trim. I'm going to have to have to cut each of the balusters by hand with a dove tail saw to trim the pegs. My came saw just doesn't like wood very much. There's going to be a white trim piece that will fit onto those little hand painted pink pegs.
Total Time: 2 Hours 45 Minutes


Home | About Me | Aliens | Foil | Miscellaneous | Shop | Projects | Tips | Shopping List | Links | Awards

Started on 6-15-01