![]()


![]()
You will need:
6 plastic (mineral water) bottles
Craft knife
PVA glue
Green acrylic paint
White acrylic paint
Brushes and sponge
Containers for mixing paint
Glue gun
Stars or glitter to decorate
An angel/Star or other decoration for the tree top
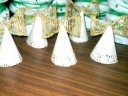
Carefully use a crafting knife to cut off the top parts of several plastic bottles (I used 6 for my trees). Cut them in a way that each one is slightly smaller than the last. You can also cut in a wavy shape for a better effect; this you can do by going over the cut part with scissors to create a wavy outline.
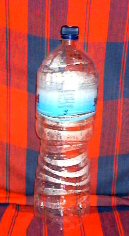 Start cutting just above the label for the
bottom layer of the tree - keep the bottle caps on.
Start cutting just above the label for the
bottom layer of the tree - keep the bottle caps on.
Once you have cut all the pieces required, coat each piece (on the outside) with PVA glue mixed with just enough water (do not make it runny) to be able to brush it on. This coating will make it easier for the acrylic paint to adhere to the plastic. Let dry.
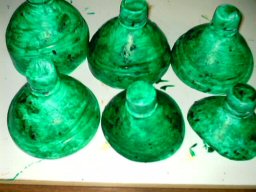 Add one or two coats of green acrylic
paint using a sponge or a brush - the last coat should be sponged to give it
texture and eliminate any brush marks. Let dry in between coats.
Add one or two coats of green acrylic
paint using a sponge or a brush - the last coat should be sponged to give it
texture and eliminate any brush marks. Let dry in between coats.
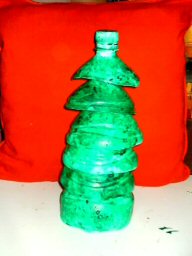 Layer each on top of the other,
starting with the largest for the bottom of the tree and build up one at a time
gluing each in place using your glue gun.
Layer each on top of the other,
starting with the largest for the bottom of the tree and build up one at a time
gluing each in place using your glue gun.
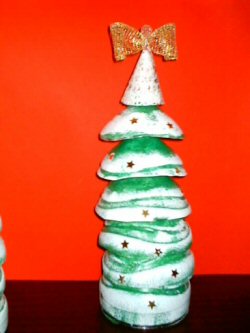
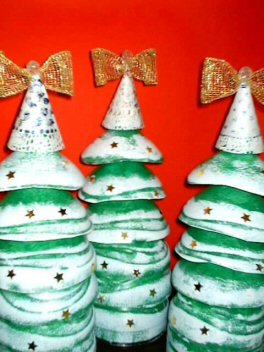
Lightly sponge white acrylic paint around the edges of the 'tree' branches to give it a snowy effect. Not all plastic bottles have the same shape - the ones I used had a curly ridged shape which gave it a great layered effect resembling layers of branches.
Finally decorate with stars or sprinkle with glitter while the white paint is still fresh.
To finish off add an angel* or star to the top of the tree, making sure the bottle cap at the top is covered.
For directions on how to
make the Tree top angels click on the picture
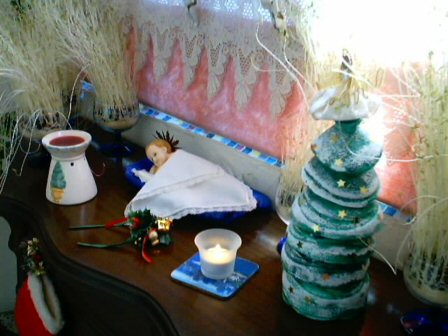
Think ahead, make several to decorate your house or to give away to your family and friends
![]() ENJOY!
ENJOY!