|
|
John C. Campbell Folk School
February 4-10: Sock Knitting and Bowl Carving
|
|
|
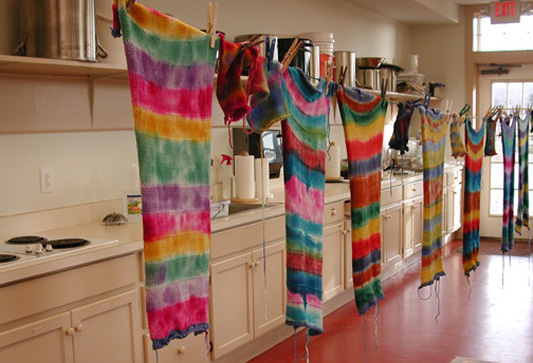
During February we were again at John C Campbell Folk School. During the first week Elizabeth attended classes on dyeing sock yarn and knitting socks. The image above shows one of the techniques for hand-painting yarn for socks. The teacher knit the fabric on her knitting machine and the students dyed the sections in their own color schemes. Once dry the rectangle was unraveled to reveal two matching balls of yarn, to make a pair of matching socks. In the afternoons the students knit sample socks showing different heel and toe techniques
|
|
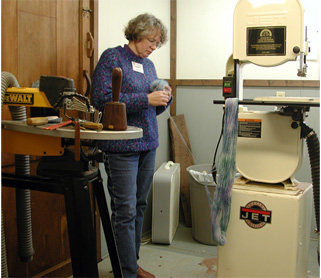
Elizabeth transfers yarn from a hand-dyed skein onto a ball. A ball is used to knit her socks. Her classroom was closed for the evening so she joined Jim in the wood carving studio.
|
 |
|
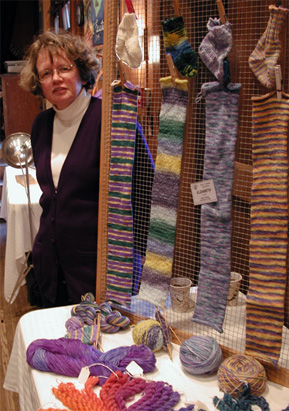 |
Pictured are her week-long efforts. The long tubes were knit on a circular sock machine at night in the room. It showed the other students at the Friday show how the yarn would look in sock form.
|
|
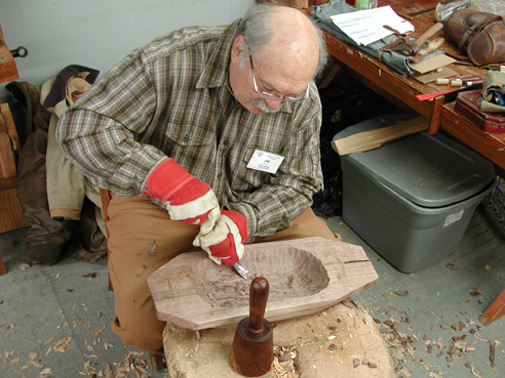
Carving a Walnut Bowl
A year or so ago, our good neighbor Rodney cut down a walnut tree in his yard. Jim had been wanting to get some walnut to carve a bowl so he jumped at the chance to get several logs. A class on bowl carving was offered at the Folk School 4-9 February, so he decided to enroll rather than try to figure it out on his own.
Above he is seen on day two of the class carving on a piece of his walnut tree. These bowls are often referred to as bread bowls but can be used to hold most anything.
When the tree was cut down, Rodney and he sawed it into lengths of about 2 feet. The log was split down the middle with a chain saw to form a flat top of the bowl. The wood was then allowed to dry for a year or so. Splitting the log down the middle reduces checking as it dries. However, in spite of all the best efforts, some checking did occur Jim tried to cut away most of the checks but those which penetrated too deep were filled with CA glue. He learned from this that there should be 1-1/2 to 2" slice removed from the tree center to eliminate pith (the center) of the log to prevent this occurrence.
|
Feb. 11-16: Watercolor Painting and Spinning Silk, Cotton and Flax
|

Watercolor Fish
This was the second class which Jim had taken from art teacher Kathy Chastain. (His former class with her at the folk school was on watercolor journaling.) For starters and to see what kind of work each student was capable of producing, Kathy had each one create a "funny fish." Jim's great artistic endeavour was a pink-lipped goldfish. His other inspired works are scattered about.
Pictured below are the folks who attended the class. Student's work hangs on the display racks behind the group. Teacher is in the center. Elizabeth took the picture using Lorna's (second from right) camera.
|
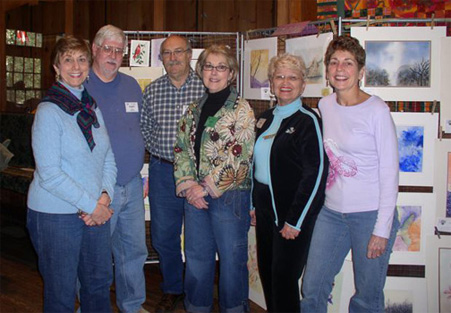
Watercolor Class at the Folk School
|
|
February 16-18: Shaker Boxes and Processing Flax
|

Finely Spun Flax
On Friday night she learned the history of flax and how to process the flax plant to obtain the fiber. All Saturday was spent spinning flax. In the image above she proudly shows off her flax spun so fine that it doesn't registered on the photograph. There are probably three strands of flax fiber in her thread. The plastic bag looking thing in the foreground is a tissue covered distaff layered with the flax fibers. Distaffs are used for holding the three-foot-long flax fiber for spinning.
Elizabeth's teacher was a topic of conversation over meals. She had provided each of her students a decorated cigar box stuffed full of goodies: Lavender for relaxation when the stress builds up, chocolate and candies for energy, flax seeds and little pots for planting a future crop of flax, a piece of the teacher's handspun and handwoven fabric, etc.
|
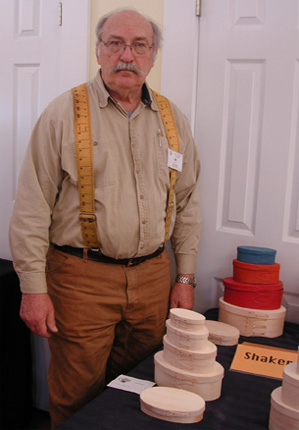
Shaker Boxes
Jim was able to make five boxes during this concentrated weekend. The instructor had supplied the band materials cut to proper dimensions but students cut the swallow tails. Also students cut out 1/4-inch thick ovals for tops and bottoms on a scroll saw. The bands were steamed, bent to shape around molds, secured with copper tacks and allowed to dry. Bands are secured to tops and bottoms using toothpicks as nails. Time did not permit finishing the boxes so that task will be accomplished at home. Jim's stack is the colorful ones to the back. The less than enthusiastic look is from stress of getting the boxes done in a incredibly short time.
|